Amigurumi Bishop Crochet – Pattern has become an increasingly popular project among crafters who enjoy combining traditional crochet techniques with creative character design. In this article, you will learn how to create an adorable bishop-themed amigurumi figure, using a clear and well-structured pattern suitable for both beginners and experienced crocheters. Throughout the text, the main keyword Amigurumi Bishop Crochet – Pattern will appear naturally and strategically to ensure SEO optimization while maintaining a humanized, friendly tone.
Amigurumi is a Japanese-inspired crochet technique that focuses on creating stuffed figures using simple shapes, careful stitching, and personalized details. Making a bishop-character amigurumi is a charming project because it merges crochet craftsmanship with symbolic design. Whether you intend to use it as decoration, a collectible piece, or a meaningful handmade gift, this pattern offers an engaging and rewarding experience.
Before we move into the step-by-step sections, it is important to highlight that the Amigurumi Bishop Crochet – Pattern requires basic knowledge of amigurumi techniques such as working in rounds, increasing, decreasing, and stuffing. However, with patience and attention to detail, crafters of all levels can successfully complete the project. This guide provides everything you need—from materials to finishing touches—to help you achieve a neat, well-shaped, and expressive amigurumi bishop.
1. Materials and Preparation
To begin your Amigurumi Bishop Crochet – Pattern, gather the essential materials. Medium-weight cotton yarn works best for amigurumi because it offers excellent stitch definition and durability. Choose colors that match the traditional look of a bishop character—typically white, cream, burgundy, purple, gold, or other accent colors to highlight clothing details.
Select a small crochet hook appropriate for your yarn weight. For most amigurumi projects, a hook size between 2.0 mm and 3.0 mm is ideal. Using a smaller hook ensures tight stitches that prevent stuffing from showing through. Consistent tension is important for achieving a smooth, polished finish for your amigurumi bishop.
Prepare additional tools such as a yarn needle for sewing parts together, stitch markers for tracking rounds, embroidery thread for facial details, and polyester fiberfill for stuffing. High-quality stuffing helps maintain the shape and stability of the figure over time.
Before starting the full Amigurumi Bishop Crochet – Pattern, practice a small swatch to check your tension. Amigurumi requires tight stitches, so adjust your hook size if necessary. This preparation step ensures that each part of the bishop figure maintains symmetry and firmness.
Review the basic stitches and techniques used in amigurumi, such as the magic ring, single crochet, invisible decrease, and slip stitch. If you are new to amigurumi, take your time practicing these techniques before beginning the pattern. This will help you follow the instructions with confidence.
Consider planning the final look of your bishop. Think about facial expressions, garment details, and any additional accessories you may want to include, such as a staff or decorative embroidery. Preparing these ideas in advance can make the crocheting process smoother and more enjoyable.
2. Crocheting the Body and Head
The body is the foundation of your Amigurumi Bishop Crochet – Pattern, and it typically begins with a magic ring to create a tight, neat base. Start working in continuous rounds, gradually increasing stitches to shape the lower body. This rounded base forms the structure on which the clothing and decorative details will be added later.
As you continue upward, maintain consistent increases to create a cylindrical or slightly tapered shape, depending on your design preference. Keep your stitch count accurate and check your work periodically to be sure the body remains symmetrical. Even tension is crucial for achieving a professional look.
Stuff the body gradually as you crochet. This helps maintain shape and makes the stuffing more uniform. Avoid over-stuffing, as this can stretch the stitches. The right amount of stuffing ensures the bishop stands or sits correctly while maintaining softness.
Once the body reaches the desired height, you can begin shaping the neck. The neck section usually involves a few rounds of decreases to create a natural transition between the body and the head. This step helps support the head securely and gives the figure a balanced proportion.
To crochet the head, start once again with a magic ring and gradually increase stitches. Amigurumi heads are typically spherical or slightly oval. Maintain even increases and rounds until the head reaches the appropriate size for the bishop’s body. The head should be a smooth, symmetrical shape free from visible gaps.
Before fully closing the head, add facial features using embroidery thread. Eyes can be simple embroidered dots, small safety eyes (if the figure is not intended for small children), or crocheted pieces. Adding these details before closing the head ensures better positioning and control over the expression.
3. Creating Clothing, Accessories, and Details
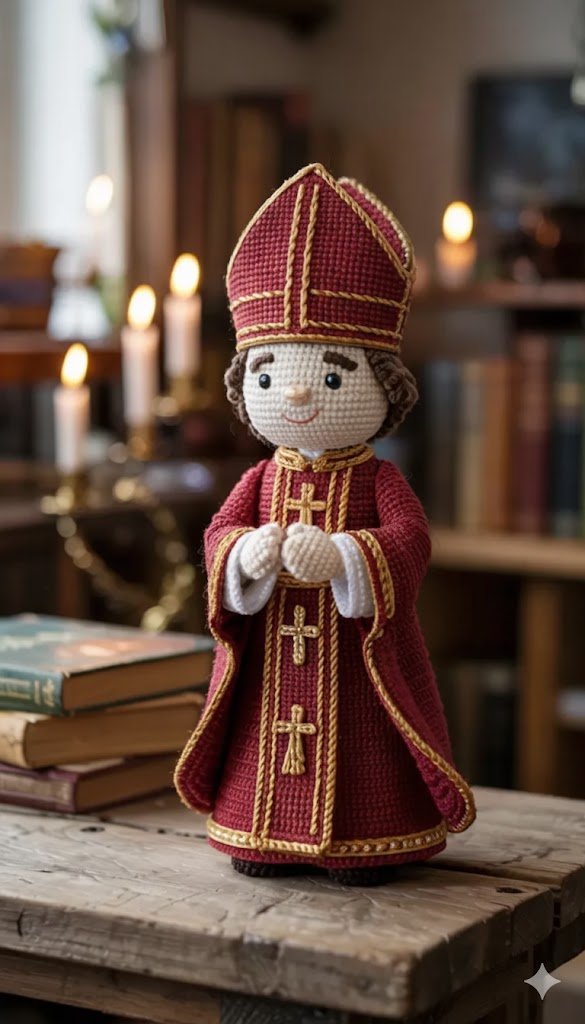
The clothing is where your Amigurumi Bishop Crochet – Pattern becomes truly expressive. Begin with the bishop’s robe, which can be crocheted directly onto the body or made separately and sewn on afterwards. Traditional bishop robes include long, flowing shapes and rich colors, making them perfect for decorative crochet.
Use contrasting yarn colors to create borders, stripes, or symbolic patterns along the robe. Small details like these make the bishop figure visually appealing and faithful to its theme. Experiment with textured stitches if you want to enhance the clothing’s depth and richness.
Next, crochet the bishop’s hat or mitre. This is one of the most recognizable features of the bishop figure. Begin by forming a flat base, then build height using continuous rounds or rows. The mitre typically has a pointed top and may include gold or white decorative lines to give it an authentic look.
Accessories such as a crocheted staff, cross, or small book can be added to personalize your Amigurumi Bishop Crochet – Pattern. These small elements are optional but elevate the overall character design and make the figure stand out in a collection or display.
Once all clothing and accessories are complete, sew them securely to the main body. Take your time with this step to ensure neat attachment and symmetry. Using a yarn needle, stitch each piece with small, invisible stitches to maintain a clean finish.
Lastly, refine your amigurumi bishop by adding embroidered lines or subtle details to the robe and hat. These embellishments help bring your character to life and create a more polished, expressive final piece.
4. Assembly, Finishing Touches, and Care
The final steps of your Amigurumi Bishop Crochet – Pattern involve assembling all the body parts. Begin by attaching the head to the neck using strong, even stitches. Make sure the head is centered and secure, as this defines the figure’s posture and expression.
Attach the arms next. Arms can be crocheted separately and sewn on or attached directly as you work the body. Their placement should reflect a natural position—either down at the sides or slightly forward if the bishop holds an accessory.
Add any additional accessories, such as the staff or book. Make sure they are attached firmly, especially if the figure will be handled frequently or used as decoration in a child-friendly environment. Secure stitching ensures durability and safety.
Inspect the figure for gaps, loose ends, or uneven tension. Trim any excess yarn and weave in all remaining tails. This gives your amigurumi a polished, clean look and increases its durability over time.
To keep your amigurumi bishop clean, gently surface-wash with mild soap and a damp cloth. Avoid soaking unless your yarn is washable. Always allow the figure to dry completely before storing or displaying it again.
Store your finished amigurumi in a cool, dry place away from direct sunlight to preserve color and shape. With proper care, your crocheted bishop will remain beautiful for many years and become a treasured handmade piece.
FAQ – Frequently Asked Questions
1. Is the Amigurumi Bishop Crochet pattern suitable for beginners?
Yes. The Amigurumi Bishop Crochet – Pattern is beginner-friendly as long as you know basic amigurumi techniques like single crochet and working in rounds.
2. What yarn works best for a bishop amigurumi?
Cotton or acrylic yarn with good stitch definition works best, allowing clean shaping and durability.
3. Can I customize the bishop’s colors and details?
Absolutely. You can choose any color scheme or decorative accessories to personalize your design.
4. How long does it take to complete the bishop amigurumi?
Depending on experience, it may take between a few hours and a couple of evenings to complete.
5. Can children play with the amigurumi bishop?
Yes, as long as you avoid small accessories or safety eyes for very young children. Embroidered features are safest.
6. How do I ensure the figure keeps its shape?
Use firm stuffing, tight stitches, and careful assembly to maintain shape and stability.
Conclusion
Creating an Amigurumi Bishop Crochet – Pattern is a fun, rewarding, and meaningful project that blends creativity with tradition.
This guide taught you how to prepare materials, crochet the body and head, add clothing and accessories, and finish the figure with care. I hope you feel inspired to create your own unique bishop amigurumi.