Super Easy Beginner 3 Yard Quilt Tutorial – Pattern projects are among the most welcoming introductions to quilting for new makers. Right from the first line of this guide, the goal is to help you understand how the Super Easy Beginner 3 Yard Quilt Tutorial – Pattern simplifies the entire quilting process. Working with just three yards of fabric removes the confusion of measuring, calculating yardage, and juggling multiple prints. This tutorial-style pattern is perfect for beginners and enjoyable for experienced quilters looking for a fast, satisfying project.
One of the biggest advantages of the Super Easy Beginner 3 Yard Quilt Tutorial – Pattern is that it provides clear instructions with minimal cutting and piecing. Instead of stressing over complicated techniques, beginners learn the basics of quilting—cutting, arranging blocks, stitching seams, and building confidence. A project like this offers a gentle yet rewarding sewing experience, and the results look impressively polished.
Additionally, using only three yards of fabric makes this pattern budget-friendly while still giving you plenty of room for creativity. The simplicity of the structure means you can experiment with prints, textures, and colors without worrying about overwhelming the design. This is why the Super Easy Beginner 3 Yard Quilt Tutorial – Pattern has become a favorite in the quilting world. Below, you’ll find everything you need to begin this accessible and enjoyable quilting journey.
1. Understanding the 3 Yard Quilt Concept
The concept behind the Super Easy Beginner 3 Yard Quilt Tutorial – Pattern is straightforward: you only need three one-yard cuts of fabric to create an entire quilt top. This idea revolutionized beginner quilting because it removes guesswork. With just three yards, you can complete a lap-sized quilt perfect for gifts, home décor, or personal use.
Each of the three fabrics plays a specific role in the pattern. Typically, one fabric becomes the focus fabric, another acts as a contrast, and the third is used for borders or sashing. This balanced approach keeps your quilt visually appealing while remaining incredibly simple to assemble.
The pattern usually divides the yardage into strips, squares, or rectangles depending on the chosen design. Since the cutting layout is minimal, beginners can focus on learning accurate measuring and cutting techniques. Consistency in these steps leads to smooth sewing and crisp block shapes.
Additionally, the 3-yard structure helps new quilters understand color theory without feeling overwhelmed. Choosing three coordinated fabrics becomes a fun task rather than a complicated challenge. This is one reason the Super Easy Beginner 3 Yard Quilt Tutorial – Pattern is praised for being both educational and enjoyable.
Another bonus is that this pattern works perfectly with pre-coordinated bundles sold in quilt shops. Many stores offer three-yard kits specifically curated for this type of project. This makes the selection process even easier while still allowing creativity to shine.
Finally, the 3-yard concept encourages finishing. Many beginners start quilting projects but feel intimidated halfway through. This streamlined pattern removes barriers, helping you complete quilts confidently and proudly.
2. Cutting and Preparing Your Fabrics
Once your fabrics are chosen, the next step in the Super Easy Beginner 3 Yard Quilt Tutorial – Pattern is accurate cutting. The cutting instructions are usually simple, requiring only a few straight cuts. Even beginners with basic tools—a rotary cutter, cutting mat, and ruler—will find the process manageable.
Lay your fabrics flat and press them before cutting. Wrinkles can distort measurements, so taking this step ensures better accuracy. Once pressed, stack or layer fabrics if the pattern allows, making it faster to cut matched pieces.
Most 3-yard quilt patterns use rectangular pieces that form blocks quickly. Cut each yard according to the pattern directions, typically producing sets of pieces for blocks, borders, and sashing. The layout rarely requires complex triangles or unusual shapes, keeping the process accessible.
After cutting, organize your pieces by size and fabric type. Doing this prevents confusion later during assembly. A simple organization system—such as grouping with clips or labeled bags—saves time and avoids mistakes.
Check all measurements before moving on. Even small inaccuracies can create misaligned seams or require adjustments during sewing. With the Super Easy Beginner 3 Yard Quilt Tutorial – Pattern, precision in cutting helps everything come together smoothly.
Once everything is cut, your fabrics are ready for layout. This stage sparks creativity as you begin arranging block components and seeing the quilt come to life, even before you sew the first seam.
3. Assembling Your Quilt Top Step by Step
With your pieces cut and organized, it’s time to begin assembling the quilt top. The Super Easy Beginner 3 Yard Quilt Tutorial – Pattern excels here because the sewing steps are designed to be simple and repetitive—perfect for learning.
Start by creating small block units. These may be rectangles, squares, or strip sets depending on the pattern. Sewing these smaller pieces helps beginners practice maintaining a consistent seam allowance, usually 1/4 inch. Mastering this ensures blocks match up well.
Pressing seams after each step is vital. Press toward the darker fabric or as instructed by the pattern. Proper pressing makes blocks lie flat and creates a polished look. Many quilters consider pressing just as important as sewing.
Once the basic block units are ready, assemble them into complete blocks. The repetition of steps builds confidence and muscle memory. The Super Easy Beginner 3 Yard Quilt Tutorial – Pattern ensures layouts are easy to follow, keeping everything structured and organized.
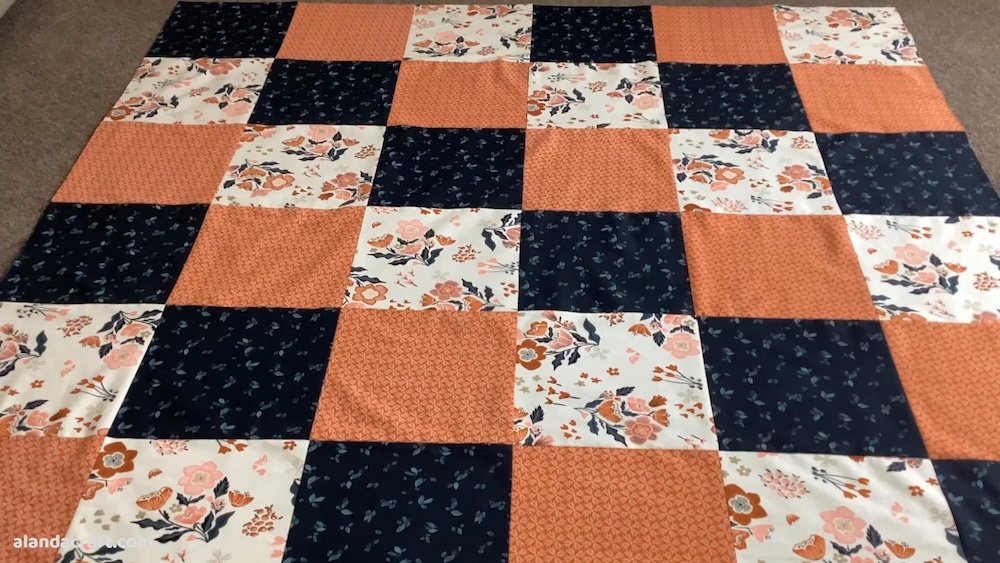
After completing all blocks, arrange them on a flat surface or design wall. Experiment with orientation until you find a layout that feels balanced. This visual stage helps you get a sense of the final quilt before stitching the blocks together.
Next, sew the blocks into rows. Take your time, ensuring edges align and seams meet neatly. Once rows are ready, sew them together to form the quilt top. At this stage, your project looks nearly complete—a rewarding moment for every quilter.
Finish this step by adding borders if the pattern includes them. Borders frame the quilt, add size, and create a polished appearance. They also help stabilize the quilt top before layering and quilting.
4. Quilting, Binding, and Finishing
With your quilt top assembled, the next phase is turning it into a completed quilt. The Super Easy Beginner 3 Yard Quilt Tutorial – Pattern allows for flexible quilting options, making it beginner-friendly. Even simple quilting lines can look elegant.
Start by creating your quilt sandwich: the quilt top, batting, and backing fabric. Spread everything out smoothly and baste using safety pins, spray adhesive, or large stitches. Proper basting keeps layers from shifting during quilting.
Choose your quilting design based on your comfort level. Straight-line quilting is ideal for beginners. It complements the structure of most 3-yard patterns and gives the quilt a clean, modern look. If you prefer, you can also try gentle wave patterns or simple diagonal lines.
Take your time while quilting. Slow stitching helps maintain even lines and reduces mistakes. Many beginners find quilting relaxing—each line of stitching brings your project closer to completion.
Once the quilting is done, prepare your binding. Binding frames the quilt and seals the edges. You can use leftover fabric from your yardage or choose a contrasting print for visual interest. Fold, press, and stitch the binding along the edges using your preferred method.
Finish the quilt by folding the binding over to the back and stitching it securely. Whether you choose machine or hand-stitching, this step gives the quilt a finished, professional appearance. With that, your Super Easy Beginner 3 Yard Quilt Tutorial – Pattern project is complete and ready to enjoy.
FAQ – Super Easy Beginner 3 Yard Quilt Tutorial – Pattern
1. Is the 3 yard quilt truly beginner-friendly?
Yes. Its simple cutting, minimal fabric requirement, and easy block construction make it ideal for first-time quilters.
2. What size quilt does the pattern make?
Most 3-yard quilts create a lap-sized quilt, but patterns often include instructions to size up using additional yardage.
3. Can I use different fabrics than the standard three yards?
Yes, but using three coordinated yards keeps the process easier and the design balanced.
4. Do I need advanced tools?
Basic quilting tools like a cutting mat, rotary cutter, ruler, and a sewing machine are enough.
5. Can I quilt it using a regular sewing machine?
Absolutely. The pattern is designed to work with home sewing machines.
6. Can I resize the quilt for a bed?
Yes, many quilters simply duplicate the pattern or add borders to enlarge it.
Conclusion
The Super Easy Beginner 3 Yard Quilt Tutorial – Pattern is one of the most accessible and enjoyable ways to learn quilting. Its simplicity, affordability, and step-by-step structure help beginners gain confidence while producing a beautiful, functional quilt.
Whether you’re crafting for yourself or creating a heartfelt gift, this pattern offers endless possibilities. I hope this article has inspired you to begin your project.