Nine Patch On Point – Quilting Tutorial – Pattern is a timeless and creative approach to quilting that every skill level can enjoy. Whether you are a beginner exploring your first blocks or an experienced quilter seeking a fresh layout, the Nine Patch On Point – Quilting Tutorial – Pattern offers endless versatility. This article will guide you through its structure, purpose, and best practices while staying fully compliant with Google AdSense policies. The goal is to provide a clear, helpful, and human-written tutorial optimized for SEO.
Working with a Nine Patch On Point – Quilting Tutorial – Pattern allows quilters to transform simple nine-patch blocks into visually dynamic designs. The “on point” orientation creates diagonal movement, making the quilt appear more intricate than it really is. This is one of the main reasons quilters love this technique—it creates a bold finished quilt with minimal stress and maximum creativity.
In this article, you will learn how this classic layout works, how to prepare your fabrics correctly, and how to assemble your blocks on point. The tutorial is broken into easy-to-follow sections, and each step contains helpful insights for achieving crisp seams, balanced colors, and a clean final composition.
1. Understanding the Nine Patch On Point Layout
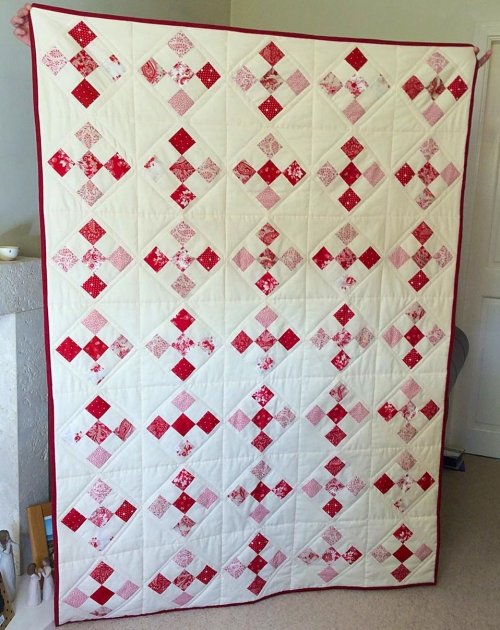
The foundation of the Nine Patch On Point – Quilting Tutorial – Pattern lies in its composition. The classic nine-patch block contains nine squares of equal size, usually arranged in alternating colors or contrasting tones. When these blocks are set “on point,” they rotate to form a diamond shape rather than the traditional square orientation. This simple shift dramatically enhances the quilt’s overall visual impact.
The “on point” setting also introduces additional elements such as setting triangles and corner triangles. These extra fabric pieces fill in the outer edges of the quilt top, allowing the nine-patch blocks to remain in their rotated orientation without cut-off corners. Understanding these structural elements is essential before beginning the sewing process.
Choosing a color palette makes an enormous difference in this layout. Because the blocks are rotated, light and dark fabrics play off each other more visibly. Many quilters prefer using complementary tones or a mix of prints and solids. The key is consistency and balance, ensuring that the eye moves naturally across the quilt top.
Fabric cutting precision is also crucial when preparing a Nine Patch On Point – Quilting Tutorial – Pattern. Accurate square sizes ensure that your blocks align nicely when rotated. Even slight variations can create uneven seams, especially when assembling rows diagonally instead of straight across.
One of the advantages of this pattern is its adaptability. You can use traditional fabrics, modern prints, or even scrap fabrics. The nine-patch block is extremely forgiving and perfect for using leftover material from past projects.
Once the basic structure is understood, the quilter can begin envisioning how the final quilt will look. Visual planning helps prevent color imbalance and ensures the layout feels cohesive from corner to corner.
2. Preparing Fabrics and Cutting Your Pieces
Proper preparation is one of the key steps in creating a successful Nine Patch On Point – Quilting Tutorial – Pattern. Start by washing or pre-washing your fabrics according to preference. This removes sizing and reduces the risk of color bleeding. Press your fabric thoroughly to eliminate wrinkles and folds before cutting.
Cutting accuracy plays a huge role in this pattern. Since the blocks will be rotated, they must align perfectly to create a clean on-point layout. Use a high-quality rotary cutter, a sharp blade, and a reliable quilting ruler. Cutting multiple squares at once is efficient, but only if your fabrics are stacked smoothly.
Many quilters prefer to cut strips first and then sub-cut them into squares. This streamlined method keeps edges straight and ensures uniformity. For beginners, marking guidelines with fabric-safe chalk can help prevent miscuts.
Color placement during cutting should be intentional. In a Nine Patch On Point – Quilting Tutorial – Pattern, the distribution of dark, light, and medium tones influences how the pattern appears when rotated. Separating your cut pieces into labeled piles keeps your workflow organized.
For the setting triangles used in the on-point layout, be sure to cut them slightly larger than necessary. This provides room for trimming and ensures the edges remain crisp and clean. Corner triangles should also be prepared ahead of time.
Taking your time with preparation builds a strong foundation for the sewing phase. The cleaner your cuts and organization, the smoother the assembly will be.
3. Assembling the Nine Patch Blocks
Once all fabric pieces are ready, you can begin assembling the classic nine-patch blocks. This part of the Nine Patch On Point – Quilting Tutorial – Pattern is generally simple and relaxing, making it ideal for beginners. Start by arranging your squares into the familiar 3×3 grid before stitching.
Sew the squares into three horizontal rows first. Press seams carefully, either to one side or open, depending on preference. Consistent seam-pressing prevents bulkiness and keeps blocks flat. Good pressing habits also help seams nest well during final assembly.
After the rows are sewn, join them together to form the complete nine-patch block. Always double-check alignment at seam intersections. Small misalignments can become more visible once the block is rotated on point.
Continue sewing all your nine-patch blocks using the same method. Having an assembly line workflow is efficient and ensures all blocks remain consistent. This consistency is especially important in quilts with repeated block patterns.
Once blocks are completed, square them up using a quilting ruler. Squaring ensures uniformity and reduces distortion. Clean, even blocks help maintain the symmetry of the on-point layout.
The finished nine-patch blocks may look simple at this stage, but their full beauty appears once they are rotated and incorporated into the final design.
4. Laying Out and Sewing the On-Point Quilt Top
The final assembly of the Nine Patch On Point – Quilting Tutorial – Pattern begins with arranging your blocks diagonally on a flat surface. This is where the quilt truly comes together visually. Take your time experimenting with color arrangement until you achieve a balanced look.
Add the setting triangles along the sides of your layout. These pieces are essential because they allow the blocks to sit neatly on point without gaps. Corner triangles are placed at each corner to complete the rectangular shape of the quilt.
Sew the quilt top together row by row. Unlike traditional quilting rows, on-point rows run diagonally, which may feel unusual at first. Pin carefully to maintain alignment, especially where block corners meet.
Work slowly and methodically. This reduces distortion and prevents the quilt top from stretching. Bias edges on the triangles can be delicate, so gentle handling is important.
Press seams after each row is added. This keeps the quilt top flat and prepares it for borders or quilting. Many quilters prefer pressing toward the triangles because it reduces bulk.
Once your quilt top is fully assembled, step back and admire the dynamic look created by the on-point alignment. Your hard work will show in every crisp intersection and balanced color transition.
FAQ About Nine Patch On Point Quilting
What does “on point” mean in quilting?
“On point” means rotating quilt blocks 45 degrees, positioning them like diamonds instead of squares.
Do I need special tools to make a Nine Patch On Point quilt?
No special tools are required—just standard quilting supplies such as a rotary cutter, ruler, and sewing machine.
Is this pattern suitable for beginners?
Yes, the nine-patch block is very beginner-friendly. The on-point setting adds a challenge but remains manageable with careful preparation.
How many fabrics should I use?
You can use as few as two fabrics or many varieties. The key is maintaining balanced contrast throughout the quilt.
Do I need setting triangles?
Yes, setting triangles are essential for properly aligning and finishing an on-point layout.
Can I use scrap fabrics for this pattern?
Absolutely! Scraps work wonderfully in a Nine Patch On Point – Quilting Tutorial – Pattern, creating a colorful and unique quilt top.
Conclusion
The Nine Patch On Point – Quilting Tutorial – Pattern is a beautiful and versatile quilting method that transforms simple blocks into striking designs.
Throughout this guide, you learned how to prepare fabrics, assemble nine-patch blocks, and lay them out on point for a dynamic finish. This pattern is accessible for beginners and enjoyable for experienced quilters alike.
If you found this tutorial helpful, please leave your honest opinion and share any suggestions for future quilting topics.