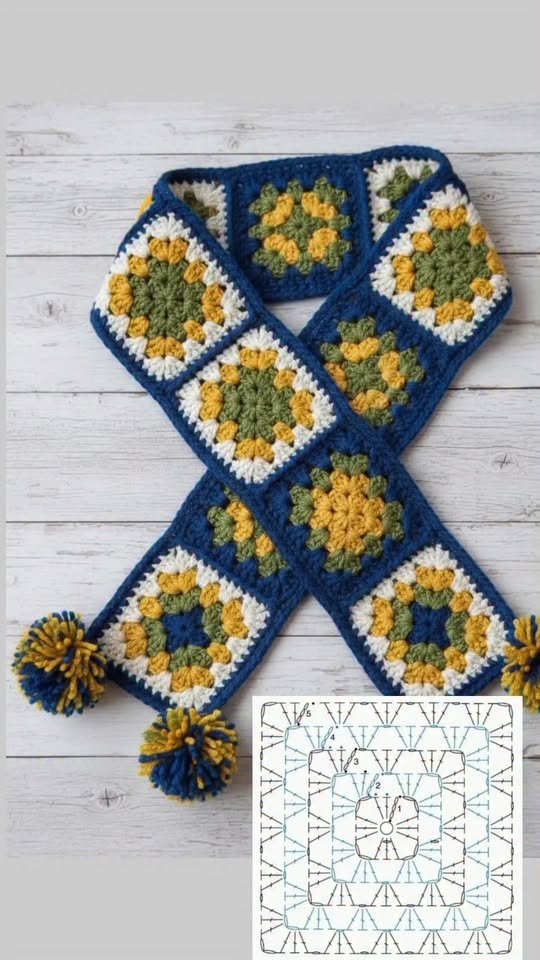
The Crochet Scarf – Pattern is arguably the most iconic project for anyone entering the world of fiber arts, offering a perfect blend of simplicity and endless creative potential. Whether you are picking up a hook for the very first time or you are a seasoned artisan looking for a relaxing weekend project, a scarf provides the ideal canvas to practice new stitches and experiment with luxurious textures. Unlike complex garments that require precise sizing and tailoring, a scarf is forgiving, versatile, and serves as a functional masterpiece that can brighten up any winter wardrobe.
When you dive into a Crochet Scarf – Pattern, you are engaging in a tradition that spans generations, yet it remains incredibly modern and trendy. From the chunky, oversized “blanket scarves” that dominate autumn fashion to the delicate, lace-like cowls worn in the spring, the adaptability of this accessory is unmatched. Creating your own handmade neckwear allows you to control the quality of the materials, ensuring that you stay warm without the itchiness often found in mass-produced synthetic alternatives. It is a slow-fashion statement that prioritizes craftsmanship and personal expression.
In this comprehensive guide, we are going to explore the essential elements that make a Crochet Scarf – Pattern successful and enjoyable to complete. We will discuss the technical side of yarn selection, the importance of maintaining consistent tension, and how to add professional finishes like fringe or borders. Beyond the mechanics, we will look at how to choose the right colors and textures to match your personal style. By the end of this article, you will feel empowered to start your next project with confidence, knowing exactly how to navigate the rows and rounds of your favorite designs.
1. Choosing the Right Yarn and Hook for Your Crochet Scarf – Pattern
The first and most vital step in any Crochet Scarf – Pattern is selecting the perfect yarn weight for your intended climate and style. If you are aiming for a classic, cozy winter look, a “Bulky” or “Super Bulky” yarn is your best friend; it works up quickly and provides immense warmth. For those living in milder regions, a “DK” (Double Knitting) or “Worsted” weight yarn offers a lighter drape that is perfect for layering without feeling too heavy or restrictive around the neck.
Fiber content is the next pillar of a great Crochet Scarf – Pattern. While 100% wool is prized for its incredible insulation, many crafters prefer an acrylic-wool blend for its softness and ease of care. If you have sensitive skin, consider using bamboo yarn or high-quality cotton, which provide a silky feel and beautiful stitch definition. Always check the yarn label for the “softness factor,” as a scarf sits directly against the delicate skin of your neck for hours at a time.
Your hook selection must complement your yarn to ensure the Crochet Scarf – Pattern has the right amount of “drape.” If your hook is too small, the scarf will be stiff and board-like; if it is too large, the stitches may look sloppy and loose. A general rule of thumb for scarves is to use the hook size recommended on the yarn label or even go up half a size. This creates a more fluid, flexible fabric that wraps comfortably around the body without feeling rigid.
Color choice can completely transform the look of a Crochet Scarf – Pattern. Solid colors are fantastic for showcasing intricate textures and complex stitch patterns like cables or puff stitches. On the other hand, self-striping yarns or “variegated” cakes do the heavy lifting for you, creating beautiful color transitions without the need to weave in dozens of ends. Think about your existing coat collection and choose a palette that will complement your daily outfits for maximum wearability.
Don’t forget to check the “yardage” requirements in your Crochet Scarf – Pattern before you head to the store. There is nothing more frustrating than running out of yarn when you are only six inches away from the finish line. Most standard scarves require between 300 to 500 yards of yarn, depending on the width and length. Always buy an extra skein if you plan on adding large, decorative yarn tassels or a matching pom-pom, as these can consume a surprising amount of material.
Finally, consider the “stretch” of your chosen fiber. Natural fibers like alpaca have very little “memory” and can grow longer over time due to the weight of the scarf. If you are following a Crochet Scarf – Pattern that is already quite long, you might want a fiber with a bit of “spring,” like a high-quality acrylic or a wool mix. This ensures that your scarf maintains its original dimensions even after a full season of heavy use and repeated washings.
2. Essential Stitches to Elevate Your Scarf Design
The foundation of most Crochet Scarf – Pattern designs is the humble single crochet or double crochet stitch. While these are simple, they can be used to create a sophisticated fabric by simply changing where you insert your hook. For example, working in the “back loop only” (BLO) creates a beautiful ribbed effect that mimics the look of knitting. This ribbing provides extra stretch and a modern, store-bought aesthetic that looks great on both men and women.
If you want to add more visual interest to your Crochet Scarf – Pattern, the “Half Double Crochet” (HDC) is a fantastic middle-ground stitch. It provides more height than a single crochet but is denser and warmer than a double crochet. Many modern patterns use the HDC between stitches (rather than in the top loops) to create a “moss stitch” or “linen stitch” look. This creates a woven, fabric-like texture that is incredibly soft and looks much more complicated than it actually is.
For those who love a bit of “squish,” the Crochet Scarf – Pattern can incorporate “Puff Stitches” or “Bobbles.” These stitches involve pulling up multiple loops in the same space to create a raised, 3D effect. While they use more yarn, they add a luxurious, high-end feel to your accessory. Using these as an accent border or in alternating rows can turn a basic rectangular scarf into a statement piece that everyone will ask you about.
Texture can also be achieved through “Post Stitches,” which are a staple in any advanced Crochet Scarf – Pattern. By working around the vertical post of the stitch rather than the top, you can create crochet cables and deep ridges. This technique is perfect for “outdoor” style scarves that need to be extra thick and wind-resistant. It adds a level of sophistication and “architectural” beauty to the project that is very satisfying to master.
Lace patterns are another beautiful variation of the Crochet Scarf – Pattern, often used for decorative “scarfettes” or evening wraps. By using “Chain Spaces” and “Shell Stitches,” you create an open, airy design that showcases the beauty of the yarn. These patterns are best worked with thinner, “Fingering” or “Lace” weight yarns. A lace crochet scarf is a great way to practice counting and following more complex visual charts while creating something elegant.
Lastly, the Crochet Scarf – Pattern can be worked “lengthwise” rather than in short rows. By making a very long starting chain and working a few wide rows, you create a scarf with vertical stripes and a different kind of stretch. This technique is often used for “Scrappy Scarves,” where you change colors every row to use up your yarn leftovers. It’s a fun, rhythmic way to build a unique accessory that is completely one-of-a-kind.
3. Mastering Sizing and Proportions for Every Wearer
When following a Crochet Scarf – Pattern, the “standard” adult size is usually about 6 inches wide and 60 inches long. However, this is just a starting point. A good rule for a classic scarf is that it should be roughly as long as the wearer is tall. This allows for the scarf to be wrapped once around the neck with the ends hanging down comfortably. If you prefer a more dramatic “oversized” look, you can easily extend the length to 70 or 80 inches.
Width is also a key factor in your Crochet Scarf – Pattern. A narrow scarf (3-4 inches) is often referred to as a “skinny scarf” and is more of a fashion accessory than a functional winter item. For maximum warmth, a wider “stole” style (10-12 inches) can be doubled over for extra insulation. When making a men’s crochet scarf, designers often stick to a 7-inch width to provide a masculine, structured look that fits well under a traditional overcoat.
Infinity scarves and cowls are popular variations that require a specific Crochet Scarf – Pattern approach. An infinity scarf is essentially a very long scarf that has been joined at the ends to form a large loop. For a “double wrap” infinity scarf, you generally want a circumference of about 50-60 inches. If you are making a “cowl,” which sits snugly against the neck, a circumference of 24-28 inches is usually the goal.
Children’s scarves require special safety considerations within the Crochet Scarf – Pattern. You should avoid making them too long to prevent tripping hazards, and always ensure the yarn is incredibly soft and machine washable. A standard child-sized scarf is usually 4 inches wide and 30-45 inches long. For toddlers, many parents prefer a keyhole scarf pattern, where one end pulls through a loop on the other end to keep it securely in place without the need for a knot.
Gauge is something you must check if you want your Crochet Scarf – Pattern to match the designer’s intended dimensions. If your tension is tighter than the pattern suggests, your scarf will be shorter and narrower. While gauge isn’t as critical for a scarf as it is for a sweater, it still matters if you have a limited amount of yarn. Work a small swatch first to see how your hook and yarn choice are interacting before committing to the full project.
Don’t forget the “fringe factor” when calculating your length. In many Crochet Scarf – Pattern designs, the fringe adds an extra 4 to 6 inches of length to each end. If you like a clean look, you might skip the fringe and add a “Crab Stitch” (reverse single crochet) border instead. This provides a corded, finished edge that prevents the sides of the scarf from curling and adds a professional touch to your handmade winter gear.
4. Finishing Touches and Care for Your Handmade Scarf
Blocking is the “secret ingredient” that takes a Crochet Scarf – Pattern from amateur to professional. Once you have finished the last stitch, your scarf might look a bit rumpled or the edges might curl. “Wet blocking”—which involves soaking the scarf, pinning it to the correct dimensions on a foam mat, and letting it air dry—sets the stitches and opens up the pattern. This is especially important for lace scarves where you want the openwork to be clearly visible.
Adding a “Border” can change the entire vibe of your Crochet Scarf – Pattern. A simple row of single crochet around the entire perimeter can hide uneven edges and provide a sturdy frame. If you want something more decorative, a “Picot Border” adds tiny, dainty points, while a “Pom-Pom Border” adds a playful, modern flair. These small additions are a great way to use up the last few yards of your yarn and give the piece a completed look.
Tassels and Fringe are the most common ways to finish a Crochet Scarf – Pattern. To make a uniform fringe, wrap your yarn around a piece of cardboard that is the width of your desired fringe length, cut along one side, and then larks-head knot the strands into the ends of the scarf. This adds movement and a classic “winter aesthetic” to the project. For a more modern look, try making large, chunky handmade tassels and attaching them only to the corners.
Proper care is essential to ensure your Crochet Scarf – Pattern lasts for decades. If you used animal fibers like wool or alpaca, you must hand-wash the item in cool water with a dedicated wool soak. Never wring the scarf out; instead, roll it in a towel to remove excess water. For acrylic scarves, a gentle cycle in a mesh laundry bag is usually fine, but air-drying is still the best way to prevent the fibers from “pilling” over time.
Labels and packaging can turn your Crochet Scarf – Pattern into a high-end gift. You can buy or make your own “Handmade with Love” leather or fabric tags to sew onto the bottom corner. This small detail adds a level of branding and quality that makes the recipient feel extra special. If you are selling your work at craft fairs, a nice wrap-around paper sleeve with the “Care Instructions” and “Fiber Content” is a must for a professional presentation.
Finally, consider the longevity of your design. Trends come and go, but a well-made Crochet Scarf – Pattern in a classic stitch is timeless. If you find your scarf is starting to look a bit fuzzy after a season of wear, use a “fabric shaver” to carefully remove any pills. This simple maintenance task will keep your crochet accessory looking brand new, year after year, allowing you to enjoy the fruits of your labor for many winters to come.
FAQ – Frequently Asked Questions
How long does it take to crochet a scarf?
For a beginner using a Crochet Scarf – Pattern with worsted weight yarn, it usually takes between 6 to 10 hours of active work. If you use “Super Bulky” yarn and a large hook, you can often finish a scarf in just 2 or 3 hours. Lace patterns or thinner yarns will take significantly longer.
What is the best yarn for a beginner’s first scarf?
A worsted weight (Level 4) acrylic yarn is highly recommended. It is affordable, easy to see the stitches, and doesn’t split as easily as some natural fibers. Choose a light, solid color so you can clearly see the “V” of your stitches as you follow the Crochet Scarf – Pattern.
Why is my scarf getting wider as I go?
This is a common issue when starting a Crochet Scarf – Pattern. It usually happens because you are accidentally adding an extra stitch at the end of the row. To fix this, count your stitches at the end of every single row to ensure the number stays the same. Using stitch markers in the first and last stitch of each row is a lifesaver!
Can I make a scarf without a specific pattern?
Absolutely! A scarf is just a long rectangle. You can choose any stitch you like and just keep going until it is the length you want. However, following a Crochet Scarf – Pattern helps you with the “turning chain” math and ensures you have a consistent edge and a professional-looking finished product.
How do I join a new ball of yarn?
The best way to join yarn in a Crochet Scarf – Pattern is the “Magic Knot” or by finishing the last stitch of the old ball with the new color. Always try to join new yarn at the end of a row rather than in the middle, as it is much easier to hide the woven-in ends along the side border.
Is a crochet scarf warmer than a knitted one?
Generally, yes. Crochet stitches are “thicker” and use about 25-30% more yarn than knitting, which results in a denser, warmer fabric. However, because crochet can have larger gaps, a Crochet Scarf – Pattern that uses solid stitches like the single or half-double crochet will be the most wind-resistant.
Conclusion
The Crochet Scarf – Pattern is more than just a sequence of stitches; it is a gateway to creativity, comfort, and the joy of making something with your own two hands. In this guide, we have explored everything from the importance of fiber selection and hook sizes to the advanced stitches and finishing techniques that can turn a simple project into a work of art.
We’ve discussed how to size your scarf for different people and how to care for your finished piece so it remains a staple in your wardrobe for years. Whether you are crafting for yourself or creating a heartfelt gift, the humble scarf remains the most rewarding project in the crochet world.