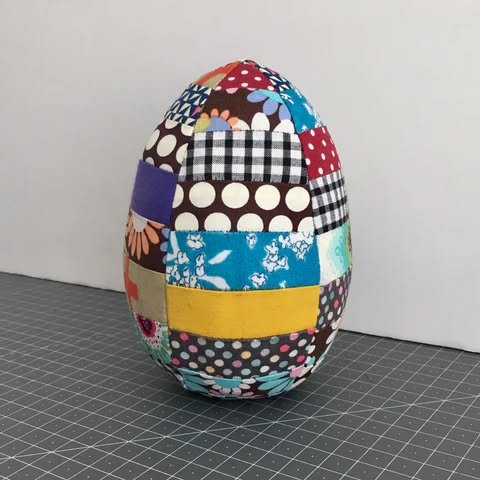
Jumbo Easter Egg – Pattern designs are becoming the ultimate trend for DIY enthusiasts looking to add a massive splash of color to their spring celebrations. If you are tired of tiny decorations that get lost in the grass, diving into a Jumbo Easter Egg – Pattern is the perfect way to create a statement piece that stands out. These oversized creations offer a unique opportunity to experiment with textures, vibrant yarns, and intricate stitches that smaller projects simply don’t allow for.
Whether you are a seasoned crocheter or a beginner looking for a bold new project, working with a Jumbo Easter Egg – Pattern allows you to explore the world of “amigurumi on a grand scale.” The beauty of these large-scale patterns is their versatility; they can serve as floor pillows, centerpiece decorations, or even giant plush toys for children. By choosing the right crochet techniques and high-quality materials, you can transform a simple concept into a professional-looking masterpiece.
In this comprehensive guide, we will explore everything you need to know about mastering the Jumbo Easter Egg – Pattern. We will cover the essential materials, the step-by-step construction process, and how to customize your design to fit your personal style. Our goal is to provide you with an SEO-optimized walkthrough that makes the crafting process as enjoyable as the finished product itself, ensuring your Easter decor is the talk of the neighborhood this year.
1 Understanding the Basics of the Jumbo Easter Egg – Pattern
The foundation of any successful Jumbo Easter Egg – Pattern lies in understanding scale and proportion. Unlike standard patterns, a jumbo design requires a firm grasp of how stuffed toy geometry works when enlarged significantly. You aren’t just making a bigger egg; you are managing the weight of the yarn and the tension of the stitches to ensure the egg maintains its iconic oval shape without sagging.
When selecting your materials for this giant crochet project, look for super bulky yarn or “blanket” yarn. These thick fibers are essential for achieving that “jumbo” size quickly while providing a soft, plush texture that is pleasing to the touch. Using a larger crochet hook, typically ranging from 8mm to 12mm, will help you maintain a consistent gauge throughout the entire Jumbo Easter Egg – Pattern workflow.
The magic ring is your best friend when starting this journey. Because you are working with thick yarn, the center must be pulled tight to prevent any poly-fill stuffing from leaking out. Starting with a solid foundation ensures that as you increase your stitches, the base of your Jumbo Easter Egg – Pattern remains sturdy and symmetrical, providing a stable bottom for the egg to sit upright.
In the world of amigurumi, increases are what create the curve. For a Jumbo Easter Egg – Pattern, you will likely use single crochet increases spaced evenly across several rounds. It is vital to use stitch markers religiously here; in a project this size, losing your place by even one stitch can lead to a lopsided egg that looks more like a potato than a festive decoration.
One often overlooked aspect of the Jumbo Easter Egg – Pattern is the “invisible decrease.” To get that smooth, tapered top that characterizes a perfect egg shape, you need to decrease your stitches without leaving unsightly gaps or bumps. The invisible decrease technique allows the fabric to remain dense and uniform, which is a hallmark of high-quality handmade crafts.
Finally, consider the structural integrity of your oversized Easter egg. Since it’s a Jumbo Easter Egg – Pattern, the weight of the stuffing can be substantial. Many crafters choose to insert a lightweight plastic frame or a bean-bag base at the bottom to give it a “roly-poly” effect, ensuring it stays exactly where you want it during your Easter egg hunt or photo shoot.
2 Essential Materials for Your Jumbo Easter Egg – Pattern
To bring a Jumbo Easter Egg – Pattern to life, your shopping list starts with the right fiber. Most experts recommend chenille-style yarn because it works up incredibly fast and hides minor imperfections in your stitching. This type of yarn provides the “wow factor” needed for a jumbo project, giving the finished egg a velvety sheen that looks expensive and professionally made.
Don’t underestimate the amount of premium polyester fiberfill you will need. A Jumbo Easter Egg – Pattern is a literal “stuffing hog,” often requiring several large bags to achieve the desired firmness. It is important to stuff as you go, especially as the egg begins to narrow at the top, to ensure there are no hollow spots or lumps inside your Easter creation.
Your toolkit should also include a large-eye yarn needle, often called a tapestry needle, specifically designed for thick yarns. This is crucial for weaving in ends and closing the final hole of your Jumbo Easter Egg – Pattern. Without a needle that can accommodate bulky fibers, finishing the project can become a frustrating struggle that risks damaging the yarn’s integrity.
Color selection is where your Jumbo Easter Egg – Pattern truly starts to shine. While traditional pastels like mint green, baby blue, and soft pink are classic choices, don’t be afraid to experiment with variegated yarns or bold neon stripes. Using high-contrast colors can highlight the texture of your stitches and make the jumbo size feel even more impressive to the naked eye.
For those looking to add a bit of “bling” to their festive decor, consider incorporating embroidery thread or felt appliques onto the finished surface. You can use the Jumbo Easter Egg – Pattern as a blank canvas to sew on polka dots, zig-zags, or even the recipient’s name. This customization turns a standard pattern into a cherished personalized gift.
Lastly, ensure you have a comfortable workspace. Working on a Jumbo Easter Egg – Pattern can be physically demanding on your wrists and shoulders due to the weight of the yarn. Take frequent breaks and use an ergonomic crochet hook to prevent fatigue, allowing you to enjoy the process of creating your oversized holiday masterpiece from start to finish.
3 Step-by-Step Guide to Stitching the Jumbo Easter Egg – Pattern
The actual construction of the Jumbo Easter Egg – Pattern follows a specific mathematical rhythm. You will start with a small number of stitches and gradually expand. The key to the “jumbo” aspect is the duration of the middle rounds. Unlike standard eggs that might have 5 rounds of even stitching, a jumbo version may require 15 to 20 rounds to give it that towering presence.
As you move through the Jumbo Easter Egg – Pattern, pay close attention to your tension. If your stitches are too loose, the stuffing will show through, which is a major “no-no” in amigurumi quality control. If they are too tight, the egg may become stiff and lose its cuddly appeal. Finding that “Goldilocks” tension is the secret to a professional-looking giant plush egg.
Mid-way through the Jumbo Easter Egg – Pattern, you have the perfect opportunity to change colors. If you want a striped effect, this is the time to carry your yarn or use a seamless color change technique. Striped jumbo eggs are visually striking and help break up the monotony of stitching such a large surface area with a single color.
One of the most satisfying parts of the Jumbo Easter Egg – Pattern is seeing the “bulge” form. This is the widest part of the egg, and it’s where the project feels the most massive in your lap. At this stage, you are working the maximum number of single crochets per round, which serves as the anchor for the entire structural design of your Easter centerpiece.
When it comes time to taper the top of the Jumbo Easter Egg – Pattern, the decrease rounds must be handled with care. If you decrease too quickly, the egg will look flat; if you decrease too slowly, it will look like a cylinder. Following the tapered decrease sequence in the pattern is essential for achieving that iconic, slightly pointed top that screams “Easter Egg.”
The final closure of your Jumbo Easter Egg – Pattern should be done using the “ultimate finish” method. This involves threading your yarn needle through the front loops of the remaining stitches and pulling tight like a drawstring. This creates a clean, professional finish that is virtually invisible, leaving you with a stunning holiday decoration you can be proud of.
4 Advanced Tips for Customizing Your Jumbo Easter Egg – Pattern
Once you have mastered the basic Jumbo Easter Egg – Pattern, it is time to get creative. One popular modification is the “hidden pocket” feature. By altering a section of the crochet pattern, you can create a flap or a zipper opening, turning your jumbo egg into a giant storage container for actual treats or smaller crochet surprises.
Another way to elevate your Jumbo Easter Egg – Pattern is by using textured stitches like the popcorn stitch or the waffle stitch. These add a 3D element to the surface of the egg, making it a tactile delight. Textured jumbo eggs are particularly popular as sensory toys for children or as sophisticated accents in modern home decor.
If you are making the Jumbo Easter Egg – Pattern for an outdoor display, consider the “weather-proofing” aspect. Using nylon-based yarns or treated outdoor fibers can help the egg withstand the elements. Additionally, adding a heavy weight at the bottom prevents your giant Easter eggs from blowing away during a windy spring afternoon.
For those who love a bit of sparkle, weaving a strand of metallic thread alongside your jumbo yarn can give the egg a magical, “golden egg” appearance. This is a fantastic way to create a “Grand Prize” for an Easter egg hunt, making the Jumbo Easter Egg – Pattern the most coveted item of the entire holiday event.
Lighting is another innovative way to enhance your Jumbo Easter Egg – Pattern. Some crafters choose to leave a small opening at the bottom to insert a battery-operated LED puck light. The light glows through the stitches, creating a beautiful lantern effect that looks stunning during evening Easter celebrations or as a nightlight in a nursery.
Finally, remember that the Jumbo Easter Egg – Pattern is just a template. You can scale it even further by using “mega” yarns or even arm-knitting techniques. The only limit is your imagination and the amount of stuffing you can fit in your house! Sharing your finished work on social media is a great way to inspire other crafters and showcase your unique take on this festive trend.
FAQ: Everything You Need to Know About the Jumbo Easter Egg – Pattern
How much yarn do I need for a Jumbo Easter Egg – Pattern?
Typically, you will need between 300 to 500 yards of super bulky yarn, depending on your specific hook size and stitch tension. It is always better to have an extra skein on hand to avoid different dye lots.
What is the best stuffing for a giant crochet egg?
High-loft polyester fiberfill is the gold standard. It provides the best “spring back” and won’t clump over time. For an eco-friendly option, you can use recycled fabric scraps, but keep in mind they will make the egg much heavier.
How long does it take to finish a Jumbo Easter Egg – Pattern?
For an intermediate crafter, a Jumbo Easter Egg – Pattern can usually be completed in a weekend (about 8 to 12 hours of active stitching). The thick yarn makes the progress very visible and rewarding.
Can I wash my jumbo Easter egg?
Yes, if you use washable synthetic yarn. It is recommended to spot clean or hand wash and air dry. Due to its size, machine washing might be difficult and could cause the stuffing to shift significantly.
Is this pattern suitable for beginners?
Absolutely! While the size is intimidating, the Jumbo Easter Egg – Pattern primarily uses basic stitches like the single crochet, increase, and decrease. It is a great way for beginners to practice their technique on a large scale.
How do I make the egg stand up on its own?
The best way is to create a flat base by not over-stuffing the very bottom or by adding a small bag of plastic pellets (weighted stuffing beads) at the base before filling the rest with fiberfill.
Conclusion
Creating a Jumbo Easter Egg – Pattern is more than just a craft project; it’s a way to bring joy and a sense of wonder to your holiday festivities. We have covered the importance of selecting the right bulky yarns, mastering the geometry of large-scale amigurumi, and adding those personal touches that make your work unique.
From the first magic ring to the final invisible finish, this project is a rewarding journey for any maker. We hope this guide inspires you to pick up your hook and start your own oversized Easter adventure.