Cute Bunny Drawstring Pouch- Pattern projects are the perfect way to combine functionality with an adorable aesthetic, making them a favorite among DIY enthusiasts and crafters alike. Whether you are looking to create a unique gift wrap, a small treasure bag for a child, or a charming organizer for your own accessories, this specific sewing pattern offers endless possibilities for customization. Throughout this guide, we will explore every detail of creating your very own bunny-themed accessory, ensuring that even beginners can achieve a professional and high-quality result.
When you dive into the world of handmade gift bags, the Cute Bunny Drawstring Pouch- Pattern stands out because of its iconic long ears and versatile shape. This project is not just about utility; it is about the joy of creating something whimsical that brings a smile to anyone who sees it. By using high-quality cotton fabrics and contrasting textures, you can transform a simple pouch into a piece of art that reflects your personal style and attention to detail.
Mastering the Cute Bunny Drawstring Pouch- Pattern requires a blend of basic sewing skills and a bit of creative flair for the finishing touches. In the following sections, we will break down the essential materials, the step-by-step construction of the bunny ears, and the secret to a smooth drawstring closure. By following these optimized SEO tips and detailed instructions, you will be well on your way to crafting a collection of these delightful pouches that are as durable as they are beautiful.
1 Understanding the Cute Bunny Drawstring Pouch- Pattern Essentials
The foundation of any successful sewing project lies in understanding the core components of the Cute Bunny Drawstring Pouch- Pattern. This specific design relies on a circular or rectangular base that forms the body of the pouch, complemented by two long, floppy ears that serve as the primary decorative element. When selecting your fabric types, consider using lightweight canvas or linen for the exterior to provide structure, while choosing a soft flannel or printed cotton for the lining to add a touch of luxury.
Choosing the right sewing notions is equally vital for this bunny pouch project. You will need a reliable pair of fabric shears, coordinating thread, and a sturdy drawstring cord—ribbon, cotton twine, or paracord all work beautifully depending on the look you want. The pattern dimensions can be scaled up or down, allowing you to create everything from a tiny coin purse to a larger toy storage bag, making this one of the most versatile free sewing patterns available.
One of the most important aspects of the Cute Bunny Drawstring Pouch- Pattern is the placement of the casing. This is the “tunnel” where the drawstring sits, and it must be positioned correctly so that when the bag is pulled shut, the bunny ears stand up or flop over naturally. Paying close attention to the seam allowance during this stage ensures that your pouch remains symmetrical and functional, preventing the fabric from bunching awkwardly at the top.
To make your DIY bunny bag truly unique, consider the “face” of the bunny. Many crafters use embroidery techniques to stitch on eyes and a pink nose, while others prefer using safety eyes or fabric markers. If you are following a minimalist modern sewing aesthetic, you might even choose to leave the face blank, letting the silhouette of the ears carry the theme. This flexibility is what makes the Cute Bunny Drawstring Pouch- Pattern so popular in the crafting community.
Preparation is key when working with this sewing template. Before cutting your precious fabric, it is highly recommended to print your digital pattern and pin it to a scrap piece of fabric first. This “mock-up” stage allows you to check if the ear size is proportional to the bag body. Since this Cute Bunny Drawstring Pouch- Pattern is often used for Easter or baby showers, getting the proportions right ensures the maximum “cute factor” for your finished product.
Lastly, don’t forget the importance of pressing your seams. In the world of professional sewing, an iron is just as important as the sewing machine itself. Pressing each seam as you go will give your drawstring pouch a crisp, high-end look that distinguishes it from a basic amateur project. Following these essential steps ensures that your Cute Bunny Drawstring Pouch- Pattern results in a sturdy, well-constructed item that can withstand daily use.
2 Step-by-Step Construction of the Bunny Ears and Body
The most distinctive feature of the Cute Bunny Drawstring Pouch- Pattern is undoubtedly the ears. To begin, you will cut four ear pieces—two for the outer fabric and two for the lining. To give the ears some “body” so they don’t just limp downwards, you can iron a thin layer of fusible interfacing onto the wrong side of the outer ear pieces. This small addition makes a world of difference in the final silhouette of your handmade pouch.
Once the ears are prepared, you will sew them right sides together, leaving the bottom edge open for turning. After turning them right side out, give them a good press with your iron. The Cute Bunny Drawstring Pouch- Pattern usually instructs you to fold the bottom edges of the ears slightly inward before basting them to the main body. This creates a realistic “pinched” look at the base of the ear, which adds a professional touch to your sewing craft.
Now, focus on the main body of the Cute Bunny Drawstring Pouch- Pattern. You will typically have two main exterior pieces and two lining pieces. Align the ears on the right side of one exterior piece, pointing downwards toward the center. When you later sew the top edge and turn the bag, the ears will flip upward into their correct position. This “sandwiching” technique is a staple in creative sewing and ensures all raw edges are hidden inside.
Creating the drawstring casing is the next critical phase of the Cute Bunny Drawstring Pouch- Pattern. You will need to leave small gaps in the side seams of the exterior fabric, usually about an inch from the top edge. These gaps act as the entry and exit points for your drawstring ribbon. Ensuring these openings are reinforced with backstitching will prevent the seams from ripping when the pouch is frequently opened and closed by eager hands.
After the exterior and lining are joined at the top, you will pull the bag through a small opening left in the lining. This is known as “birthing” the bag in the sewing community. Once the bag is right side out, topstitch around the top edge. This not only keeps the lining from rolling outward but also creates the defined path for your drawstring cord, completing the functional structure of the Cute Bunny Drawstring Pouch- Pattern.
The final construction step involves threading the cord. Using a safety pin or a bodkin, thread one piece of cord through the entire casing and back out the same side, then repeat with a second cord from the opposite side. Tying the ends of these cords into knots creates the “pull” mechanism. Your Cute Bunny Drawstring Pouch- Pattern is now physically complete, leaving only the decorative embellishments to bring your character to life.
3 Customizing Your Pouch with Creative Embellishments
Customization is where the Cute Bunny Drawstring Pouch- Pattern truly shines as a creative project. You aren’t limited to just plain cotton; you can experiment with textured fabrics like faux fur, minky, or even velvet for a more sophisticated version. Using a floral print for the inside of the ears while keeping the outer fabric a solid neutral color creates a beautiful contrast that highlights the bunny design every time the ears move.
For the bunny’s face, the Cute Bunny Drawstring Pouch- Pattern offers a blank canvas. Hand-embroidery using a simple satin stitch for the nose and a backstitch for the whiskers adds a rustic, artisanal feel. If you prefer a faster method, high-quality heat-transfer vinyl (HTV) can be used to “iron on” a cute face. This is particularly useful if you are making these pouches in bulk for a birthday party or school event.
Another way to elevate your drawstring bag is by adding charms or pom-poms. A small white pom-pom sewn to the back of the pouch acts as a “bunny tail,” adding a 3D element that is absolutely irresistible. You can also attach wooden beads to the ends of the drawstrings to make them easier to grip and to provide a natural, eco-friendly aesthetic to your Cute Bunny Drawstring Pouch- Pattern creation.
If you are an advanced crafter, you might consider adding quilted details to the body of the pouch. Using a diamond quilt pattern on the exterior fabric before assembly provides extra padding, making the pouch suitable for carrying delicate items like jewelry or small electronics. This variation of the Cute Bunny Drawstring Pouch- Pattern transforms a simple toy into a functional, protective travel accessory that looks expensive and well-made.
Don’t overlook the power of scent in your handmade crafts. You can tuck a small sachet of dried lavender into the lining of the bunny pouch to create a soothing drawer freshener or a “calm down” toy for children. Because the Cute Bunny Drawstring Pouch- Pattern is washable (depending on your fabric choice), it remains a hygienic and long-lasting gift option that serves multiple sensory purposes.
Finally, consider the seasonal versatility of this pattern. While bunnies are associated with Spring, using deep jewel tones or plaid fabrics can turn the Cute Bunny Drawstring Pouch- Pattern into a cozy winter-themed gift. By simply changing the fabric palette, you can adapt this single sewing project for any time of year, making it a valuable addition to your digital library of sewing patterns and tutorials.
4 Marketing and Selling Your Handmade Bunny Pouches
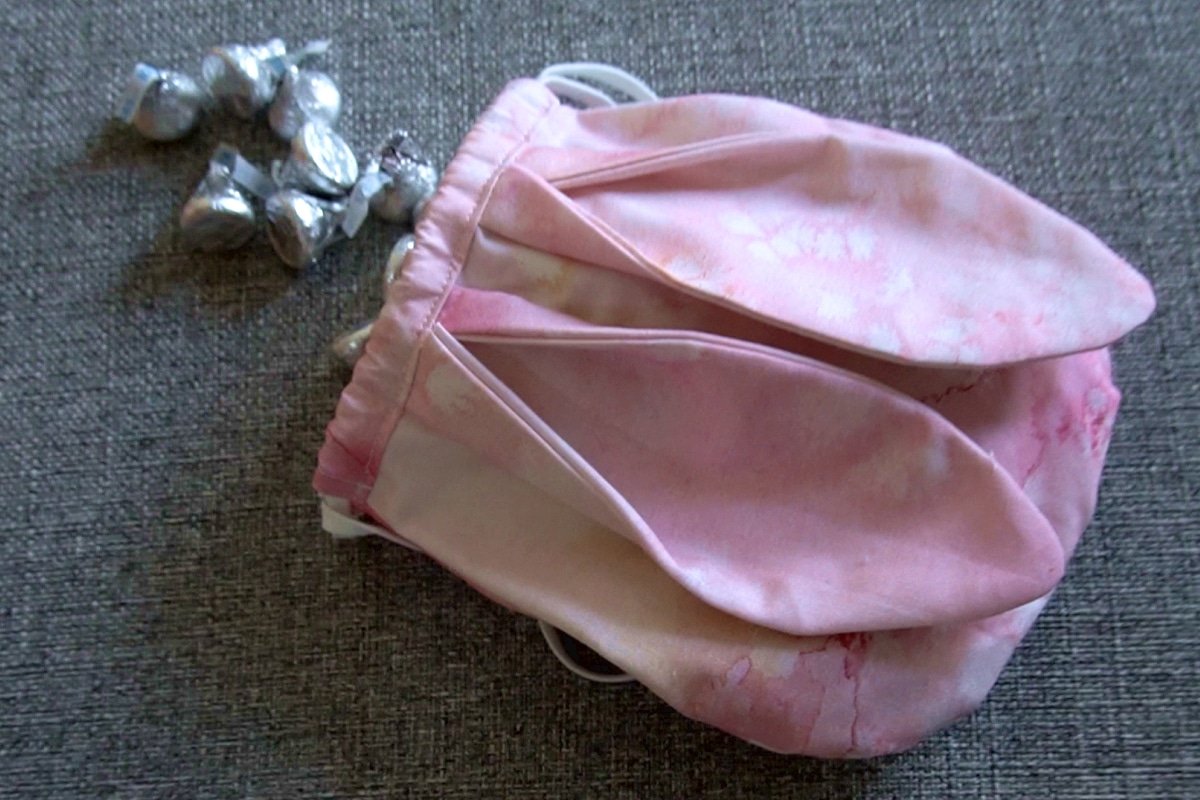
If you plan to sell your creations, the Cute Bunny Drawstring Pouch- Pattern is a high-demand item on platforms like Etsy or at local craft fairs. To succeed, focus on your product photography. Use bright, natural lighting and “lifestyle” shots that show the pouch being used—perhaps filled with colorful candies or small craft supplies. Highlighting the handmade quality and the unique “bunny ears” will help your listing stand out in a crowded market.
In your product descriptions, use SEO keywords such as “Easter gift bag,” “reusable gift wrap,” and “nursery decor.” Mentioning that your product follows the Cute Bunny Drawstring Pouch- Pattern tells customers that they are getting a classic, tried-and-true design. Be sure to emphasize any eco-friendly materials you used, as many modern shoppers are looking for sustainable alternatives to plastic packaging.
Pricing your bunny pouches correctly is essential for a profitable hobby or business. Factor in the cost of your fabric, the drawstring material, and, most importantly, your time. Even though the Cute Bunny Drawstring Pouch- Pattern is relatively quick to sew, your expertise in embroidery or fabric selection adds significant value. Offering “bundles” (e.g., a set of three pouches) can often encourage larger purchases.
Social media is a powerful tool for promoting your sewing business. Create short videos or “reels” showing the process of sewing the Cute Bunny Drawstring Pouch- Pattern. Seeing the transformation from flat fabric pieces to a 3D bunny bag is incredibly satisfying for viewers and often leads to impulse buys. Use hashtags like #SewingProject, #BunnyPouch, and #HandmadeGift to reach a wider audience of craft lovers.
Consider offering personalization as a “premium” add-on. Adding a child’s name to one of the ears using embroidery or fabric paint can double the perceived value of the Cute Bunny Drawstring Pouch- Pattern. Personalized items are favorites for baby showers and first birthdays, allowing you to tap into the lucrative gift-giving market with a product that feels one-of-a-kind.
Lastly, always encourage customer feedback. When someone buys a bag made from your Cute Bunny Drawstring Pouch- Pattern, ask them to share a photo or leave a review. Word-of-mouth and social proof are the most effective ways to grow a brand around handmade textiles. With its universal appeal and simple construction, this bunny pouch is the perfect “anchor product” for any small sewing business.
FAQ – Frequently Asked Questions
1. What is the best fabric to use for a Cute Bunny Drawstring Pouch- Pattern?
The most recommended fabric is 100% cotton or quilting cotton. These fabrics are easy to sew, come in thousands of prints, and hold their shape well. For the lining, you can use the same cotton or a softer fabric like flannel.
2. Can a beginner sew this bunny pouch?
Yes! The Cute Bunny Drawstring Pouch- Pattern is considered an advanced beginner project. If you can sew a straight line and know how to create a basic casing, you can successfully finish this bag.
3. How long does it take to make one pouch?
Once the fabric is cut, an experienced sewer can finish a Cute Bunny Drawstring Pouch- Pattern in about 30 to 45 minutes. Beginners may take an hour or two for their first attempt.
4. Is this pattern washable?
Absolutely, as long as you pre-wash your fabrics to prevent shrinking. If you added hand-embroidery or delicate charms, we recommend hand-washing or using a gentle machine cycle and air-drying to keep the bunny ears looking crisp.
5. What size cord should I use for the drawstring?
A 1/8 inch or 1/4 inch cord usually works best. You want something that slides easily through the casing without being so thick that it prevents the bag from closing tightly.
6. Can I sell items made from this pattern?
Most designers allow you to sell physical items made from their Cute Bunny Drawstring Pouch- Pattern, but it is always polite to check the specific license of the pattern you downloaded and give credit to the designer.
Conclusion
In this article, we have explored the delightful world of the Cute Bunny Drawstring Pouch- Pattern, covering everything from the essential materials to advanced customization and marketing tips.
We learned that the secret to a great bunny bag lies in the stabilization of the ears, the precision of the drawstring casing, and the creative “face” details that bring the character to life. This project is a fantastic way to practice sewing skills while creating a practical and heart-warming item that appeals to all ages.