Creating a Quick and Easy Easter Mug Rug – Pattern is the perfect way to welcome the spring season into your home while honing your sewing skills. Whether you are a seasoned quilter or a complete beginner, this project offers a delightful balance of functionality and festive charm. A mug rug is essentially a miniature quilt, larger than a coaster but smaller than a placemat, designed to hold both your favorite morning coffee and a small snack or treat.
The beauty of this Quick and Easy Easter Mug Rug – Pattern lies in its versatility and the speed at which it can be completed. In the world of DIY crafts, having a project that provides instant gratification is a huge win. This specific Easter pattern focuses on bright colors, pastel fabrics, and adorable motifs like bunnies or eggs, making it an excellent gift for friends, family, or even as a decorative addition to your office desk.
When we talk about a Quick and Easy Easter Mug Rug – Pattern, we are looking at a project that maximizes visual impact without requiring hours of intricate labor. By using basic quilting techniques and simple applique methods, you can create a professional-looking piece of home decor in under an afternoon. This article will guide you through the essentials of the pattern, the materials needed, and the steps to ensure your Easter sewing project is a resounding success.
1. Understanding the Quick and Easy Easter Mug Rug – Pattern
A Quick and Easy Easter Mug Rug – Pattern serves as a foundational blueprint for your creative work. It typically includes measurements for the fabric pieces, a template for the holiday-themed shape, and instructions on how to assemble the “sandwich” of top fabric, batting, and backing. Understanding the layout is crucial for ensuring your finished mug rug is symmetrical and durable.
The primary goal of this pattern is to simplify the quilting process. Unlike full-sized quilts, a mug rug allows you to practice binding and topstitching on a small scale. This makes it a fantastic educational tool for those new to the hobby. You can experiment with different fabric scraps you have lying around, turning waste into a beautiful Easter decoration.
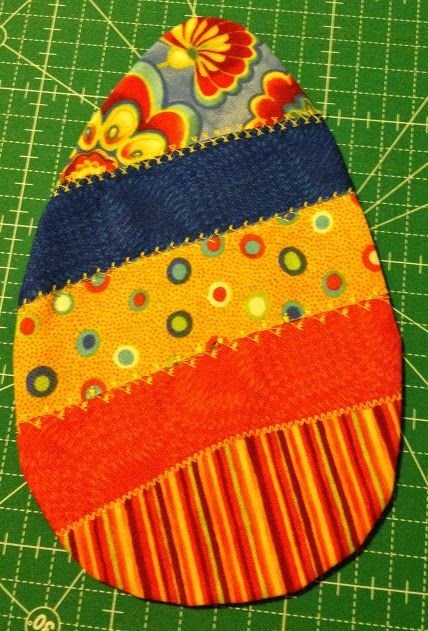
In this Quick and Easy Easter Mug Rug – Pattern, we prioritize a size of approximately 5×8 inches. This specific dimension is ideal because it accommodates a standard mug and a couple of cookies or a piece of cake. It is the gold standard for functional fabric art, providing enough space for a cute Easter bunny applique on one side while leaving the other side clear for your drink.
The “Quick” aspect of this pattern refers to the use of fusible web for the applique. Instead of traditional hand-sewing, which can take hours, you simply iron your shapes onto the background fabric. This modern quilting technique ensures that your Easter mug rug stays together through multiple washes while saving you a significant amount of time.
“Easy” denotes that no advanced mathematical calculations or complex quilt blocks are required. This Quick and Easy Easter Mug Rug – Pattern utilizes straight lines and basic shapes. If you can sew a straight line on a sewing machine, you can master this project. It is designed to be stress-free, allowing the joy of the holiday to shine through your craftsmanship.
Finally, the Easter theme is brought to life through your choice of textiles. Look for cotton fabrics featuring prints of tulips, jellybeans, or soft floral patterns. By following this Quick and Easy Easter Mug Rug – Pattern, you ensure that your color palette and design elements remain cohesive, resulting in a charming finished product that looks like it came from a boutique.
2. Essential Materials for Your Easter Sewing Project
To begin your Quick and Easy Easter Mug Rug – Pattern, you will need high-quality 100% cotton fabric. Cotton is preferred because it is heat-resistant—essential if you plan on placing a hot mug of tea on it—and it is very easy to manipulate under a presser foot. You will need at least two contrasting fabrics for the front and one solid piece for the back.
Quilt batting is the next vital component. For a mug rug, a thin cotton or bamboo batting works best. It provides enough insulation to protect your furniture from heat while remaining thin enough to sew through easily. Avoid high-loft polyester batting, as it can make your mug rug too puffy, causing your mug to become unstable and potentially tip over.
You cannot complete a Quick and Easy Easter Mug Rug – Pattern without a good quality thread. A 50wt cotton thread is the industry standard for quilting. Choose a color that matches your fabric for a seamless look, or a contrasting color if you want your decorative stitching to stand out. This small detail can significantly elevate the final look of your Easter craft.
Fusible web (like HeatnBond) is the secret weapon for the Quick and Easy Easter Mug Rug – Pattern. This double-sided adhesive allows you to bond your Easter shapes to the base fabric with an iron. It prevents the fabric from fraying and holds it securely in place while you sew around the edges, making the applique process foolproof for beginners.
Cutting tools are equally important. A rotary cutter, a self-healing mat, and a quilting ruler will ensure your edges are perfectly straight. Precision in cutting is what separates a homemade project from a professional-looking handmade gift. Following the measurements in the Quick and Easy Easter Mug Rug – Pattern exactly will make the assembly phase much smoother.
Lastly, don’t forget your sewing machine needles. A fresh universal needle or a quilting needle (size 80/12) is recommended. Starting a new project like this Quick and Easy Easter Mug Rug – Pattern with a sharp needle prevents skipped stitches and ensures that the machine glides through the multiple layers of fabric and batting without effort.
3. Step by Step Guide to the Mug Rug Construction
The first phase of the Quick and Easy Easter Mug Rug – Pattern involves preparing your background. Cut your main fabric into a rectangle. If you want a more dynamic look, you can “pieced” two different fabrics together. This adds a level of sophistication to your Easter design without adding much difficulty to the overall process.
Next, you will create your Easter applique. Using the Quick and Easy Easter Mug Rug – Pattern templates, trace a bunny or egg shape onto the paper side of your fusible web. Iron this onto the wrong side of your chosen scrap fabric, cut it out, and then peel the paper off to reveal the adhesive. Center this on your background fabric and press it down firmly.
Now it is time to secure the applique. Set your machine to a zigzag stitch or a blanket stitch. Slowly sew around the edge of your Easter shape. This not only adds a beautiful decorative border but also ensures the fabric won’t lift over time. This is the “soul” of the Quick and Easy Easter Mug Rug – Pattern, where your personality really starts to show.
Once the top is decorated, you create the “quilt sandwich.” Lay your backing fabric face down, place the batting on top, and then place your finished Easter top face up. Use curved safety pins or basting spray to hold these three layers together. This prevents the fabric from shifting while you perform the final quilting stitches.
Quilting can be as simple as “stitching in the ditch” or sewing straight diagonal lines across the entire piece. For this Quick and Easy Easter Mug Rug – Pattern, simple straight lines approximately one inch apart look clean and modern. It gives the mug rug that classic quilted texture that feels so cozy and festive during the Easter season.
The final step is binding the edges. You can use a traditional double-fold binding or a simpler “turn and topstitch” method for maximum speed. Once the edges are finished, give your Quick and Easy Easter Mug Rug – Pattern creation a final press with a steam iron. Your Easter mug rug is now ready to hold your morning beverage and bring a smile to your face.
4. Tips for Customizing Your Easter Pattern
One way to make the Quick and Easy Easter Mug Rug – Pattern unique is through fabric choice. Instead of standard pastels, try a “shabby chic” look with muted vintage florals or a bold, modern look with geometric prints in spring colors. The pattern is just a guide; your creativity is what makes the Easter project truly special and one-of-a-kind.
You can also add embroidery details to your Quick and Easy Easter Mug Rug – Pattern. Use hand-embroidery to give your bunny a little pink nose or some whiskers. These small, hand-stitched touches add a lot of character and a “high-end” feel to the finished piece. It transforms a simple sewing project into a cherished holiday keepsake.
Think about adding textural elements. Using a bit of minky fabric for a bunny tail or a small piece of lace for an egg decoration can make your Quick and Easy Easter Mug Rug – Pattern pop. Texture invites people to touch and admire the work, making it a great conversation piece when you have guests over for Easter brunch.
Another customization tip is to adjust the size. While the pattern suggests a standard size, you could easily enlarge the dimensions to create a matching Easter placemat. Having a coordinated set of table linens based on the same Quick and Easy Easter Mug Rug – Pattern creates a beautiful, cohesive look for your holiday dining table.
Don’t be afraid to experiment with quilting motifs. Instead of straight lines, you could try free-motion quilting to create “stipple” patterns or even sew small heart shapes. Since the Quick and Easy Easter Mug Rug – Pattern is a small canvas, it is the perfect place to practice new quilting skills without the pressure of a large project.
Finally, consider the back of your mug rug. Using a reversible fabric means you can flip the Easter mug rug over and use it all through the spring, even after the holiday has passed. This adds value and longevity to your Quick and Easy Easter Mug Rug – Pattern, ensuring that your hard work is enjoyed for many months out of the year.
FAQ – Frequently Asked Questions
What is the best size for a mug rug?
Most quilters agree that a size between 5″ x 8″ and 6″ x 10″ is ideal. This provides enough room for a cup and a snack without taking up too much space on your table.
Can I wash my Easter mug rug?
Yes, if you use 100% cotton fabric and quality batting, you can machine wash it on a gentle cycle. I recommend air drying to maintain the shape and the integrity of the applique.
What kind of batting should I use?
A low-loft cotton batting is best. It keeps the surface flat so your mug doesn’t wobble. Avoid thick polyester batting for this specific Quick and Easy Easter Mug Rug – Pattern.
Do I need a special foot for my sewing machine?
A walking foot is very helpful for sewing through multiple layers (the quilt sandwich), but a standard foot will work if you sew slowly and pin your layers carefully.
How long does it take to make one?
Once you have your materials ready, a single Quick and Easy Easter Mug Rug – Pattern can usually be completed in 45 to 90 minutes, depending on your sewing speed.
Is this project suitable for kids?
Absolutely! Because the Quick and Easy Easter Mug Rug – Pattern is small and uses fusible web, it is an excellent project for teaching children or teenagers how to sew.
Conclusion
In conclusion, following a Quick and Easy Easter Mug Rug – Pattern is a joyful and productive way to celebrate the holiday. We have covered everything from choosing the right cotton fabrics and fusible web to the final steps of binding and quilting. This project proves that you don’t need a lot of time or expensive materials to create something beautiful and functional.
By focusing on simple applique and straight-line quilting, you can produce a charming Easter accessory that brightens any room.We hope this guide inspires you to dig into your fabric stash and start sewing! Whether you make one for yourself or a dozen for gifts, the process is sure to put you in the holiday spirit.