The art of creating a Crochet Bandana – Pattern is a wonderful way to blend vintage aesthetics with modern, functional fashion. Whether you are looking for a stylish accessory to keep your hair back on a breezy day or a personalized gift for a friend, learning how to master a Crochet Bandana is a rewarding journey for any fiber artist. This specific type of headwear has surged in popularity due to its “cottagecore” appeal and its versatility, allowing makers to experiment with various yarn weights, colors, and intricate stitch designs to create something truly unique.
Understanding the core components of a Crochet Bandana – Pattern is essential before you pick up your hook. A Crochet Bandana is essentially a triangular piece of fabric, worked either from the bottom up or top down, that is designed to sit comfortably on the head and tie at the nape of the neck. The Pattern serves as your technical roadmap, providing the necessary stitch counts, row instructions, and shaping techniques required to achieve that perfect isosceles triangle shape that stays secure and looks professional.
In this comprehensive guide, we will dive deep into the world of the Crochet Bandana – Pattern, ensuring that even beginners can follow along with confidence. We will define a Crochet Bandana as a functional, handcrafted head covering and explain how a Pattern acts as a set of written instructions or a visual chart that guides the crocheter through every loop and pull. By following these steps, you will be able to create a durable, stylish, and high-quality accessory that showcases your personal style and craftsmanship.
1. Choosing the Right Yarn and Tools for your Crochet Bandana – Pattern
The first step in executing a successful Crochet Bandana – Pattern is selecting the appropriate materials for the job. For a head accessory, comfort and breathability are paramount, which is why many crafters prefer using 100% cotton or a cotton-bamboo blend. These fibers ensure that your Crochet Bandana feels light on the head and doesn’t trap excessive heat, making it perfect for summer festivals or spring outings.
When reading your Crochet Bandana – Pattern, pay close attention to the recommended yarn weight. Most designs call for a “Sport” or “DK” weight yarn to maintain a delicate, lace-like drape that isn’t too bulky. Using a yarn that is too thick might result in a Crochet Bandana that feels heavy or stiff, while a yarn that is too thin might require significantly more time and rows to reach the desired dimensions.
Your crochet hook size is the next critical factor in the Crochet Bandana – Pattern process. The Pattern will usually suggest a specific hook size, such as 3.5mm or 4.0mm, to achieve the correct gauge. It is always a good idea to create a small swatch first to ensure your tension matches the Crochet Bandana – Pattern, as tight stitches can make the fabric less flexible and comfortable for daily wear.
Don’t forget the essential “notions” that accompany your Crochet Bandana – Pattern journey. You will need a pair of sharp embroidery scissors, a tapestry needle for weaving in those pesky yarn tails, and perhaps a few stitch markers. Stitch markers are incredibly helpful when working on a Crochet Bandana, as they help you keep track of the central increase point or the beginning of a complex lace repeat.
The texture of the yarn also plays a significant role in how the Crochet Bandana – Pattern looks once finished. A smooth, mercerized cotton will give your Crochet Bandana a slight sheen and excellent stitch definition, which is ideal for showing off intricate geometric patterns. On the other hand, a slightly fuzzy or variegated yarn can add a rustic, cozy feel to a simpler Crochet Bandana – Pattern designed for warmth.
Lastly, consider the durability and care instructions of your chosen yarn before starting the Crochet Bandana – Pattern. Since hair accessories can absorb natural oils or hair products, choosing a machine-washable yarn is a smart move. Following a well-written Crochet Bandana – Pattern with the right materials ensures that your handmade piece remains beautiful and functional through many washes and wears over the years.
2. Understanding the Geometry and Construction of a Crochet Bandana
The beauty of a Crochet Bandana – Pattern lies in its geometric simplicity, but the construction can vary depending on the style you prefer. Most patterns follow a triangular construction, which can be started at the smallest point (the bottom tip) and increased on both sides. This method allows you to easily customize the size of your Crochet Bandana by simply adding more rows until it covers the desired area of your head.
Alternatively, some artists prefer a Crochet Bandana – Pattern that starts at the long top edge. In this version, you typically decrease stitches as you work your way down to the point. Understanding which direction your Crochet Bandana – Pattern flows is crucial for placing your stitches correctly and ensuring that the tension remains even throughout the project, preventing the edges from curling inward.
The “increase” rows are the heart of any Crochet Bandana – Pattern. Usually, you will perform increases at the very edges of the row or at a central “spine” point. This mathematical growth is what transforms a few starting stitches into a wide, wearable Crochet Bandana. Mastery of these increases is what separates a beginner project from a professional-looking Crochet Bandana – Pattern result.
Texture is often added to a Crochet Bandana – Pattern through the use of “eyelets” or “V-stitches.” These stitches create small decorative holes in the fabric, giving the Crochet Bandana a lightweight, airy feel. When following a lace-based Crochet Bandana – Pattern, it is helpful to count your stitches every few rows to ensure the symmetry of the triangle is perfectly maintained on both sides of the center.
The ties of the Crochet Bandana – Pattern are just as important as the triangle itself. You can create these by continuing the yarn from the top corners of the triangle into long chains, which are then reinforced with slip stitches or single crochets. A good Crochet Bandana – Pattern will provide specific lengths for these ties to ensure they are long enough to be double-knotted securely without being cumbersome.
Finally, blocking your finished work is a secret step often mentioned in a high-quality Crochet Bandana – Pattern. Blocking involves wetting the finished Crochet Bandana, pinning it into its final triangular shape, and letting it dry. This process “sets” the stitches, opens up any lace work, and ensures that the edges of your Crochet Bandana – Pattern stay straight and professional rather than wavy or distorted.
3. Stitch Variations and Customizing Your Crochet Bandana – Pattern
One of the most exciting aspects of working with a Crochet Bandana – Pattern is the ability to swap stitches to create different looks. For a solid, vintage look, the “Granny Stitch” is a classic choice. A Crochet Bandana – Pattern using granny clusters (three double crochets in the same space) creates a timeless aesthetic that is both sturdy and slightly stretchy, making it very comfortable for all-day wear.
If you prefer a more modern, minimalist look, look for a Crochet Bandana – Pattern that utilizes the “Moss Stitch” or simple “Half Double Crochets.” These stitches create a denser fabric that offers more sun protection and a cleaner finish. This type of Crochet Bandana is excellent for beginners because the stitch placement is straightforward and less prone to errors than complex lace designs.
For those who love a feminine touch, a Crochet Bandana – Pattern can incorporate shell stitches or scalloped borders. Adding a decorative edge to your Crochet Bandana is a simple way to elevate the design without changing the entire structure. Most patterns will include a final “Border” row that finishes the edges and adds that extra bit of flair that makes the piece look boutique-quality.
Colorwork is another way to make your Crochet Bandana – Pattern stand out. You can use self-striping yarn to create effortless color transitions or manually change colors every few rows to create a bold, striped Crochet Bandana. When using multiple colors, your Crochet Bandana – Pattern instructions will guide you on how to carry the yarn or weave in ends to keep the back of the work looking neat.
Don’t be afraid to adjust the “wingspan” of your Crochet Bandana – Pattern. If you have thick, curly hair, you might want a slightly larger triangle to provide more coverage. Conversely, for a petite fit or a child’s version, you can stop the Crochet Bandana – Pattern rows earlier. This flexibility is why the Crochet Bandana remains one of the most popular patterns in the crochet community.
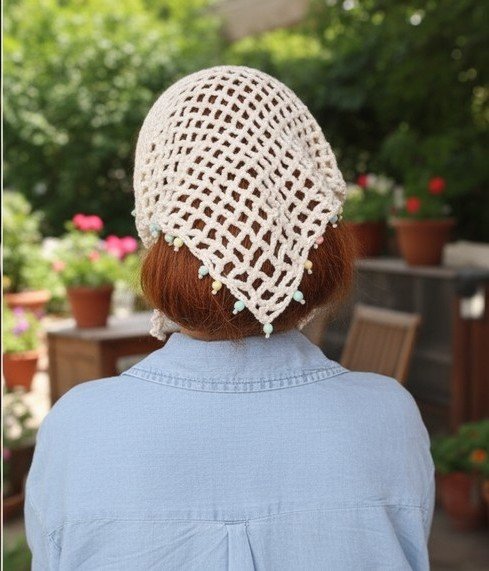
Incorporating beads or charms into the fringe or the ties of your Crochet Bandana – Pattern can add a bohemian touch. Some advanced versions of a Crochet Bandana – Pattern might even include instructions for “beaded crochet,” where beads are strung onto the yarn before you begin and worked into the stitches. This level of customization ensures that your Crochet Bandana is a one-of-a-kind masterpiece.
4. Tips for Selling and Promoting Your Handmade Crochet Bandanas
If you have mastered the Crochet Bandana – Pattern and find yourself making them in bulk, you might consider selling them online or at local craft fairs. To be successful, you must focus on the “finish” of your Crochet Bandana. Buyers look for clean edges, hidden yarn tails, and consistent stitch tension. A high-quality Crochet Bandana – Pattern executed with precision is a product people are willing to pay a premium for.
Photography is key when showcasing your work based on a Crochet Bandana – Pattern. Use natural lighting and, if possible, a model to show how the Crochet Bandana sits on the head. Showing the different ways to wear the item—such as over the hair, under the hair, or even as a neck kerchief—helps potential customers see the versatility of your Crochet Bandana – Pattern creations.
When listing your items, use the keywords Crochet Bandana and Pattern in your descriptions. Explain the materials used, such as organic cotton or eco-friendly dyes, to appeal to conscious consumers. Mentioning that the item was made using a specific, high-quality Crochet Bandana – Pattern gives customers confidence in the structural integrity and design of the accessory they are purchasing.
Branding your Crochet Bandana with a small leather or fabric tag can add a professional touch. Even a simple project from a free Crochet Bandana – Pattern looks expensive and “designer” when it has a small brand label attached to the edge. This small detail helps build brand recognition and encourages repeat customers who appreciate the effort you put into your Crochet Bandana.
Consider offering “Make-it-Yourself” kits that include the yarn, the hook, and your printed Crochet Bandana – Pattern. Many people love the look of a Crochet Bandana but want the satisfaction of making it themselves. By selling the Pattern along with the supplies, you tap into the growing DIY market and share your love for crochet with a wider audience.
Finally, always stay updated on current fashion trends to adapt your Crochet Bandana – Pattern choices. Whether it’s the “strawberry dress” trend or a shift toward 70s retro colors, being able to pivot your yarn choices while using the same reliable Crochet Bandana – Pattern will keep your shop or hobby feeling fresh and relevant. The Crochet Bandana is a timeless piece that, with a little creativity, never goes out of style.
FAQ – Frequently Asked Questions
How long does it take to finish a Crochet Bandana?
Depending on the complexity of the Crochet Bandana – Pattern and your skill level, it typically takes between 2 to 5 hours to complete. A simple mesh or solid stitch design will be faster, while an intricate lace or floral Pattern will require more focus and time.
Is a Crochet Bandana – Pattern suitable for absolute beginners?
Yes! Many versions of the Crochet Bandana are designed specifically for beginners. Look for a Pattern that uses basic stitches like the chain, single crochet, and double crochet. It is a fantastic first project because it involves basic shaping without the complexity of a full garment.
How much yarn do I need for one bandana?
Usually, one 50g skein of DK or Sport weight yarn (approximately 120–150 meters) is more than enough to complete a standard Crochet Bandana – Pattern. If you are adding long tassels or a very wide border, having a second skein on hand is a safe bet.
Will the bandana slip off my hair?
To prevent slipping, ensure the ties in your Crochet Bandana – Pattern are long enough to wrap securely. You can also use bobby pins to anchor the Crochet Bandana to your hair, or choose a yarn with a bit of texture (like unmercerized cotton) which provides more grip than slippery silk or acrylic yarns.
Can I use the same pattern for different sizes?
Absolutely. Most Crochet Bandana – Pattern designs are “work until desired size.” You simply keep repeating the increase rows until the top edge is wide enough to reach from ear to ear across your forehead, then follow the instructions for the ties.
What is the best way to wash my handmade bandana?
It is best to hand wash your Crochet Bandana in cool water with a mild detergent. Gently squeeze out the excess water (don’t wring it!) and lay it flat on a towel to dry. This preserves the shape and the delicate stitches defined in your Crochet Bandana – Pattern.
Conclusion
In conclusion, mastering the Crochet Bandana – Pattern is a delightful way to expand your crochet skills while creating a stylish and practical accessory. Throughout this article, we have explored the importance of choosing high-quality cotton yarns, understanding the geometric increases of a triangular Pattern, and the various ways you can customize your Crochet Bandana with different stitches and borders.
Whether you are following a simple Crochet Bandana – Pattern for a quick weekend project or a complex lace design for a special occasion, the result is a testament to the beauty of handmade fashion. We hope this guide has inspired you to pick up your hook and start your next project!