The Block Flaming Star – Patternis one of the most dynamic and visually arresting designs in the world of traditional quilting, offering a sense of movement and energy that few other motifs can match. This specific design is a variation of the classic star block, characterized by its sharp, radiating points and the clever use of color gradation to simulate the appearance of flickering flames. When you choose to work with a Block Flaming Star – Pattern, you are engaging in a craft that balances mathematical precision with artistic flair, resulting in a textile masterpiece that draws the eye toward its center and then explodes outward in a burst of geometric brilliance.
For many quilters, the appeal of a Block Flaming Star – Pattern lies in its versatility and the way it challenges one’s ability to manage bias edges and precise “fussy cutting.” Unlike simpler blocks, the Block Flaming Star requires a keen eye for contrast; the “flaming” effect is only achieved when the quilter selects a palette that transitions smoothly from deep, dark embers to bright, searing highlights. By following a well-constructed pattern, even an intermediate sewist can achieve professional-grade results, creating a quilt top that looks incredibly complex but is actually built upon a logical and repeatable set of shapes.
In this comprehensive guide, we will explore the essential components of the Block Flaming Star – Pattern to ensure your project is a resounding success from the very first snip of the fabric. We will focus on the two core pillars of this craft: the Block Flaming Star, which is the physical geometric unit that forms the heart of your quilt, and the Pattern, which serves as the technical blueprint and roadmap for your sewing machine. Whether you are aiming to create a wall hanging or a full-sized bedspread, understanding the structural nuances of this pattern will empower you to create a legacy piece that radiates warmth and craftsmanship.
1. Selecting the Perfect Fabrics for Your Block Flaming Star – Pattern
The foundation of a stunning Block Flaming Star – Pattern is the strategic selection of fabric colors and textures. To truly capture the “flaming” essence of the Block Flaming Star, you should look for a range of at least four to six tones within the same color family, such as oranges, reds, and yellows. High-quality 100% quilting cotton is the gold standard for this project, as it provides the stability needed for the many small pieces that make up the star’s points without the risk of excessive fraying during the assembly of your pattern.
In addition to the “flame” colors, the background fabric for your Block Flaming Star – Pattern plays a crucial role in the overall impact. Many quilters opt for a solid black, deep navy, or dark charcoal to provide a stark contrast that makes the Block Flaming Star appear as though it is glowing against a night sky. This high-contrast approach is a hallmark of the pattern, ensuring that every sharp point and angled seam is visible and crisp, which is exactly what makes this specific star design so famous in the quilting community.
Texture can also be introduced to your Block Flaming Star – Pattern through the use of “batiks” or tone-on-tone prints. Batiks are particularly effective for the Block Flaming Star because their mottled, hand-dyed appearance can mimic the organic, shifting nature of fire. When you follow the cutting instructions in your pattern, using these marbled fabrics adds a layer of depth that solid fabrics might lack, giving your quilt a more sophisticated and professional aesthetic that looks wonderful under both natural and artificial light.
Don’t overlook the importance of fabric grain when working with a Block Flaming Star – Pattern. Because the star points are often cut on the bias (the diagonal of the fabric), they can be prone to stretching and distorting as you sew. Choosing a high-thread-count fabric for your Block Flaming Star will help maintain the integrity of these delicate edges. Many experts suggest using a light spray of fabric starch before cutting your pattern pieces to give the cotton more “body” and prevent the points from becoming misshapen during the piecing process.
The “center” of the Block Flaming Star – Pattern is often a focal point that requires special attention. Some quilters choose a large-scale print to “fussy cut” for the very middle of the Block Flaming Star, while others prefer a radiant metallic fabric to enhance the celestial theme. Whatever your choice, ensure the fabric weight is consistent across all your pattern pieces to avoid puckering or uneven seams, which can be very noticeable in a design that relies so heavily on geometric perfection and symmetry.
Lastly, consider the “washability” of your chosen materials for the Block Flaming Star – Pattern. If you are making a quilt that will be used and laundered frequently, ensure all your fabrics are colorfast, especially the deep reds and oranges that are prone to bleeding. Pre-washing your fabrics before you start the pattern is a wise step to prevent shrinkage. By investing time in the selection phase, your Block Flaming Star will not only be a visual triumph but also a durable item that stands the test of time and repeated use.
2. Technical Drafting and Cutting Your Pattern Pieces
Accuracy in the cutting phase is where a Block Flaming Star – Pattern is truly won or lost. Because the design involves several intersecting angles that must meet perfectly in the center, even a sixteenth of an inch of error can cause the Block Flaming Star to “lump” or “wave” rather than lying flat. Using a high-quality rotary cutter with a fresh blade and a non-slip acrylic ruler is essential when following the measurements laid out in your pattern to ensure every diamond and triangle is identical.
Many modern versions of the Block Flaming Star – Pattern utilize the “paper piecing” technique for maximum precision. This involves sewing the fabric directly onto a paper template that has the pattern lines printed on it. For a complex motif like the Block Flaming Star, paper piecing is a game-changer because it eliminates the guesswork of matching points and ensures that the “flames” of the star radiate with mathematical exactness, which is often difficult to achieve with traditional piecing.
If you prefer traditional piecing for your Block Flaming Star – Pattern, you will need to pay close attention to the “seam allowance.” A strictly accurate quarter-inch seam is mandatory for this project. If your seams are too wide, the Block Flaming Star will be too small and won’t fit into its background; if they are too narrow, the star will be too large and will “bowl” in the center. Constant checking of your seam gauge as you work through the pattern will save you hours of frustration and unpicking.
The “points” of the Block Flaming Star – Pattern are the most challenging aspect of the cutting process. In a flaming star design, these points are often elongated to create the flickering effect. Your pattern will likely include specific templates for these shapes. When cutting, try to keep the fabric flat and avoid pulling or pushing the ruler, as this can cause the bias edges of the Block Flaming Star to warp before they even reach the sewing machine, leading to misaligned stars.
Organizing your cut pieces is a vital tip for anyone tackling a Block Flaming Star – Pattern. Since you will be working with many similar shades of red, orange, and yellow, it is easy to mix up the “flame” layers. Using small labeled bins or “design boards” to keep the pieces for each section of the Block Flaming Star separate will streamline your workflow. Following the pattern step-by-step becomes much more manageable when you can quickly grab the exact piece needed for the next round of the star.
Finally, consider the use of “templates” if your Block Flaming Star – Pattern doesn’t provide them. You can create your own out of sturdy template plastic or thin cardboard. Tracing the shapes onto the back of the fabric for the Block Flaming Star can provide a visual “stitch line” that helps beginners stay on track. This extra layer of preparation ensures that the finished pattern result is a crisp, clean, and perfectly balanced star that looks exactly like the professional examples found in quilting magazines.
3. Assembling the Block Flaming Star with Precision
The assembly of a Block Flaming Star – Pattern usually begins from the center and moves outward in “rounds.” You will start by joining the innermost diamonds to form the “eye” of the star. It is crucial to use “pins” at every intersection when following the pattern for the Block Flaming Star. This prevents the fabric from shifting as it passes under the presser foot, ensuring that all eight (or more) points meet at a single, perfect center point without any unsightly gaps or “beaking.”
As you add the “flame” layers to your Block Flaming Star – Pattern, you will notice the block starting to grow and take on its iconic 3D appearance. Pressing your seams is the secret to a flat quilt. Most patterns for the Block Flaming Star will tell you whether to press seams “to the dark side” or “open.” For this specific block, pressing seams open can help reduce the bulk at the center point, allowing your needle to glide through the fabric without skipping stitches or breaking.
The “Y-seams” are a common feature in a traditional Block Flaming Star – Pattern. These are seams where three pieces of fabric meet in a way that requires you to stop sewing exactly at the seam allowance mark and pivot. While Y-seams can be intimidating, the pattern instructions will guide you through the “dot-to-dot” method. Mastering this technique is what allows the Block Flaming Star to have its unique, non-grid-based geometry, elevating your skill set to an advanced level.
Stability is key when the Block Flaming Star – Pattern reaches its final stages. Once the star itself is complete, you will “square it up” by adding the background corners. This is the moment when the circular-looking star becomes a true square Block Flaming Star. Use a large square ruler to ensure the block is perfectly 90 degrees at the corners. If the star is slightly off-center within the pattern, now is the time to make minor adjustments before you join it to other blocks.
Top-stitching or “stay-stitching” the outer edges of your Block Flaming Star – Pattern can be very helpful. Because the outer edges of the star are often bias-cut, they can stretch as you handle the block. A quick row of stitching about an eighth of an inch from the edge will “lock” the fibers in place. This ensures that when you go to sew several Block Flaming Star units together, they all fit together like a perfect jigsaw puzzle, maintaining the integrity of the overall quilt design.
Lastly, take a moment to admire the “flame” effect you’ve created. When the Block Flaming Star – Pattern is assembled correctly, the colors should appear to flow from the center to the tips of the points. This radiant energy is what makes the Block Flaming Star such a popular choice for “Quilt of Valor” designs or competition pieces. By adhering to the technical rigor of the pattern, you have transformed simple scraps of cotton into a powerful symbol of warmth, light, and artistic dedication.
4. Troubleshooting and Finishing Your Star Project
Even with a perfect Block Flaming Star – Pattern, you might encounter the dreaded “puckered center.” This usually happens if the points weren’t trimmed of their “dog ears” (the little triangles of fabric that stick out past the seam). When following the pattern, always trim these excess bits as you go. If your Block Flaming Star still has a bump in the middle, a heavy steam press or a gentle “hammering” of the seam (using a specialized quilting clapper) can often flatten the bulk and save the block.
If you find that your Block Flaming Star – Pattern is turning out smaller than it should be, check your “cutting line.” Sometimes, if you cut on the outside of the line rather than the center of it, the cumulative error across a many-pointed Block Flaming Star can be significant. To fix this, you may need to adjust your seam allowance to be a “scant” quarter-inch. A scant seam is just one or two threads narrower than a true quarter-inch, which provides the extra space needed for the fabric to fold over the seam.
Color bleeding is a risk with the vibrant reds and oranges used in a Block Flaming Star – Pattern. To protect your hard work, use “color catchers” in the wash if you are laundering the finished Block Flaming Star quilt. These are small sheets that absorb loose dye in the water. If you used high-quality batiks for your pattern, they are generally quite stable, but it’s always better to be safe than sorry when you’ve spent dozens of hours on a single project.
Quilting the finished Block Flaming Star – Pattern offers another opportunity for creativity. Many quilters use “stitch-in-the-ditch” to emphasize the geometric lines of the Block Flaming Star, while others prefer “free-motion quilting” to create swirls that look like smoke rising from the flames. The choice of quilting design should complement the sharp angles of the pattern, adding a second layer of texture that enhances the visual story of the flaming star.
If a point of your Block Flaming Star – Pattern gets “chopped off” during assembly, don’t panic. You can sometimes “fudge” the seam by taking a slightly deeper seam on the neighboring pieces to bring the point back into view. However, the best way to avoid this is to always leave at least a quarter-inch of background fabric at the tip of the Block Flaming Star points when you are squaring up the block. This “safety zone” is a standard part of a well-written pattern.
Finally, once your Block Flaming Star – Pattern is quilted and bound, take a high-quality photograph of it. The way light interacts with the Block Flaming Star is fascinating, and documenting your work allows you to see the color transitions from a distance. Whether you keep the quilt as a family heirloom or gift it to someone special, the pattern you followed and the Block Flaming Star you created will stand as a testament to your patience, precision, and passion for the textile arts.
Frequently Asked Questions (FAQ)
Is the Block Flaming Star – Pattern suitable for beginners?
The Block Flaming Star – Pattern is generally considered an intermediate to advanced project. It requires a high degree of accuracy in cutting and piecing. However, an ambitious beginner who is comfortable with their sewing machine and understands basic seam allowance could certainly succeed by using the “paper piecing” method, which simplifies the geometry.
How much fabric do I need for a single Block Flaming Star?
A single 12-inch Block Flaming Star usually requires about a quarter-yard of background fabric and small “fat eighths” or scraps of the flame colors. If you are making a full quilt, the pattern will provide a detailed yardage chart based on the number of blocks and the size of the sashing and borders.
Can I make this star in colors other than fire tones?
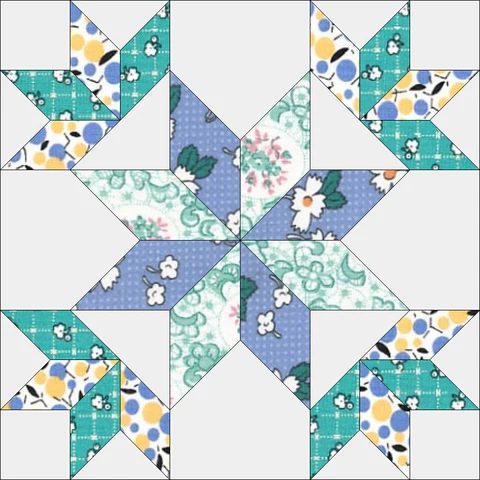
Absolutely! While it is called the “Flaming Star,” the Block Flaming Star – Pattern looks spectacular in “ice” tones (blues, purples, and whites) or “forest” tones (various greens and browns). The “flaming” effect is created by the color gradation (light to dark), regardless of the actual hues you choose to use.
What is the best way to join the blocks together?
Most quilters use “sashing” (strips of fabric between blocks) when joining Block Flaming Star units. This provides a visual break and prevents the points of different stars from touching, which can make the quilt look cluttered. Sashing also helps to ensure the pattern remains the focal point of the overall design.
Do I need special tools for the Block Flaming Star – Pattern?
While not strictly necessary, a 60-degree diamond ruler can make cutting the points for the Block Flaming Star much faster. Additionally, using a “micro-tex” needle (size 70/10 or 80/12) is recommended for the sharpest possible stitches in your pattern work.
How do I stop the center of the star from being too bulky?
The best way to manage bulk in a Block Flaming Star – Pattern is to “spin the seams” at the center or press them open. Also, ensure you are using a thin, high-quality thread (like 50wt cotton) to minimize the physical space the thread takes up inside the seams of your Block Flaming Star.
Conclusion
Mastering the Block Flaming Star – Pattern is a significant milestone for any quilter, representing a blend of technical mastery and artistic vision. In this guide, we have explored the critical steps of selecting high-contrast fabrics, drafting and cutting with precision, and assembling the Block Flaming Star using advanced piecing techniques. We also discussed how to troubleshoot common issues like bulky centers and misaligned points to ensure your pattern results in a flat, beautiful finish.
By following these principles, you turn a series of simple fabric diamonds into a radiant work of art that pulses with the energy of a flaming star. We hope this article has inspired you to start your own project! Please leave your sincere opinion and any suggestions or tips you’ve discovered while working on this design in the comments below!