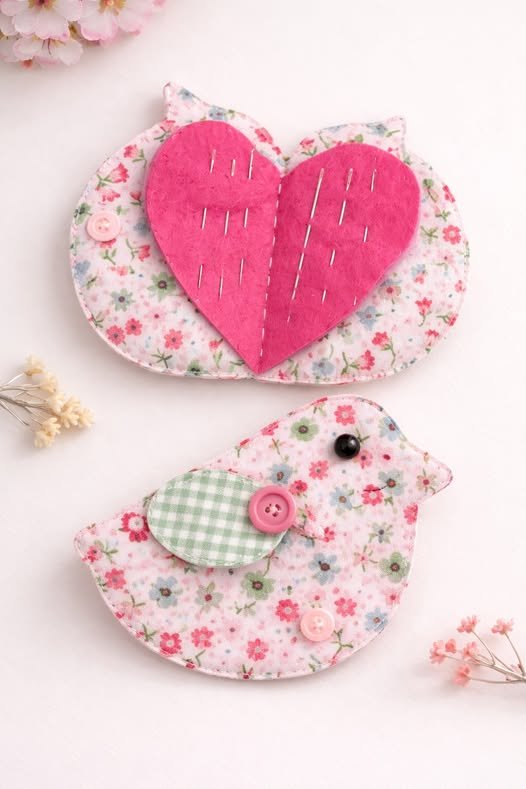
A Bird-shaped Fabric Needle Holder – Pattern is a delightful way to organize your sewing space while adding a touch of vintage charm to your crafting table. If you have ever struggled to find a stray pin or lost a needle in the depths of your sofa cushions, you know that a reliable pincushion is more than just an accessory—it is a necessity. This specific bird-shaped pattern offers a whimsical departure from the traditional tomato-style cushions, providing a sculptural and artistic element to your sewing room that is as beautiful as it is functional.
Creating your own Bird-shaped Fabric Needle Holder – Pattern allows for incredible personalization through fabric choice, embroidery, and embellishments. Whether you prefer a modern aesthetic with geometric prints or a classic look using floral cotton scraps, this project is highly adaptable to your personal style. It serves as a fantastic introduction to soft sculpture sewing, requiring only basic stitches while yielding a professional-looking result that makes for a perfect handmade gift for fellow quilters and seamstresses.
In this comprehensive guide, we will delve into every detail of the Bird-shaped Fabric Needle Holder – Pattern, ensuring you have the knowledge to select the best materials and master the assembly process. We will explore why certain fabrics work better for needle holders, how to achieve a crisp bird silhouette, and the secrets to stuffing your creation so it remains sturdy over years of use. By the time you finish this article, you will be ready to transform simple fabric remnants into a charming avian sewing companion that keeps your needles safe and organized.
1. Selecting the Best Materials for Your Bird-shaped Fabric Needle Holder – Pattern
The success of your Bird-shaped Fabric Needle Holder – Pattern starts with choosing a high-quality quilting cotton. Cotton is the ideal fabric because it has a tight weave that holds the shape of the bird’s beak and tail perfectly, and it is easy to iron for crisp seams. You want a fabric that can withstand repeated pin punctures without fraying or developing large holes over time, ensuring your needle holder remains durable for long-term use.
For the base of the bird, many crafters choose a weighted material to ensure the holder doesn’t tip over when loaded with needles. You can achieve this by placing a small pouch of dried lavender, crushed walnut shells, or even clean sand at the bottom of the bird. Using crushed walnut shells is particularly popular among professionals because the natural oils in the shells help keep your needles sharp and prevent them from rusting inside the Bird-shaped Fabric Needle Holder – Pattern.
Interfacing is a secret weapon that can elevate your sewing pattern results significantly. Applying a lightweight fusible interfacing to the back of your fabric pieces provides extra structure, making the bird appear more “plump” and less wrinkled. This is especially helpful if you are using thinner fabrics or vintage scraps that might need a bit of reinforcement to stand up to the pressure of the polyester fiberfill stuffing.
Don’t overlook the importance of your thread choice when working on the Bird-shaped Fabric Needle Holder – Pattern. A strong all-purpose polyester thread in a coordinating or contrasting color will ensure that the seams don’t pop when you are stuffing the bird firmly. Since this is a small-scale project, the quality of your stitching is visible, so using a thread that glides smoothly through the fabric will result in a much cleaner and more professional finish.
For the bird’s eyes and beak, you can get creative with embroidery floss or small glass beads. If you want a more rustic look, a simple French knot using black embroidery thread creates a soulful expression for your bird. If you prefer a more decorative needle holder, tiny sequins or metallic threads can add a bit of “shimmer” to the wings, making the Bird-shaped Fabric Needle Holder – Pattern a true work of art on your desk.
Finally, you will need sharp fabric shears and a marking tool, such as a water-soluble pen or tailor’s chalk. Accurate cutting is vital for this bird pattern because the pieces are small and have specific curves for the head and breast. Having the right tools at hand ensures that your fabric bird looks symmetrical and elegant once it is fully assembled and displayed in your sewing corner.
2. Preparing and Cutting the Fabric Pattern Pieces
Before you begin sewing the Bird-shaped Fabric Needle Holder – Pattern, you must prepare your workspace and your fabric. Start by washing and ironing your fabric to remove any chemicals or wrinkles that might distort the pattern shapes. A flat, smooth surface is essential for accurate tracing, as even a small misalignment in the cutting phase can lead to a lopsided bird when you finally reach the stuffing stage.
Most versions of the Bird-shaped Fabric Needle Holder – Pattern consist of four main pieces: two side bodies, one belly gusset, and two wing pieces. Tracing these onto the wrong side of the fabric with a seam allowance in mind is a critical step. If your pattern doesn’t already include a seam allowance, be sure to add about 1/4 inch (6mm) around the edges so that the finished bird isn’t smaller than you intended.
When cutting the curves around the bird’s head and tail, use short, precise snips with your scissors. For the Bird-shaped Fabric Needle Holder – Pattern to look its best, the transitions between the curves must be smooth. If you find cutting curves difficult, try using a rotary cutter with a small blade, which allows for more fluidity when following the arched lines of the bird’s silhouette.
It is often helpful to “stay-stitch” the curved edges of your fabric pieces before assembly. Stay-stitching is a line of regular stitches placed just inside the seam line that prevents the fabric from stretching out of shape as you handle it. This is a hallmark of high-quality handmade sewing projects and ensures that the wings of your bird needle holder remain perfectly aligned with the body.
Once your pieces are cut, it is a great time to apply any decorative embroidery or surface details. It is much easier to sew a wing or an eye onto a flat piece of fabric than it is to do so once the bird is stuffed and three-dimensional. Following your Bird-shaped Fabric Needle Holder – Pattern instructions for early embellishment will save you a lot of time and potential frustration during the final steps.
Double-check that you have “mirrored” your pieces correctly. For the side bodies of the Bird-shaped Fabric Needle Holder – Pattern, you need one piece with the bird facing left and one facing right. If you accidentally cut two identical pieces, they won’t fit together correctly, and you will have to waste fabric. This is a common mistake in sewing bird patterns, so always lay your fabric “right sides together” before cutting to ensure perfect symmetry.
3. Assembling the Bird Body and Adding Structure
The assembly of the Bird-shaped Fabric Needle Holder – Pattern usually begins with sewing the two side pieces together along the top back line. Using a small stitch length (around 2.0mm) is recommended because it creates a stronger seam that can handle the tension of the stuffing. Start at the top of the head and sew down toward the tail, making sure to backstitch at the beginning and end to secure your work.
Next, you will attach the belly gusset, which is the piece that gives the Bird-shaped Fabric Needle Holder – Pattern its width and stability. This is the trickiest part of the project because you are sewing a curved gusset to curved side pieces. Using plenty of sewing pins or wonder clips will help you keep the edges aligned. Slow and steady wins the race here; take your time to ensure there are no puckers in the fabric.
One of the most important tips for a beautiful fabric needle holder is to clip your curves. After sewing the seams, take your scissors and make small snips into the seam allowance every half-inch or so, being careful not to cut the stitches. This allows the fabric to “open up” when you turn the bird right-side out, resulting in a smooth, rounded shape for the bird’s breast and head rather than a lumpy or angular one.
Turning the Bird-shaped Fabric Needle Holder – Pattern right-side out is best done through a small opening left in the belly seam. Use a turning tool or a blunt chopstick to gently push the fabric through the hole. Be especially careful with the beak and the tip of the tail; these small points can be difficult to turn, and pushing too hard with a sharp object might result in a hole in your handmade bird.
Once the bird is turned, give it a good press with your iron. This sets the seams and gives the Bird-shaped Fabric Needle Holder – Pattern a professional, crisp appearance before you add the filling. Even though the bird is now a 3D shape, you can usually flatten it slightly to press the edges. This step is often skipped by beginners, but it makes a world of difference in the final pincushion’s quality.
Now comes the fun part: stuffing! Begin by pushing small bits of polyester fiberfill into the beak and head of the bird. Use your turning tool to ensure the stuffing is packed firmly into the extremities. For a Bird-shaped Fabric Needle Holder – Pattern, you want the body to be quite firm so that it provides a solid base for your needles and pins to grip onto without falling out.
4. Finishing Details and Final Embellishments
After the head and upper body are stuffed, it is time to add the weighting material to the bottom of your Bird-shaped Fabric Needle Holder – Pattern. If you are using walnut shells or sand, consider making a small fabric “inner bag” to hold them so they don’t leak out through the stitches. Placing this weight at the bottom ensures your bird pincushion sits proudly on your table and won’t wobble when you use it.
The final closure of the bird is done using a ladder stitch (also known as an invisible stitch). This hand-sewn technique allows you to close the opening in the belly so that the seam is completely hidden. It requires a bit of patience, but it is the best way to finish your Bird-shaped Fabric Needle Holder – Pattern with a professional touch. Ensure your thread is doubled for extra strength during this final step.
Now that the body is complete, you can attach the wings. Your Bird-shaped Fabric Needle Holder – Pattern might call for the wings to be stuffed slightly or left flat. Sew them onto the sides of the body using a small running stitch or a decorative blanket stitch. You can even use a small button at the joint of the wing to add a “shabby chic” or vintage feel to your sewing accessory.
If you want to make your bird even more functional, consider adding a small ribbon loop to the tail. This allows you to hang the needle holder from your sewing machine or a wall hook, keeping it within arm’s reach at all times. Little details like this transform a standard fabric bird into a highly specialized tool tailored to your specific sewing habits and workspace layout.
For those who love a bit of flair, consider adding a tiny “nest” for your bird using scraps of yarn or felt. You can also add a small magnet inside the bird’s head near the surface; this makes it easy to pick up dropped needles from the floor. Innovations like these turn the Bird-shaped Fabric Needle Holder – Pattern into a multifunctional gadget that every crafter will envy.
The last step is to give your bird its “personality” by checking the eyes and beak one last time. If you used beads for eyes, make sure they are sewn on tightly. Give the bird a final “massage” to distribute the stuffing evenly and ensure the silhouette matches the original pattern. Your Bird-shaped Fabric Needle Holder is now ready to serve as the guardian of your needles for many projects to come!
FAQ – Frequently Asked Questions
1. What is the best filling for a Bird-shaped Fabric Needle Holder – Pattern?
While polyester fiberfill is great for the “pulp,” crushed walnut shells or emery sand are the best for the core. These materials are heavy, providing stability, and the abrasive nature of emery sand actually sharpens your needles every time you poke them into the holder.
2. Can I make this pattern if I am a total beginner?
Yes! The Bird-shaped Fabric Needle Holder – Pattern is an excellent project for beginners. It involves basic machine sewing and a small amount of hand-stitching. It is a great way to practice sewing curves and learning how to use a gusset to create 3D shapes.
3. How much fabric do I need for one bird?
Very little! You can easily make this needle holder using two 10-inch squares of fabric. It is the ultimate scrap-buster project, allowing you to use up those beautiful bits of fabric that are too small for a quilt but too pretty to throw away.
4. Is it better to hand-sew or machine-sew this project?
While you can hand-sew the entire Bird-shaped Fabric Needle Holder – Pattern, a sewing machine is faster and provides more durable seams for the body. However, the final closure and the wing attachments are almost always done by hand for better control.
5. How do I keep the needles from getting lost inside the bird?
The key is to stuff the bird very firmly. If the stuffing is too loose, the needles can slide all the way inside. If you pack the fiberfill or walnut shells tightly, the needle will stay exactly where you put it, with the head of the needle visible on the outside.
6. Can I wash my fabric needle holder?
If you used polyester stuffing, you can spot-clean it with a damp cloth. However, if you used walnut shells or sand, you should never submerge the bird in water, as it can cause the filling to clump or ruin the fabric.
Conclusion
In this article, we have explored the charming and practical world of the Bird-shaped Fabric Needle Holder – Pattern. We discussed the importance of choosing the right cotton fabrics, the necessity of weighting the base with materials like walnut shells, and the step-by-step process of assembling the body, clipping curves, and finishing with a hidden ladder stitch.
This project is not only a fantastic way to keep your sewing room tidy but also an opportunity to practice soft sculpture techniques that can be applied to many other crafts.