The Rabbit Bag With Ears – Pattern is one of the most charming projects you can undertake if you are looking to combine functionality with an adorable aesthetic. Whether you are an experienced sewist or a beginner looking for a whimsical challenge, creating a bunny-themed accessory is a rewarding experience that results in a unique, handmade piece. This project is perfect for gifting, especially during festive seasons like Easter, or simply for adding a touch of personality to a child’s wardrobe or your own quirky style.
When you start working with a Rabbit Bag With Ears – Pattern, you are not just following a set of instructions; you are bringing a character to life through fabric and thread. The beauty of this specific design lies in its versatility, as it can be adapted into a drawstring pouch, a crossbody purse, or even a small toddler backpack. By choosing high-quality materials and paying attention to the details of the ear construction, you ensure that the final product is both durable and visually striking, capturing that “handmade with love” feel that mass-produced items often lack.
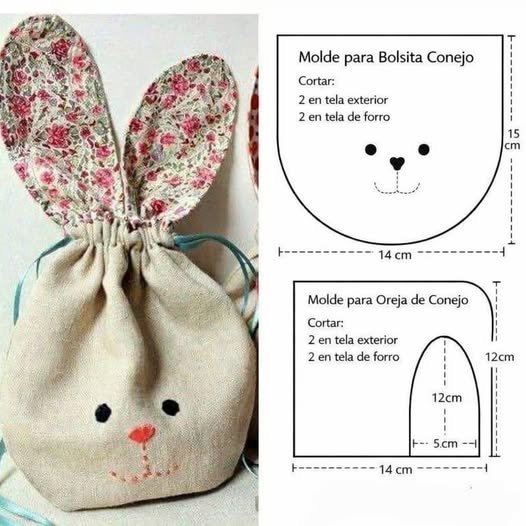
The search for the perfect Rabbit Bag With Ears – Pattern often leads creators to explore various techniques, from simple sewing patterns to more complex crochet or knitting charts. In this article, we will focus on the fundamental steps of crafting this delightful bag, ensuring that your DIY sewing project is successful from the first cut to the final stitch. By understanding the core components—such as fabric selection, lining techniques, and the signature floppy ears—you will be able to master this pattern and perhaps even customize it to create a whole warren of unique bags.
1. Choosing the Best Materials for Your Rabbit Bag With Ears – Pattern
Selecting the right textile is the foundation of any successful Rabbit Bag With Ears – Pattern. For a soft, cuddly feel, many crafters opt for minky fabric, fleece, or faux fur, which mimic the texture of a real bunny. If you prefer a more structured or vintage look, linen blends or heavyweight cotton canvas work beautifully, especially when paired with a floral interfacing for added stability.
The lining fabric is just as important as the exterior, as it provides the interior finish and reinforces the bag’s shape. Using a contrasting poplin cotton or a satin lining can add a professional touch to your handmade bag. Don’t forget that since this is a Rabbit Bag With Ears – Pattern, the ears will need a bit of support; lightweight fusible fleece is often used to help the ears stand up or drape naturally without being too heavy.
Hardware and notions are the “jewelry” of your project. Depending on your specific sewing tutorial, you might need magnetic snaps, zippers, or cotton cord for a drawstring closure. For the bunny’s face, many artists prefer embroidery floss for a minimalist look, while others use safety eyes or buttons to give the rabbit more personality and “pop.”
Sustainability is a growing trend in the DIY community, and this pattern is a great way to upcycle. You can repurpose old denim jeans or high-quality wool remnants to create an eco-friendly version of the Rabbit Bag With Ears – Pattern. This not only saves money on materials but also gives your creation a story, making the final handcrafted accessory even more special and environmentally conscious.
When it comes to color palettes, while classic white, grey, and brown are popular, don’t be afraid to experiment with pastels or even bold prints. A polka-dot or checkered rabbit bag can look incredibly modern and chic. The key is to ensure that the ear pattern pieces contrast slightly with the main body or use a different fabric for the “inner ear” to make the silhouette recognizable.
Lastly, preparation is key before you make your first cut. Always pre-wash your fabric to prevent shrinkage later on, especially if you are using natural fibers like cotton. Ironing your fabric flat ensures that your pattern pieces are pinned accurately, which is crucial for the symmetry of the bunny ears. Having sharp fabric shears and a fresh needle in your sewing machine will make the construction of your Rabbit Bag With Ears – Pattern much smoother.
2. Mastering the Ear Construction and Assembly Process
The defining feature of the Rabbit Bag With Ears – Pattern is, unsurprisingly, the ears. To get them right, you must pay close attention to the stitching lines and the turning process. Usually, the pattern involves sewing two ear shapes right-sides together, leaving the bottom open. Clipping the curves of the seam allowance is a vital SEO-friendly sewing tip that ensures the ears lie flat and smooth once turned right-side out.
For ears that have “perk,” you can insert a layer of stiff felt or decovil light inside the ear pieces. If you prefer the “lop-ear” look, keeping the fabric soft and adding a little bit of polyester fiberfill at the base can create a cute, weighted effect. The placement of the ears on the bag body is the most critical step; even a few millimeters of misalignment can change the entire “expression” of your Rabbit Bag With Ears – Pattern.
Most professional sewing guides recommend basting the ears to the front or back panel before you assemble the main bag. This “temporary” stitch holds the ears in place so they don’t shift when you sew the main side seams. It is also a good time to decide if you want the ears to stand straight up or fold over the front of the bag as a flap or closure mechanism.
When joining the exterior fabric to the lining, you will often use the “bagging out” method. This involves nesting the exterior bag inside the lining (or vice versa) with right sides together. As you sew around the top edge, you must ensure the ears are tucked safely inside so they don’t get caught in the topstitching. This technique results in a clean, professional edge for your Rabbit Bag With Ears – Pattern.
Reinforcing the stress points is essential for a functional tote bag or pouch. The area where the ears and straps meet the bag body takes the most pull during use. Using a backstitch or a small square-with-an-X stitch pattern provides the necessary strength. This attention to detail ensures your Rabbit Bag With Ears – Pattern remains a durable companion for daily use or play.
Final flourishes like topstitching the upper rim of the bag not only look great but also keep the lining from rolling outward. If you are adding a face embroidery, it is much easier to do this on the flat fabric panel before the bag is fully assembled. This allows you to hide the knots and thread tails between the layers of the Rabbit Bag With Ears – Pattern, leaving the inside looking as tidy as the outside.
3. Customizing Your Pattern for Different Ages and Styles
A great Rabbit Bag With Ears – Pattern is highly adaptable to suit different needs. For a toddler bag, you might want to scale the pattern down to 75% and use soft, washable flannel. For an adult’s quirky fashion accessory, keeping the scale larger and using vegan leather or velvet can elevate the design from “cute” to “avant-garde.”
Think about the functionality: do you need an interior pocket? Adding a small slip pocket inside the lining is a simple modification to the Rabbit Bag With Ears – Pattern. This is perfect for holding a phone, keys, or a small wallet. You can also vary the length of the shoulder strap, moving from a short handle to a long, adjustable crossbody strap using D-rings and swivel hooks.
Embellishments can transform the bunny design into something truly unique. Consider adding a pom-pom tail to the back of the bag using yarn or a pre-made faux fur pom-pom. You can also add “hair bows” to the base of the ears or a small lace trim along the bottom edge. These personalized touches are what make a handmade Rabbit Bag With Ears – Pattern stand out in a world of fast fashion.
If you are a fan of minimalism, you can create a “hidden bunny” bag where the ears are the only clue to the theme. Using monochromatic colors—like all black or all cream—makes the Rabbit Bag With Ears – Pattern sophisticated enough for a casual brunch or a creative office environment. The silhouette remains playful, but the color palette keeps it grounded and stylish.
For those who enjoy seasonal crafting, this pattern is a goldmine. You can create a “Spring Bunny” using floral prints, a “Winter Bunny” using quilted fabric and silver accents, or even a “Halloween Bunny” using dark colors and Gothic motifs. The Rabbit Bag With Ears – Pattern acts as a blank canvas for your seasonal creativity, making it a project you can return to year-round.
Don’t forget the power of textile art techniques like applique or fabric painting. You can paint rosy cheeks on the bunny or applique different fabric scraps to create a “patchwork” rabbit. This not only uses up your fabric stash but also ensures that no two bags created from the same Rabbit Bag With Ears – Pattern will ever look exactly the same.
4. Troubleshooting Common Sewing Issues with Animal Patterns
One of the most common hurdles when working with a Rabbit Bag With Ears – Pattern is managing thick layers of fabric. When you have the exterior, the lining, the interfacing, and two layers of ear fabric all meeting at the top seam, your sewing machine might struggle. The secret is to use a denim needle or a walking foot, which helps feed multiple layers through the machine evenly without skipping stitches.
Symmetry is another challenge. It is very easy for one ear to end up slightly higher or more tilted than the other. To avoid this, always use a fabric marking pen to draw precise placement lines on the right side of the fabric. Measuring twice and pinning (or clipping) thoroughly will save you from the frustration of having to use a seam ripper later on your Rabbit Bag With Ears – Pattern.
If your ears are “flopping” in a way that looks messy rather than cute, the issue is likely a lack of interfacing. Not all interfacing is created equal; for ears, you want something that offers “memory,” meaning it snaps back to its shape. If you’ve already finished the bag, you can sometimes carefully insert a small piece of plastic boning or even a heavy-duty pipe cleaner into the ear to provide internal structure.
Turning small, tight curves—like the tips of the ears—can result in “poky” or distorted shapes. To get a perfect curve, reduce your stitch length when sewing around the tips. This creates a stronger, smoother seam. Use a turning tool or a blunt chopstick to gently push the fabric out from the inside, being careful not to poke a hole through your Rabbit Bag With Ears – Pattern.
Tension issues often arise when sewing through varying thicknesses. If you notice loops on the bottom of your fabric, your top tension might be too loose. Always do a test stitch on a scrap piece of your chosen material, including the interfacing, before starting on the actual bag panels. This ensures your Rabbit Bag With Ears – Pattern looks professional and the seams won’t unravel over time.
Lastly, if the bag feels “limp,” it might be because the base isn’t reinforced. You can add a removable bag bottom made of plastic canvas or heavy cardboard covered in fabric. This helps the Rabbit Bag With Ears – Pattern keep its shape even when filled with items. A well-supported bag looks much more high-end and ensures that the bunny ears remain the star of the show rather than a sagging silhouette.
FAQ – Frequently Asked Questions
1. Is the Rabbit Bag With Ears – Pattern suitable for beginners? Yes! While it looks complex, it essentially consists of two main panels and four ear pieces. If you can sew a straight line and handle basic curves, you can successfully complete this sewing project.
2. What size should the ears be compared to the bag? Typically, for a balanced look, the ears should be about 2/3 the height of the bag body. However, “oversized” ears are a popular style choice in many bunny patterns for a more “kawaii” or whimsical effect.
3. Can I make this bag without a sewing machine? Absolutely. You can use a strong backstitch for the main seams and a ladder stitch (invisible stitch) for closing the lining. It will take longer, but the hand-sewn finish can be very charming.
4. What is the best way to clean a handmade rabbit bag? This depends on your fabric. If you used cotton, a gentle machine wash is fine. If you used faux fur or minky, hand washing and air drying are recommended to keep the “fur” from matting or melting in the dryer.
5. How do I make the ears stay upright? The best method is using a heavyweight sew-in interfacing or a layer of stiff felt inside the ear. Some crafters also sew a wire frame inside for “poseable” ears, though this is not recommended for toys for very young children.
6. Can I sell bags made from this pattern? Usually, if you purchased a digital pattern, the designer will state their terms. Most allow “small scale commercial use,” meaning you can sell items you make yourself, but always check the specific license of your Rabbit Bag With Ears – Pattern.
Conclusion
In this guide, we have explored the delightful world of the Rabbit Bag With Ears – Pattern, covering everything from the initial fabric selection to the nuances of ear assembly and troubleshooting.
We learned that the choice of materials like fleece or canvas sets the tone for the project, and that precision in stitching curves is what separates a DIY look from a professional finish. This project is a fantastic way to practice sewing skills while creating something functional and heartwarming.