The Crochet charger cover – Pattern is an ingenious and stylish way to protect your electronic accessories while adding a personalized, handmade touch to your tech workspace. In a world where white and gray plastic cables dominate our desks and bedside tables, a crochet charger cover offers a colorful and tactile alternative that prevents your cords from tangling or fraying. This specific pattern is designed to be both functional and decorative, ensuring that your expensive charging cables last longer while looking like a high-end designer accessory.
Starting a Crochet charger cover – Pattern is the perfect weekend project for crafters of all skill levels because it requires very little yarn and can be completed in just a few hours. The primary goal of this crochet project is to create a tubular or spiraled sleeve that fits snugly over the standard lightning or USB-C cable, providing a layer of protection against pets who like to chew on wires or the general wear and tear of travel. Using this pattern, you can transform a boring utility item into a vibrant piece of art that reflects your personality and interior design style.
When you follow a professional Crochet charger cover – Pattern, you learn how to manipulate basic stitches into a tight, durable fabric that doesn’t slip down the cable. This project is also highly practical for households with multiple people, as you can use different colors for each family member, making it immediately obvious whose charger is whose. Throughout this guide, we will explore the best materials, the step-by-step construction, and the creative ways you can modify the crochet pattern to suit various types of electronics, from phone chargers to laptop power bricks.
1. Selecting the Perfect Materials for Your Crochet charger cover – Pattern
The most critical decision when starting your Crochet charger cover – Pattern is choosing a yarn that is heat-resistant and durable. Cotton yarn is the gold standard for this type of work because it is breathable, does not melt easily under minor heat, and provides excellent stitch definition that stays crisp over time.
You will typically need a small crochet hook, such as a 2.5mm or 3.0mm, to ensure the stitches are tight enough to hide the wire underneath. A smaller hook allows the Crochet charger cover – Pattern to create a dense fabric that won’t show the white plastic of the cord, giving it a much more professional and seamless look.
Because charging cables are often moved and bent, the elasticity of the stitch is more important than the elasticity of the yarn itself. In this pattern, we focus on stitches that allow for natural movement, ensuring that the crochet sleeve doesn’t restrict the cable’s flexibility or cause internal wire damage.
Color choice is where you can truly have fun with your Crochet charger cover – Pattern. Using variegated yarn or self-striping cotton can create a dynamic, swirling effect as you work around the cord, making the final product look much more complex than a simple single-color design.
Safety is paramount, so always ensure your yarn is clean and free of loose fibers that could get stuck in the charging port. When following the Crochet charger cover – Pattern, it is wise to leave a small gap near the plug ends to prevent any interference with the connection or potential heat buildup from the device.
Lastly, having a tapestry needle on hand is essential for weaving in your ends securely. Since these covers will be handled frequently, your Crochet charger cover – Pattern needs a solid finish so that the yarn doesn’t unravel during daily use or when you are tossing the charger into a backpack.
2. Essential Stitches and Construction Techniques
The most popular method for a Crochet charger cover – Pattern involves working in a continuous spiral directly around the cable. This technique, often called cord crochet, uses a simple single crochet (sc) or slip stitch worked over the wire, effectively “trapping” the cable inside the center of your stitches.
If you prefer a removable option, your Crochet charger cover – Pattern can be worked as a flat strip that is later sewn or buttoned around the cord. This method allows you to wash the cover more easily and is a great way to practice intricate stitch patterns like the moss stitch or small cable bobs.
To prevent the cover from sliding back and forth, you must master the anchor stitch at both ends of the cable. This involves making a few extra tight stitches near the base of the plastic connector, ensuring the Crochet charger cover – Pattern stays perfectly in place regardless of how much the cord is pulled.
For those who want a bit of texture, the half double crochet (hdc) worked in the back loops only can create a beautiful ribbed effect. This modification to the pattern adds extra cushioning to the wire, providing even more protection against accidental drops or heavy objects being placed on the cord.
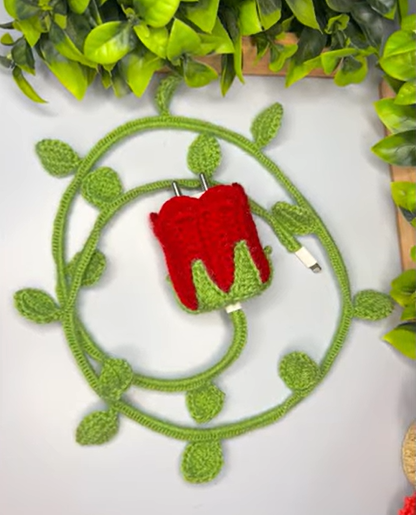
Adding a “tail” or a decorative element like a small crochet leaf or flower at the end of your Crochet charger cover – Pattern can make the cable even easier to grab. This is a common design choice for children’s chargers, making the technology feel more approachable and less like a dangerous utility.
Understanding tension is the secret to a successful Crochet charger cover – Pattern. If your stitches are too loose, the wire will peek through; if they are too tight, you might struggle to move the hook around the cord, so aim for a firm but manageable grip throughout the process.
3. Customizing Your Pattern for Different Cable Types
Not all cables are created equal, so your Crochet charger cover – Pattern should be adaptable for various thicknesses. A thick laptop power cord will require a larger starting chain and potentially a double crochet (dc) stitch to cover the surface area more efficiently than a thin headphone wire.
You can also use the Crochet charger cover – Pattern to organize “cable nests” behind your television or computer. By crocheting multiple wires together into one large sleeve, you create a much cleaner look and prevent the common frustration of tangled electronics in your living room.
For the adventurous crafter, incorporating beads into the Crochet charger cover – Pattern can add a touch of glamour. Sliding small wooden or plastic beads onto your yarn before you start allows you to drop them into your stitches at regular intervals, creating a high-end, boho-chic aesthetic.
Seasonality is another fun way to play with the pattern. You could create a green and red holiday-themed charger cover for December, or a bright neon version for the summer months, making your tech accessories a part of your seasonal home decor.
If you are making these as gifts, the Crochet charger cover – Pattern can be paired with a matching crochet pouch for the wall plug. This creates a complete “travel kit” that keeps all the components together, preventing the user from losing the small adapter brick while on the move.
Some users prefer a spiralized pattern where the yarn only covers parts of the wire in a DNA-like twist. This is achieved by working a series of increases on one side of the cord, causing the fabric to naturally rotate around the cable as the pattern progresses.
4. Maintenance, Safety, and Long-Term Care
While a Crochet charger cover – Pattern is a wonderful addition to your accessories, safety should always come first. Periodically check the ends of your crochet sleeve to ensure there is no scorching or discoloration, which could indicate that your charger is overheating or failing.
Cleaning your handmade cover is simple if you used the recommended cotton yarn. Simply unplug the cable, and use a damp cloth with mild soap to spot-clean the surface of the Crochet charger cover – Pattern, allowing it to air dry completely before plugging it back into a power source.
If you notice that your crochet work has become loose over time, you can “tighten” the pattern by gently pulling on the starting and ending tails. A well-constructed Crochet charger cover – Pattern should last for years, often outliving the actual electronic device it was meant to protect.
Avoid using highly flammable synthetic yarns like certain types of low-grade acrylic for this pattern. While modern electronics run quite cool, it is always a better practice to stick with natural fibers like cotton or bamboo to minimize any risks associated with heat.
For those with pets, the Crochet charger cover – Pattern acts as a deterrent, but it is not indestructible. Infusing the yarn with a bitter pet-safe spray can add an extra layer of protection, ensuring that neither your cat nor your crochet masterpiece gets damaged by curious teeth.
Finally, remember that a Crochet charger cover – Pattern is a great way to use up scrap yarn. Since most cables are only a few feet long, you can use those leftover bits from larger projects to create a “scrap-happy” multicolored cover that is both eco-friendly and stylish.
FAQ: Frequently Asked Questions about the Crochet charger cover – Pattern
1. Does a crochet cover make the charger overheat?
Generally, no. Most modern mobile chargers do not produce enough heat to be affected by a thin layer of cotton yarn. However, always leave the plastic connectors exposed and never cover the “power brick” (the part that plugs into the wall) as that component requires airflow.
2. Is this Crochet charger cover – Pattern safe for fast chargers?
Yes, as long as you use breathable natural fibers like cotton. We recommend checking the cable periodically during the first few uses to ensure it feels normal to the touch.
3. How much yarn do I need for a 3-foot cable?
You will typically need less than 50 yards of yarn. This makes the Crochet charger cover – Pattern an excellent project for using up small balls of leftover yarn from your stash.
4. Can I wash the cover while it’s on the cable?
We do not recommend submerging an electronic cable in water. Spot cleaning with a damp cloth is the safest way to maintain your Crochet charger cover – Pattern.
5. What is the best stitch for a beginner?
The single crochet worked directly around the cord is the easiest and most secure method for someone new to this specific type of pattern.
6. Will the cover slip off the ends?
Not if you use tight tension and anchor the stitches at the base of the plug. A well-made pattern will stay securely in place for the life of the cable.
Conclusion
In conclusion, the Crochet charger cover – Pattern is a perfect marriage of utility and creativity. We have discussed the importance of selecting the right cotton yarn, the various techniques for working around a wire, and how to customize your design for different devices. By implementing these tips, you can protect your technology from wear and tear while brightening up your living space with handmade charm.
This project is not only a great way to improve your crochet skills but also provides a practical solution to the common problem of cord damage and cable confusion.