The Spin Me Around Quilt – Pattern is a fantastic project for anyone looking to bring a sense of dynamic movement and vibrant energy to their sewing room. This specific design relies on clever geometric arrangements to create a visual illusion of rotation, making the finished piece look as though it is constantly in motion. Whether you are a seasoned quilter or a motivated beginner, mastering this layout will significantly elevate your portfolio of handmade treasures.
Working on a Spin Me Around Quilt – Pattern allows you to experiment with high-contrast fabrics and bold color palettes that emphasize the “spinning” effect of the blocks. The beauty of this technique lies in its versatility; you can achieve a modern, minimalist look using solid monochromatic tones or go for a cozy, traditional feel with floral prints and scrap fabrics. By focusing on precision cutting and consistent seam allowances, you will ensure that every point aligns perfectly to maintain the structural integrity of the design.
As you begin your journey with the Spin Me Around Quilt – Pattern, it is essential to understand the importance of fabric selection and color theory in making the pattern pop. The visual impact of the quilt is heavily dependent on how light and dark values interact within each block. In the following sections, we will break down the essential steps, from gathering your materials to the final finishing touches, ensuring your project is both a technical success and a beautiful work of art.
1. Essential Materials for the Spin Me Around Quilt – Pattern
To start your Spin Me Around Quilt – Pattern, you will need high-quality 100% cotton quilting fabric to ensure the best results during the washing and quilting process. Choosing a variety of prints or solids that have a clear distinction between light, medium, and dark tones is the key to making the circular motion of the blocks visible.
In addition to your fabric, a sharp rotary cutter and a specialized quilting ruler are non-negotiable tools for this project. Because the Spin Me Around Quilt – Pattern involves several diagonal cuts and piecing, having perfectly straight edges will make the assembly process much smoother and prevent the fabric from stretching out of shape.
Don’t forget to select a high-quality cotton thread in a neutral color like grey or tan, which tends to blend in with most fabric choices. Using a 50-weight thread helps reduce bulk in the seams, which is particularly important when you have multiple fabric layers meeting at a single central point in the block.
A reliable sewing machine equipped with a 1/4-inch presser foot will be your best friend while constructing the Spin Me Around Quilt – Pattern. This specific foot allows for the “scant quarter-inch” seam that professional quilters swear by to maintain the exact dimensions of their blocks throughout the entire construction phase.
Preparation is vital, so ensure you have a clean, flat cutting mat and a well-functioning steam iron. Pressing your seams as you go—rather than just at the end—is what separates a puckered quilt from a flat, professional-looking Spin Me Around Quilt – Pattern that is easy to quilt later on.
Lastly, consider your quilt batting and backing fabric early in the process. Depending on how much “loft” or thickness you want, you can choose between polyester, cotton, or wool blends to give your Spin Me Around Quilt – Pattern the perfect weight and drape for its intended use.
2. Step-by-Step Cutting and Block Construction
The first step in executing the Spin Me Around Quilt – Pattern is the precise cutting of your Half-Square Triangles (HSTs). These are the fundamental building blocks of the design, and mastering them is crucial for creating the sharp angles required to simulate the spinning effect across the quilt top.
Once your triangles are cut, you will begin the process of chain piecing, which is an efficient SEO-friendly quilting technique that saves both time and thread. By sewing your pairs together in a long continuous string, you maintain a steady rhythm and ensure that your Spin Me Around Quilt – Pattern blocks remain organized and consistent.
After sewing your pairs, it is time to press. For the Spin Me Around Quilt – Pattern, most experts recommend pressing seams to the dark side to prevent the seam allowance from showing through lighter fabrics. This also helps the seams “nest” together when you join the blocks, resulting in perfectly matched corners.
Arranging the blocks on a design wall or a large floor space is a critical stage of the Spin Me Around Quilt – Pattern. This allows you to step back and verify that all the “blades” of your spin pattern are facing the correct direction before you commit to sewing the rows together.
As you assemble the rows, use fine quilting pins to hold the intersections in place. In a complex layout like the Spin Me Around Quilt – Pattern, even a tiny shift in the fabric can cause the “spin” to look distorted, so taking the extra minute to pin will save you from using the seam ripper later.
Finalize the quilt top by sewing the rows together with a consistent seam allowance. Once the top of your Spin Me Around Quilt – Pattern is complete, give it one final, thorough press from the front and back to ensure it lies completely flat before moving on to the layering and quilting stage.
3. Mastering the Visual Motion of the Design
What makes the Spin Me Around Quilt – Pattern so unique is its ability to lead the eye across the fabric. This is achieved through color placement, where specific “anchor” colors are placed in the corners of the blocks to create a secondary pattern that emerges once the entire quilt is assembled.
If you want a more modern aesthetic for your Spin Me Around Quilt – Pattern, try using a solid white or cream background. This creates a “floating” effect for the colorful spinning elements, making the geometric shapes appear sharper and the overall design feel more spacious and airy.
For those who prefer a traditional look, the Spin Me Around Quilt – Pattern works wonderfully with reproduction fabrics or civil war prints. The busy patterns in these fabrics add a layer of texture that makes the spinning motion feel more subtle and sophisticated, perfect for a rustic home decor style.
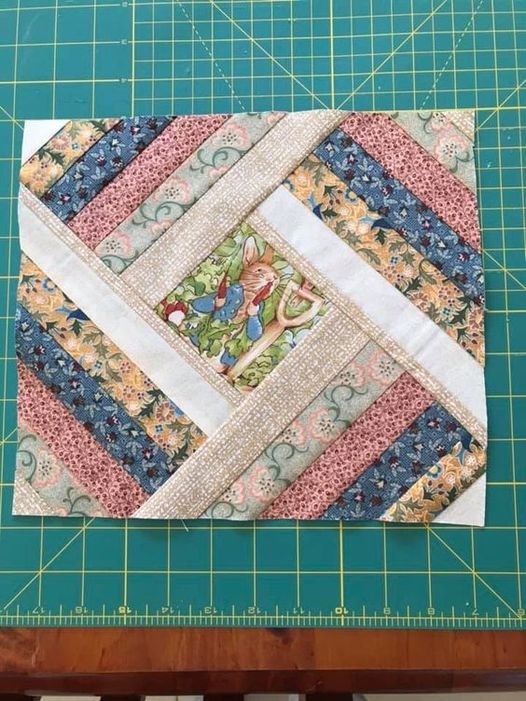
Experimenting with fussy cutting can also take your Spin Me Around Quilt – Pattern to the next level. This involves cutting your fabric so that a specific motif, like a flower or a bird, is centered within the triangles, adding an element of surprise and detail that rewards close inspection of your work.
Another way to enhance the motion is through your quilting motifs. Using a spiral or circular quilting pattern over the straight lines of the Spin Me Around Quilt – Pattern creates a beautiful contrast between the structured piecing and the fluid stitching, reinforcing the “spinning” theme of the project.
Remember that the border selection acts as the frame for your masterpiece. A simple, dark border can “contain” the energy of the Spin Me Around Quilt – Pattern, while a pieced border can extend the movement all the way to the edges of the binding, making the quilt feel even larger and more complex.
4. Professional Finishing and Care Tips
The final stage of the Spin Me Around Quilt – Pattern is applying the quilt binding. A double-fold bias binding is often recommended for its durability, especially if the quilt is intended for daily use or frequent washing, as it protects the edges from fraying over time.
Before you consider your Spin Me Around Quilt – Pattern finished, adding a quilt label is a vital step. Include your name, the date, and the name of the pattern; this turns your handcrafted item into a documented heirloom that can be cherished by future generations of your family.
When it comes to washing your Spin Me Around Quilt – Pattern, always use a gentle cycle with cold water. Including a “color catcher” sheet in the wash is a smart trick to prevent any dark dyes from bleeding into the lighter sections of your beautiful handmade quilt.
Air drying is the preferred method for maintaining the longevity of the fibers, but if you must use a dryer, choose a low-heat setting. This prevents the cotton batting inside the Spin Me Around Quilt – Pattern from shrinking excessively or becoming brittle over years of maintenance.
Storage is also important for preserving the Spin Me Around Quilt – Pattern. Avoid storing it in plastic bins where moisture can get trapped; instead, wrap it in a clean cotton sheet or acid-free tissue paper to allow the natural fibers to breathe while protecting them from dust.
Sharing your finished Spin Me Around Quilt – Pattern on social media or in quilting forums is a great way to inspire others. The quilting community thrives on seeing different interpretations of the same pattern, and your unique color choices might be exactly what someone else needs to start their own creative journey.
FAQ: Common Questions About the Spin Me Around Quilt – Pattern
Is the Spin Me Around Quilt – Pattern suitable for beginners?
Yes, while it looks complex, it is essentially made of Half-Square Triangles. If you can sew a straight line and keep a consistent seam allowance, you can successfully complete this pattern.
How much fabric do I need for a throw-sized quilt?
Typically, you will need about 3 to 4 yards of assorted prints for the blocks and an additional 2 yards for the background and binding. Always check the specific requirements on your Spin Me Around Quilt – Pattern instructions for exact yardage.
Can I use precut fabrics like Charm Packs or Layer Cakes?
Absolutely! This design is very “precut friendly.” Using a Layer Cake (10-inch squares) is especially efficient for the Spin Me Around Quilt – Pattern as it minimizes cutting time and offers a wide variety of coordinating prints.
How do I prevent my points from being cut off?
The secret is the “scant” quarter-inch seam. By sewing just a hair narrower than a full 1/4 inch, you leave room for the fold of the fabric, ensuring your points stay sharp when the blocks are joined together.
What is the best way to quilt this pattern?
Many quilters choose “stitch in the ditch” to highlight the geometric lines, but a free-motion swirling design is also highly recommended to complement the spinning theme of the Spin Me Around Quilt – Pattern.
Conclusion
In this article, we have explored the intricate and beautiful world of the Spin Me Around Quilt – Pattern. We covered everything from the essential materials like high-quality cottons and rotary tools to the step-by-step construction of Half-Square Triangles and the final professional finishing touches.
By focusing on color value and precise piecing, you can create a stunning visual illusion of movement that makes this quilt a standout piece in any collection.