A Crochet Lavender Flower- Pattern is one of the most rewarding projects for crafters who want to bring a touch of everlasting nature into their homes. These delicate, purple-hued sprigs are not only visually stunning but also serve as versatile decor pieces, ranging from bouquet fillers to scented sachet embellishments. When you decide to master a Crochet Lavender Flower- Pattern, you are engaging in a mindful art form that combines repetitive, soothing motions with a beautiful, tactile result that never wilts.
Working on a Crochet Lavender Flower- Pattern allows for incredible customization in terms of yarn weight, hook size, and color gradients. Whether you prefer the deep, royal purples of traditional French lavender or the soft, muted lilacs of English varieties, the Crochet Lavender Flower- Pattern provides a blueprint for creativity. In this comprehensive guide, we will explore the essential techniques and steps required to create a professional-looking botanical masterpiece that looks just as good in a ceramic vase as it does pinned to a summer hat.
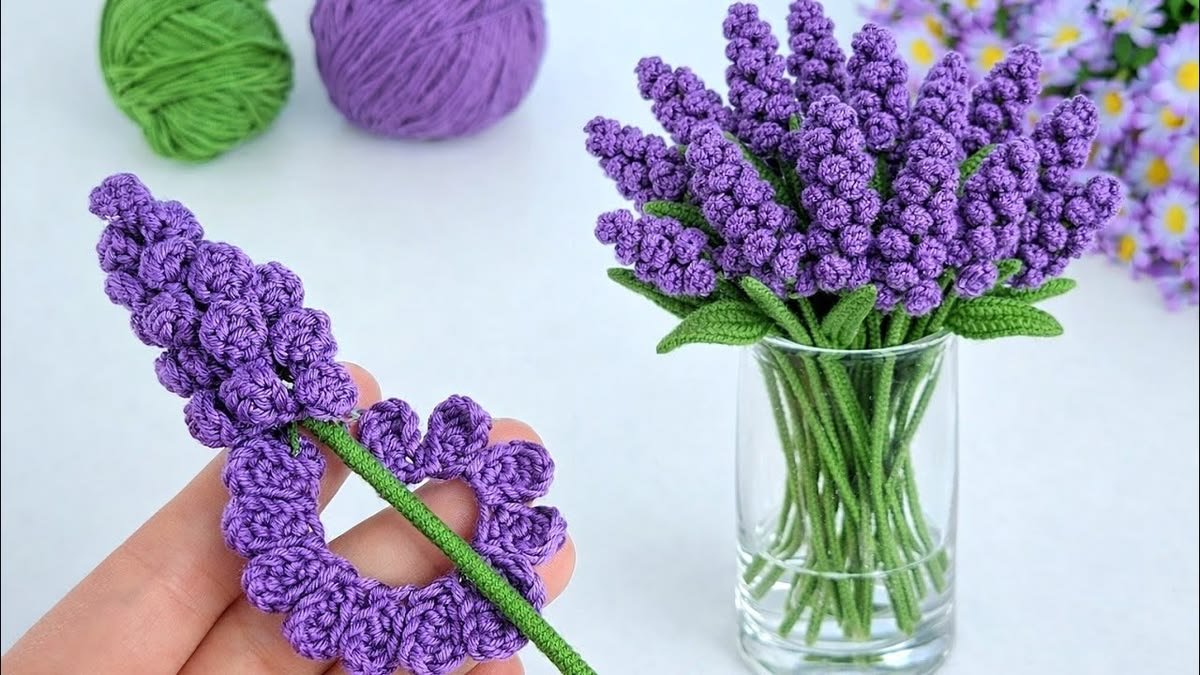
To ensure your Crochet Lavender Flower- Pattern turns out perfectly, it is vital to understand the foundational stitches and structural requirements of floral crochet. Unlike flat blankets or structured garments, a Crochet Lavender Flower- Pattern relies on building texture through “clusters” or “popcorn” stitches to mimic the tiny buds found on a real lavender stalk. By following this optimized guide, you will learn how to select the right materials and execute the stitches necessary to produce high-quality, handmade crochet flowers that stand the test of time.
1. Choosing the Right Materials for Your Crochet Lavender Flower- Pattern
Selecting the perfect cotton yarn is the first step toward achieving a realistic look for your floral project. A fine, mercerized cotton (weight 2 or 3) is often the best choice because it provides excellent stitch definition and a slight sheen that mimics natural petals. Using high-quality yarn ensures that your Crochet Lavender Flower- Pattern remains sturdy enough to stand upright when attached to a floral wire.
The crochet hook size you choose should be slightly smaller than what is recommended on the yarn label. This creates tighter stitches, which prevents the stuffing or the internal wire from peeking through the gaps. For most botrancal crochet projects, a 2.0mm or 2.5mm hook is the “sweet spot” for balancing ease of use with a refined, professional finish.
Don’t forget the importance of floral wire and green floral tape when constructing your lavender stems. The wire provides the necessary “skeleton” for the Crochet Lavender Flower- Pattern, allowing you to bend and pose the flowers realistically in an arrangement. Green tape helps seamlessly blend the yarn-covered stem with the base of the flower head for a polished appearance.
In addition to your primary tools, you will need a sharp pair of craft scissors and a tapestry needle. The needle is essential for weaving in ends and securing the flower clusters to the stem. Precision is key when finishing a Crochet Lavender Flower- Pattern, as loose threads can quickly detract from the delicate nature of the finished piece.
Color selection plays a massive role in the SEO optimization of your physical product if you intend to sell your work. Using variegated yarns or “ombré” shades can add depth to the Crochet Lavender Flower- Pattern without requiring complex color changes. Mixing different shades of violet, plum, and lavender creates a more organic, multi-dimensional bouquet that catches the eye.
Lastly, consider adding a scented element to your finished project to enhance the sensory experience. You can hide a small piece of felt soaked in lavender essential oil inside the stem or base of the flower. This small detail turns a simple Crochet Lavender Flower- Pattern into a functional piece of aromatherapy decor that delights both the eyes and the nose.
2. Essential Stitches for a Textured Crochet Lavender Flower- Pattern
The most common stitch used to create the “buds” in a Crochet Lavender Flower- Pattern is the picot stitch. This simple technique involves a series of chain stitches closed with a slip stitch, creating a small point or bump on the surface of your work. When repeated across a row, these picots perfectly replicate the tiered look of a blooming lavender stalk.
Another vital technique for a successful Crochet Lavender Flower- Pattern is the slip stitch join. Because you are often working in a spiral or around a central foundation chain, knowing how to transition between rows smoothly is crucial. A clean join ensures that the “growth” of your lavender flower looks continuous and natural rather than disjointed or bulky.
For those looking to add more volume, the puff stitch or bobble stitch can be incorporated into the Crochet Lavender Flower- Pattern. These stitches involve pulling up multiple loops in a single stitch to create a thick, rounded texture. This is particularly effective for “English Lavender” styles, which tend to have denser, more compact flower heads compared to other varieties.
The foundation chain serves as the backbone of your entire flower. In a standard Crochet Lavender Flower- Pattern, you will typically work a long chain and then work back down it, creating “petals” on both sides. Mastering the tension of this initial chain is vital; if it is too tight, the flower will curl awkwardly, but if it is too loose, the stem will sag.
Don’t overlook the importance of the single crochet (sc) and half-double crochet (hdc) for the leaves and stem. While the flower head is the star of the Crochet Lavender Flower- Pattern, the long, slender leaves of the lavender plant provide the necessary contrast. These basic stitches are used to create the tapered, “silvery-green” foliage that makes the plant instantly recognizable.
Understanding stitch height is the secret to creating a tapered look. As you move toward the top of the Crochet Lavender Flower- Pattern, you may want to decrease the number of chains in your picots to make the buds appear smaller. This gradual reduction mimics the way real flowers bloom from the bottom up, with smaller, tighter buds at the very tip of the stem.
3. Step-by-Step Assembly of the Crochet Lavender Flower- Pattern
To begin the assembly, you must first prepare your stem wire by coating it with a thin layer of glue or double-sided tape. Starting at the top, you will begin wrapping your Crochet Lavender Flower- Pattern strip around the wire in a downward spiral. This technique ensures that the petals overlap slightly, hiding the wire completely and creating a full, lush appearance.
Secure the top of the crochet strip to the wire using a small dab of hot glue or by tying it tightly with a matching yarn tail. As you wrap the Crochet Lavender Flower- Pattern downwards, maintain consistent tension so the spiral looks even. This is the stage where the “magic” happens, and your flat piece of crochet transforms into a three-dimensional floral sprig.
Once the flowering portion is attached, it is time to transition to the stem wrapping. Using green yarn, continue wrapping down the remainder of the floral wire. This part of the Crochet Lavender Flower- Pattern requires patience, as you want the yarn to lie flat and smooth without any overlapping lumps or visible wire gaps.
Integrating the crochet leaves is the next critical step for a realistic finish. Typically, lavender leaves are attached in pairs near the base of the flower or further down the stem. You can sew these on using your tapestry needle, ensuring they are positioned at a natural angle to complement the height of your Crochet Lavender Flower- Pattern.
For a professional “boutique” look, consider stiffening the yarn slightly. You can use a mixture of water and white glue or a commercial fabric stiffener. Applying this to the petals of your Crochet Lavender Flower- Pattern helps them hold their shape over time, preventing them from drooping due to humidity or dust accumulation.
Final touches involve “fluffing” the picots and ensuring the wire is bent into a graceful, natural curve. Real lavender rarely grows perfectly straight, so giving your Crochet Lavender Flower- Pattern a slight tilt makes it look much more authentic. Once dry and set, these flowers are ready to be bundled into a gorgeous, handmade crochet bouquet.
4. Tips for Selling and Displaying Your Crochet Lavender Flower- Pattern
If you are an entrepreneur, the Crochet Lavender Flower- Pattern is a high-margin item for your Etsy shop or local craft fair. Because they require very little yarn, your “cost of goods” is low, while the “perceived value” is high due to the intricate detail. Marketing them as eco-friendly decor or “forever flowers” is a great way to appeal to modern, sustainable-minded consumers.
Photography is essential when showcasing your Crochet Lavender Flower- Pattern online. Use natural light and a clean, minimalist background to let the purple tones pop. Close-up “macro” shots are particularly effective for highlighting the texture of the crochet stitches, proving to potential buyers that your work is high-quality and meticulously crafted.
Offering customized arrangements can further boost your success. Customers may want a specific number of stems to fit a particular vase, or they might request a “dried lavender” look using tan and muted purple yarns. Adapting your Crochet Lavender Flower- Pattern to meet these requests allows you to charge a premium for personalized service.
Displaying your work in shadow boxes or as part of a wreath is another creative way to utilize the Crochet Lavender Flower- Pattern. These flowers don’t always have to be in a vase; they work beautifully as 3D accents on greeting cards, gift toppers, or even as part of a crochet wall hanging. Diversity in application increases your market reach significantly.
When writing product descriptions, use SEO-friendly keywords like “handmade lavender gift,” “crochet flower arrangement,” and “everlasting floral decor.” Explain the benefits of a Crochet Lavender Flower- Pattern—such as being allergy-free and requiring zero maintenance—to help shoppers understand why they need your product over real flowers.
Finally, consider creating a “kit” for other crafters. You can sell the Crochet Lavender Flower- Pattern along with the specific yarn, hook, and wires needed to complete the project. This appeals to the “DIY” community and establishes you as an authority in the crochet niche, leading to more traffic and engagement for your brand.
FAQ: Frequently Asked Questions
What is the best yarn for a Crochet Lavender Flower- Pattern?
The best yarn is usually a mercerized cotton in fingering or sport weight. Cotton holds its shape better than acrylic and provides the crisp stitch definition needed for the tiny lavender buds.
How long does it take to complete one lavender stem?
For an intermediate crafter, a single Crochet Lavender Flower- Pattern stem takes approximately 30 to 45 minutes to crochet and assemble. Beginners may take about an hour as they get used to the picot stitches.
Is this pattern suitable for beginners?
Yes! While it looks complex, the Crochet Lavender Flower- Pattern primarily uses basic stitches like chains and slip stitches. The most challenging part is the assembly, which simply requires a bit of patience.
Can I wash my crochet lavender flowers?
If you have used floral wire and glue, machine washing is not recommended. Instead, spot clean with a damp cloth or use a soft brush to remove dust to keep your flowers looking fresh.
How do I make the stems stand up straight?
Using a heavy-gauge floral wire (18 or 20 gauge) inside the stem is the best way to ensure your flowers remain upright in a vase. You can also double the wire for extra stability if your flower head is particularly heavy.
Conclusion
In this article, we have explored the intricate and beautiful world of the Crochet Lavender Flower- Pattern. We covered everything from selecting the high-quality cotton yarn and the correct crochet hook, to mastering the picot stitches and assembling the final product on floral wire.
This project is a fantastic way to practice your tension and detail work while creating a piece of handmade decor that brings joy and color to any room. Whether you are making these for yourself, as a gift, or to sell in your shop, the versatility of the lavender design ensures it will always be in style.