American-style placemat with chicken print – Tutorial is a charming and practical way to add personality to your dining table while expressing your creativity through handmade crafts. This type of placemat combines rustic farmhouse aesthetics with functional design, making it perfect for everyday use or special gatherings.
Creating your own American-style placemat with chicken print – Tutorial project allows you to customize colors, fabrics, and patterns according to your taste. Whether you love a country-style kitchen or simply enjoy sewing projects, this tutorial will guide you through each step with clarity and confidence.
In this detailed guide, you will learn how to design, assemble, and finish your placemat professionally. The American-style placemat with chicken print – Tutorial is beginner-friendly but also offers enough flexibility for experienced crafters to experiment and refine their skills.
1. Materials and Preparation for American-style placemat with chicken print – Tutorial
To begin your American-style placemat with chicken print – Tutorial, selecting the right materials is essential. The quality of your fabric will directly impact the durability and appearance of the final product.
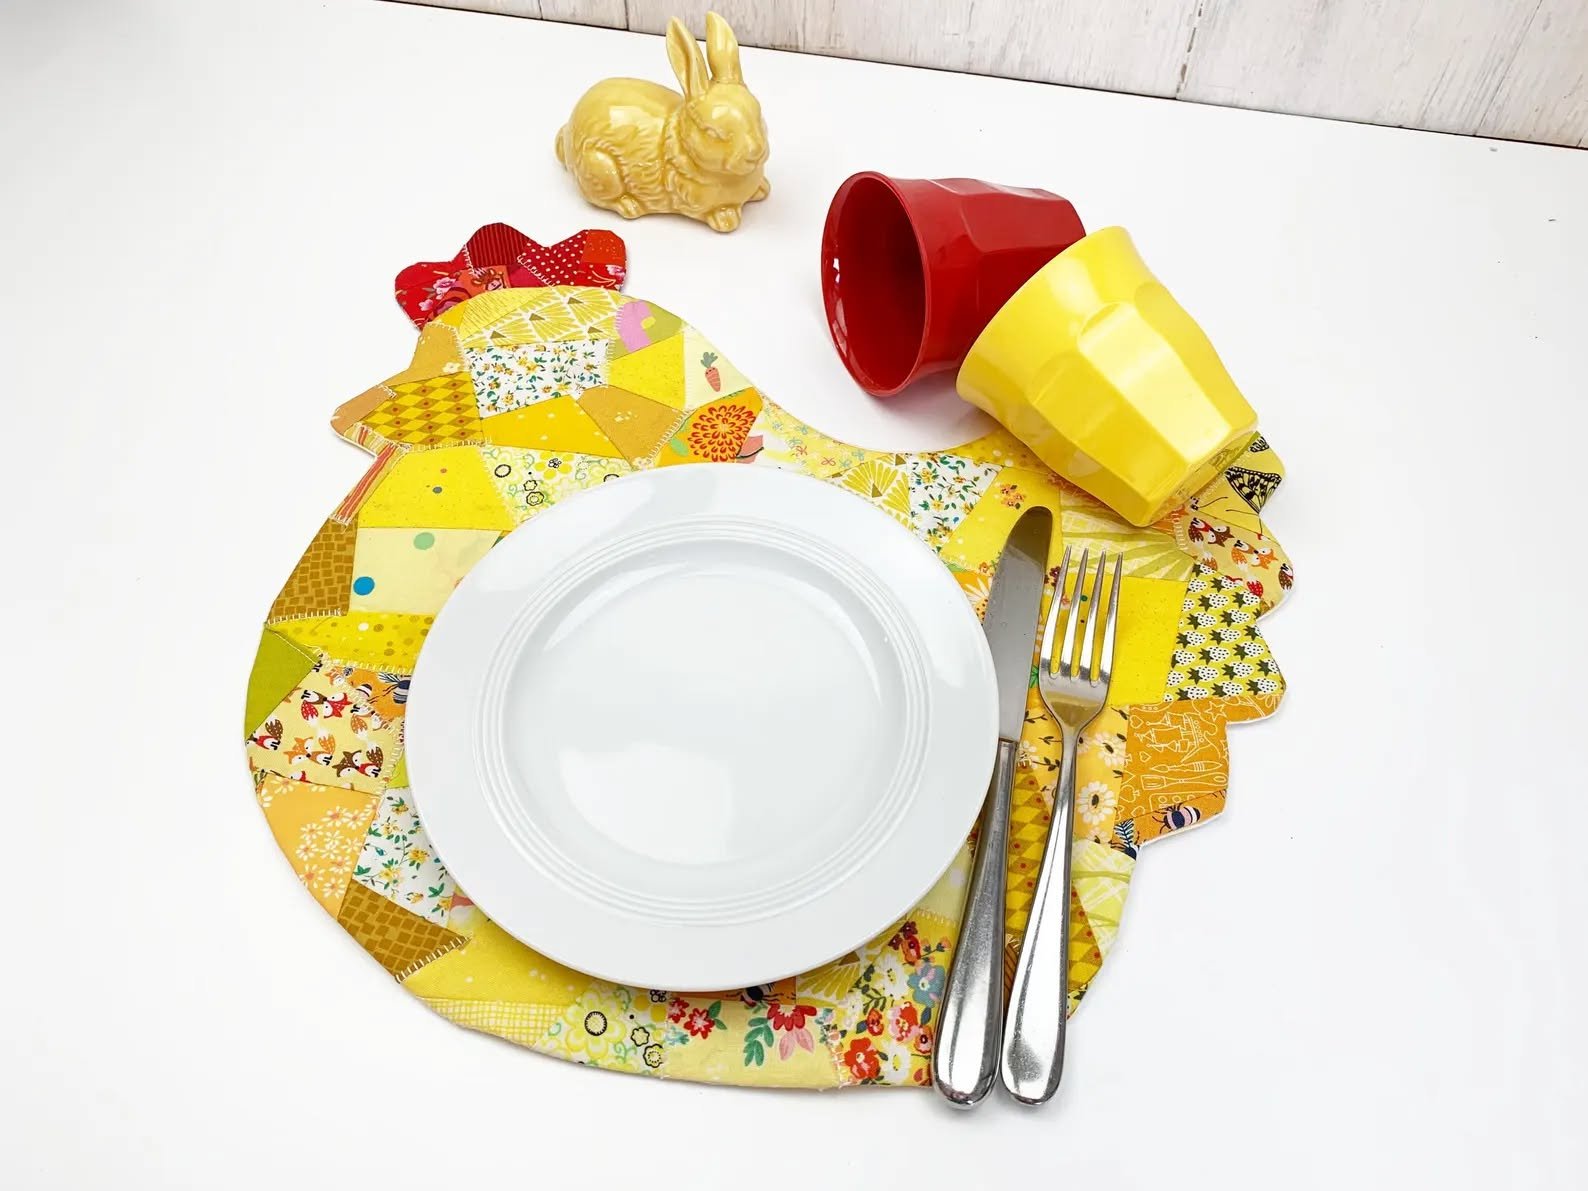
Start with cotton fabric featuring a chicken print as your main design. This is the highlight of your American-style placemat with chicken print – Tutorial, giving it that cozy farmhouse charm many people love.
You will also need a coordinating fabric for the backing. Neutral tones or simple patterns work well to balance the bold chicken print in your American-style placemat with chicken print – Tutorial.
Batting or interfacing is recommended to give your placemat structure. This layer adds thickness and helps your American-style placemat with chicken print – Tutorial maintain its shape over time.
Basic tools include fabric scissors, a ruler, pins, a sewing machine, and thread that matches your fabric. Having everything prepared makes your American-style placemat with chicken print – Tutorial process smoother.
Before cutting, wash and iron your fabric. This prevents shrinking and ensures a clean, professional finish in your American-style placemat with chicken print – Tutorial.
2. Cutting and Assembling the Placemat
The next step in your American-style placemat with chicken print – Tutorial is measuring and cutting your fabric pieces accurately. Standard placemat sizes are usually around 12 by 18 inches, but you can adjust based on your preference.
Cut the chicken print fabric for the top layer and the backing fabric in the same dimensions. Precision is key in this stage of the American-style placemat with chicken print – Tutorial to ensure everything aligns properly.
Next, cut the batting slightly smaller than your fabric pieces. This helps reduce bulk when sewing and gives a neat finish to your American-style placemat with chicken print – Tutorial.
Layer your materials carefully: backing fabric facing down, batting in the middle, and chicken print fabric on top. This sandwich structure is essential for your American-style placemat with chicken print – Tutorial.
Secure the layers with pins or clips to prevent shifting during sewing. Stability is important for achieving clean lines in your American-style placemat with chicken print – Tutorial.
Take a moment to double-check alignment before moving forward. A well-prepared layout ensures success in the next steps of your American-style placemat with chicken print – Tutorial.
3. Sewing and Finishing Techniques
Now it’s time to sew your layers together in the American-style placemat with chicken print – Tutorial. Start by stitching around the edges, leaving a small gap for turning.
Use a consistent seam allowance, typically about ¼ inch. This helps maintain uniformity and gives your American-style placemat with chicken print – Tutorial a professional look.
After sewing, carefully trim the corners to reduce bulk. This step ensures sharp edges when you turn your American-style placemat with chicken print – Tutorial right side out.
Turn the placemat through the gap and gently push out the corners. This is where your project starts to take shape in the American-style placemat with chicken print – Tutorial.
Press the placemat with an iron to flatten the seams. A crisp finish enhances the overall appearance of your American-style placemat with chicken print – Tutorial.
Finally, topstitch around the edges to close the gap and secure all layers. This finishing touch completes your American-style placemat with chicken print – Tutorial beautifully.
4. Creative Ideas and Customization Options
One of the best parts of the American-style placemat with chicken print – Tutorial is the ability to personalize your design. You can experiment with different chicken patterns to match your kitchen theme.
Adding decorative borders or trims can elevate your placemat. Lace, piping, or contrasting fabric strips can enhance your American-style placemat with chicken print – Tutorial.
You can also quilt the layers by sewing decorative patterns across the surface. This adds texture and durability to your American-style placemat with chicken print – Tutorial.
Consider creating a matching set with napkins or table runners. Coordinated pieces make your American-style placemat with chicken print – Tutorial even more appealing.
For seasonal variations, choose fabrics with different color palettes while maintaining the chicken theme. This keeps your American-style placemat with chicken print – Tutorial fresh and versatile.
If you enjoy crafting, you can even sell your handmade placemats. Many people appreciate unique items like those made through an American-style placemat with chicken print – Tutorial.
FAQ About American-style placemat with chicken print – Tutorial
What fabric is best for this placemat?
Cotton fabric is the best choice because it is durable, easy to sew, and ideal for an American-style placemat with chicken print – Tutorial.
Can beginners follow this tutorial?
Yes, this American-style placemat with chicken print – Tutorial is beginner-friendly and includes simple steps.
Do I need a sewing machine?
While a sewing machine is recommended, you can complete the American-style placemat with chicken print – Tutorial by hand with patience.
How do I clean the placemat?
Most cotton placemats can be machine washed. Always check fabric care instructions when following an American-style placemat with chicken print – Tutorial.
Can I change the size of the placemat?
Absolutely. You can customize dimensions to suit your needs in your American-style placemat with chicken print – Tutorial.
How long does it take to complete one placemat?
Typically, it takes about 1 to 2 hours depending on your experience level with the American-style placemat with chicken print – Tutorial.
Conclusion
In this complete American-style placemat with chicken print – Tutorial, you learned how to select materials, cut and assemble fabric, sew with precision, and customize your design creatively. This project is a perfect blend of functionality and artistic expression, suitable for both beginners and experienced crafters.
By following these steps, you can create beautiful handmade placemats that add charm and personality to your home. The American-style placemat with chicken print – Tutorial is not just a craft—it’s an opportunity to bring warmth and creativity into your everyday life.