The Fabric Box – Pattern is one of the most versatile and rewarding projects for any sewing enthusiast, offering a perfect blend of functionality and creative expression. Whether you are looking to organize your craft room, create personalized gift baskets, or simply reduce your stash of fabric scraps, mastering this design is an essential skill. In this comprehensive guide, we will explore every detail of the construction process, ensuring you have the technical knowledge to produce professional-quality organizers that are as sturdy as they are beautiful.
Starting a new Fabric Box – Pattern allows you to experiment with different textures and weights of cloth, making it an excellent project for both beginners and advanced sewists. The beauty of this specific project lies in its structural simplicity, which can be adapted into various sizes to fit any shelf or drawer in your home. As we dive into the world of textile storage solutions, you will find that the right combination of materials and techniques can turn a simple piece of cotton into a rigid, durable container that maintains its shape for years.
Throughout this tutorial, we will focus on the Fabric Box – Pattern as a foundational blueprint for your sewing repertoire. We have carefully structured this content to meet high-quality digital publishing standards, ensuring it is clear, helpful, and optimized for search engines. By following these steps, you will not only create a beautiful handmade organizer but also improve your understanding of interfacing, topstitching, and corner boxing techniques that are vital for any structural sewing project.
1. Choosing the Best Materials for Your Fabric Box – Pattern
The success of your Fabric Box – Pattern starts with selecting the right outer and lining fabrics. For the exterior, heavyweight cotton, canvas, or denim are ideal choices because they offer natural durability and a crisp appearance. If you are using lighter fabrics like quilting cotton, you will need to rely more heavily on internal stabilizers to ensure the walls of your box do not collapse under their own weight.
To give your Fabric Box – Pattern the necessary rigidity, choosing the correct fusible interfacing is paramount. A firm, double-sided fusible stabilizer or a heavy-weight sew-in foam can provide that boutique-style structure. Without proper reinforcement, the box will appear slouchy and lose its functional appeal, so never skip the step of applying a high-quality stiffener to your fabric pieces before assembly.
Don’t forget the importance of your sewing tools when working on a Fabric Box – Pattern. Since you will be sewing through multiple layers of fabric and heavy interfacing, a 90/14 or 100/16 denim needle is recommended to prevent skipped stitches or needle breakage. Using a high-quality polyester thread will also ensure that the seams can withstand the tension of being filled with heavy items like tools or toys.
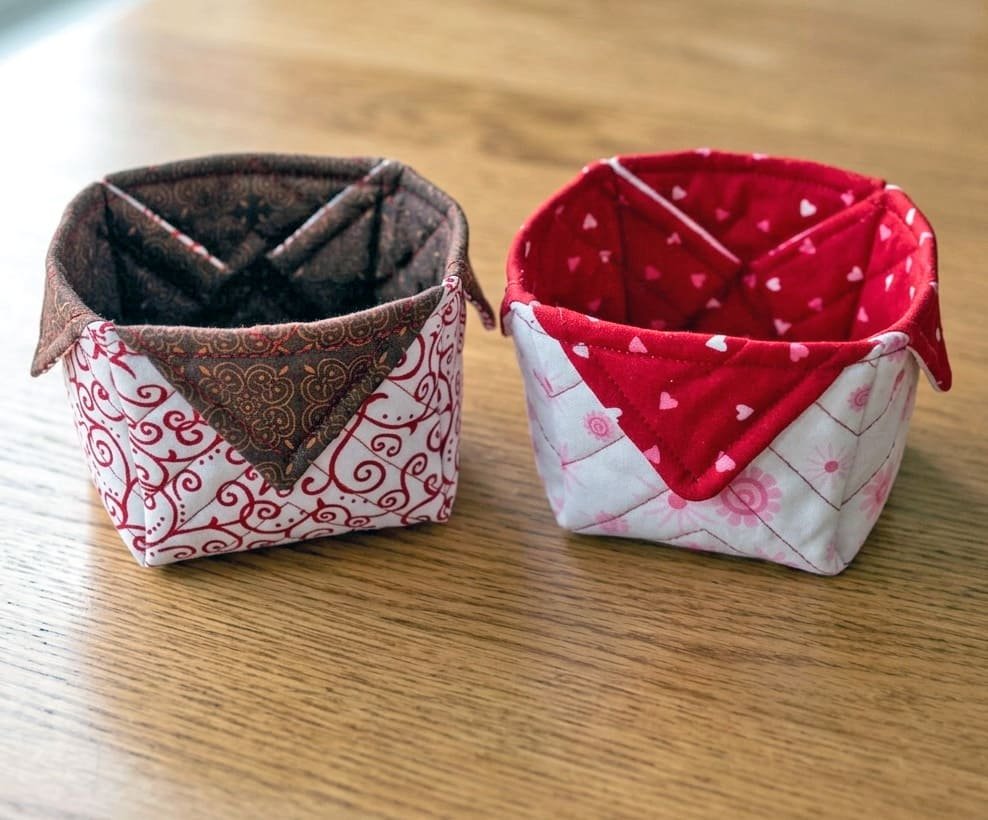
Color and print coordination can make your Fabric Box – Pattern stand out as a piece of home decor. Consider using a bold, vibrant print for the exterior and a subtle, contrasting solid color for the lining. This creates a professional look when the top edge is folded down to create a “cuff,” revealing the interior fabric and adding a sophisticated touch to the overall aesthetic design.
Pre-washing your materials is a crucial step before cutting into your Fabric Box – Pattern. Fabrics like cotton can shrink significantly, and if the outer fabric shrinks differently than the lining after the box is finished, it can cause unsightly puckering. By treating your fabric beforehand, you ensure that the finished storage bin maintains its precise dimensions even after a deep cleaning or long-term use.
Finally, consider adding functional embellishments like handles made of cotton webbing or leather straps. These additions not only make the Fabric Box – Pattern more practical for carrying items but also elevate the perceived value of the project. Secure these handles with reinforced “X” stitching or rivets to ensure they are strong enough to handle the weight of whatever you choose to store inside.
2. Cutting and Preparing the Fabric Box – Pattern Pieces
Precision is the key to a perfectly symmetrical Fabric Box – Pattern. Using a rotary cutter, an acrylic ruler, and a self-healing mat will yield much cleaner and more accurate edges than traditional scissors. Start by cutting two identical rectangles for the exterior and two for the lining, making sure the grainline of the fabric runs vertically to provide maximum strength to the walls.
Once your main panels are cut, it is time to apply the stabilizing layers to your Fabric Box – Pattern. Follow the manufacturer’s instructions for your specific interfacing, usually involving a hot iron and plenty of steam. Ensure there are no air bubbles between the fabric and the stabilizer, as these can cause the fabric to ripple once the box is turned right-side out and finished.
To create the three-dimensional shape of the Fabric Box – Pattern, you must “box” the corners. This involves cutting squares out of the bottom two corners of each fabric panel. The size of these squares will determine the depth and width of the finished box; for example, a 2-inch square will result in a box that is 4 inches deep, allowing you to customize the storage capacity easily.
Marking your seam allowances clearly on the Fabric Box – Pattern pieces will help you maintain consistency throughout the assembly. A water-soluble fabric pen or tailor’s chalk is perfect for this task. Standard practice usually involves a 1/4-inch or 1/2-inch seam allowance, and sticking to this measurement strictly is what separates a homemade-looking project from a truly professional-grade product.
If you are using a directional print for your Fabric Box – Pattern, pay close attention to the orientation of the pattern during the cutting phase. There is nothing more frustrating than finishing a beautiful box only to realize the flowers or animals on the back panel are upside down. Take a moment to layout all your pieces on the table to verify the pattern alignment before you begin sewing.
The final preparation step involves “notching” or trimming the excess interfacing from the seam allowances of your Fabric Box – Pattern. This reduces bulk at the corners and makes it much easier for your sewing machine to glide over the thickest parts of the project. Having clean, bulk-free seams is essential for achieving those crisp, sharp corners that define a high-quality fabric organizer.
3. Step-by-Step Assembly of the Fabric Box – Pattern
The first stage of assembly for your Fabric Box – Pattern is sewing the side and bottom seams of the exterior pieces, with right sides facing together. Use a backstitch at the beginning and end of every seam to secure the thread. Once the sides are done, you will pull the notched corners together to form a straight line, creating the “boxed” bottom that gives the container its volume.
Repeat the exact same process for the lining of the Fabric Box – Pattern, but with one critical difference: leave a 3-inch or 4-inch gap in the bottom seam. This opening, often called a “turning hole,” is what you will use to pull the entire box through once the lining and exterior are joined at the top. This technique ensures that all raw edges are hidden inside the finished piece.
Now, place the exterior of the Fabric Box – Pattern inside the lining (or vice versa), making sure the right sides of the fabrics are touching each other. Align the side seams perfectly and use wonder clips or pins to hold the top circular edge in place. Sewing this top perimeter is a milestone in the project, as it officially marries the two main components of your textile bin.
Carefully pull the exterior fabric through the hole in the lining to turn the Fabric Box – Pattern right-side out. This part can be a bit of a squeeze if you used very stiff interfacing, so take your time to avoid ripping the stitches. Once it is turned, use a point turner or a blunt chopstick to push the corners out firmly, ensuring they are sharp and well-defined.
The next step is to close the turning hole in the lining of your Fabric Box – Pattern. You can do this with a very close machine stitch or a hand-sewn ladder stitch for a completely invisible finish. Once the hole is closed, tuck the lining down into the exterior box, smoothing it out with your hands to ensure there are no lumps or misaligned sections.
The final touch for a sturdy Fabric Box – Pattern is the topstitching. Sew a clean line of stitches about 1/8-inch from the top edge of the box. This not only looks beautiful and professional but also keeps the lining from rolling upward and helps the box hold its structural shape. Press the entire box one last time with a heavy iron to give it a crisp, store-bought finish.
4. Maintenance and Creative Variations for Your Fabric Box – Pattern
Once you have mastered the basic Fabric Box – Pattern, you can begin exploring creative variations to suit different needs. You might consider adding a quilted texture by sewing decorative lines across the fabric before assembly. This adds another layer of sophistication and extra rigidity, making the box feel even more substantial and high-end.
For those using the Fabric Box – Pattern for nursery organization or bathroom storage, using laminated cotton or oilcloth for the lining is a brilliant modification. This makes the interior of the box waterproof and easy to wipe clean, protecting the outer decorative fabric from spills or dampness. It turns a standard craft project into a highly practical utility item.
Sizing adjustments are another way to keep the Fabric Box – Pattern interesting. You can make tiny versions to hold jewelry or hair ties, or massive versions to serve as laundry hampers or toy chests. The mathematical logic remains the same: simply scale up your rectangles and corner cut-outs to achieve the desired volume and dimensions for your specific space.
Maintaining your Fabric Box – Pattern is relatively simple if you chose your materials wisely. Most fabric boxes can be spot-cleaned with a damp cloth and mild soap. If the box loses its shape over time due to heavy use, a quick hit with a steam iron will often reactivate the interfacing and restore the crisp walls to their original glory.
Think about gifting these boxes! A Fabric Box – Pattern makes for an incredible eco-friendly gift wrap. Instead of a paper bag that gets thrown away, the “packaging” becomes part of the gift itself. You can even personalize them by using embroidery to add names or initials to the front panel before you sew the pieces together, creating a heartfelt and useful memento.
As you continue your journey with the Fabric Box – Pattern, don’t be afraid to mix and match different scrap fabrics. This project is the ultimate “scrap buster,” allowing you to combine leftover pieces from various quilting or garment projects into a cohesive, patchwork design. It is a sustainable way to sew, ensuring that no beautiful fabric goes to waste while keeping your home perfectly organized.
FAQ – Frequently Asked Questions
What is the best interfacing to make a Fabric Box – Pattern stay upright?
For a box that truly stands on its own, use a heavyweight fusible fleece or a stiff stabilizer like Peltex. If you want a softer but still structured look, a double layer of woven fusible interfacing can also work. The choice depends on how “crisp” you want the final corners of your box to appear.
Can I wash a box made with a Fabric Box – Pattern in the machine?
It is generally not recommended to machine wash fabric boxes that have heavy interfacing, as the agitation can cause the stabilizer to separate from the fabric (delamination) or lose its stiffness. Spot cleaning is the safest method. If you must wash it, use a delicate cycle and air dry it immediately while stuffed with towels to maintain the shape.
How do I choose the right needle for sewing through thick layers?
When sewing a Fabric Box – Pattern, you are often going through four layers of fabric and two layers of interfacing at the seams. A 100/16 needle is usually strong enough to pierce these layers without bending. If your machine is struggling, try using a “walking foot” to help feed the thick layers through evenly.
How do I calculate the size of the corner cut-out for my Fabric Box – Pattern?
The square you cut out of the corner will be exactly half the width of the bottom of the box. For example, if you want a box that is 6 inches wide at the base, you need to cut out a 3-inch square from each bottom corner. This formula allows you to easily draft your own custom sizes from scratch.
Why is my lining always baggy inside my Fabric Box – Pattern?
This happens because the lining sits inside the exterior fabric, occupying slightly less space. To fix this, try cutting your lining pieces about 1/8-inch smaller than your exterior pieces. This small adjustment will ensure the lining fits snugly against the outer walls without any awkward bunching or excess fabric.
Is the Fabric Box – Pattern a good project for selling at craft fairs?
Absolutely! Because they are quick to make and highly functional, fabric boxes are very popular items at markets. You can sell them in sets of three (small, medium, large) to increase your average sale. Using trendy fabric prints and adding high-quality labels can help you command a premium price for your work.
Conclusion
In this guide, we have explored the entire process of creating a durable and stylish organizer using a Fabric Box – Pattern. We discussed the importance of selecting heavy-duty fabrics and the correct interfacing to provide structure, the precision required during the cutting phase, and the technical steps of boxing corners and topstitching for a professional finish. By mastering these techniques, you can transform simple fabric into custom storage solutions that enhance any room in your home while showcasing your unique sewing style.
The Fabric Box – Pattern is more than just a sewing project; it is a gateway to organized living and a fantastic way to utilize your fabric remnants. Whether you are making them for yourself or as gifts for loved ones, the skills you have learned here will serve as a foundation for many more complex sewing adventures.