Creating a Fabric Wrist Rest- Pattern is one of the most rewarding quick-sew projects you can undertake to improve your daily ergonomic setup. Many of us spend hours at a desk, and providing your joints with a soft, supportive cushion can make a world of difference in preventing strain and fatigue. By choosing to make your own version, you gain the ability to customize the height, firmness, and aesthetic to perfectly match your workspace and personal comfort needs.
This DIY Fabric Wrist Rest- Pattern is designed to be accessible for beginners while offering enough professional detail to satisfy experienced sewists. Using simple cotton remnants or upcycled denim, you can construct a durable accessory that looks far better than mass-produced plastic alternatives. The beauty of this project lies in its utility; it serves as a functional tool for your health while acting as a canvas for your favorite quilt blocks or fabric prints.
When you follow a well-structured Fabric Wrist Rest- Pattern, you ensure that the finished product has the correct proportions to support the median nerve and carpal tunnel area. Selecting the right filling, such as organic flaxseeds or poly-fill, allows you to determine if you want a weighted feel or a pillowy soft touch. In the following guide, we will break down the essential steps to help you master this sewing tutorial and create a professional-grade office accessory.
1. Selecting the Best Materials for Your Fabric Wrist Rest- Pattern
Choosing high-quality textiles is the first step in ensuring your Fabric Wrist Rest- Pattern yields a long-lasting result. Natural fibers like 100% cotton or linen are ideal because they are breathable against the skin and can withstand frequent use without fraying. If you are looking for a more sustainable approach, consider using fabric scraps from previous patchwork projects to create a unique, eco-friendly design.
The structural integrity of your Fabric Wrist Rest- Pattern depends heavily on the weight of the fabric you select. Medium-weight woven fabrics provide the necessary tension to hold the filling in place without bulging or leaking. Avoid using stretchy knits, as they tend to lose their shape over time, which defeats the ergonomic purpose of providing consistent support for your wrists during typing.
In addition to the exterior shell, the choice of interfacing can enhance the professional finish of your work. Applying a light layer of fusible fleece to the wrong side of your fabric creates a smooth, padded texture that feels premium to the touch. This extra step ensures that the grains of your filling—whether you use rice, buckwheat hulls, or plastic pellets—don’t create unsightly lumps on the surface.
The filling is the “soul” of any Fabric Wrist Rest- Pattern, and it determines the overall sensory experience. Dried lavender or essential oil-infused beads can be added to the mix to provide a calming aromatherapy effect while you work. If you prefer a more rigid support, clean play sand or heavy beads work wonders, whereas polyester fiberfill offers a cloud-like sensation for those who prefer minimal pressure.
Don’t forget the importance of choosing a strong, all-purpose polyester thread that matches your fabric color. Since the seams will be under constant pressure from your arms resting on them, a tight stitch length is crucial for durability. Using a rotary cutter and a self-healing mat will also help you achieve the precise rectangular cuts required for a symmetrical and balanced ergonomic tool.
Finally, consider adding a non-slip backing to your Fabric Wrist Rest- Pattern to keep it from sliding across your desk. Materials like suede, faux leather, or even small dots of silicone fabric glue can provide the necessary grip. This attention to detail transforms a simple sewing craft into a high-end ergonomic accessory that competes with top-tier retail brands.
2. Essential Cutting and Preparation Steps for Success
Before you begin sewing your Fabric Wrist Rest- Pattern, you must prepare your workspace and ensure all fabric is pre-washed and pressed. Pre-washing is a critical SEO-friendly sewing tip because it prevents the finished rest from shrinking or warping if you ever need to spot-clean it later. A crisp, flat piece of fabric allows for much more accurate measurements and cleaner seam allowances during the assembly phase.
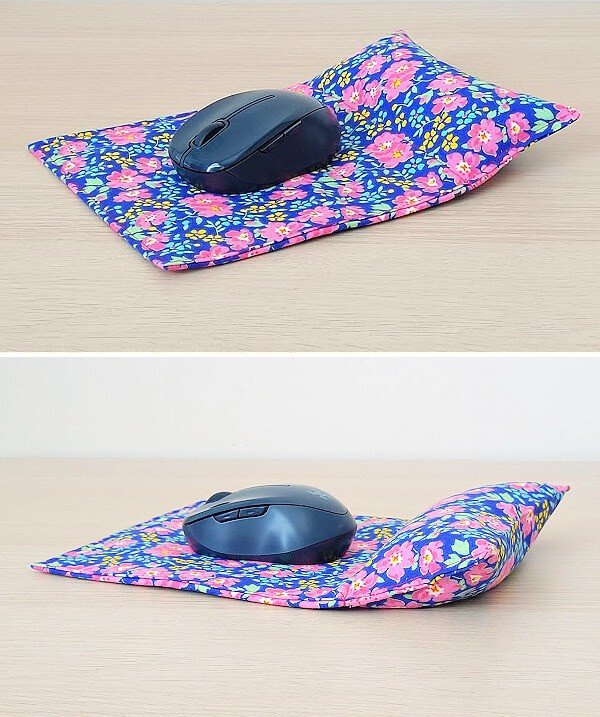
To execute the Fabric Wrist Rest- Pattern correctly, you will typically need two rectangular pieces of fabric measuring approximately 4 inches by 18 inches for a standard keyboard. If you are making a version for a computer mouse, a smaller 4-inch by 6-inch square is usually sufficient. Using a quilting ruler ensures that your corners are perfectly 90 degrees, which is vital for a professional look.
Marking your seam allowances is a step that many beginners skip, but it is vital for the Fabric Wrist Rest- Pattern to stay true to size. Use a water-soluble fabric pen or tailor’s chalk to mark a 1/2-inch border around the edges of your fabric. This guide will help you maintain a straight line on your sewing machine, ensuring that the internal volume of the rest remains consistent from end to end.
If you are incorporating patchwork blocks into your design, assemble those pieces first before cutting them to the final dimensions. A Log Cabin or Flying Geese motif can add a beautiful visual element to the top of your wrist rest. Ensure all seams are pressed open or to the side to reduce bulk, which makes the final topstitching much easier to manage around the corners.
The preparation stage is also the best time to consider if you want a removable cover for your Fabric Wrist Rest- Pattern. If you plan on using organic fillings like rice or flaxseed, creating an inner muslin pouch is highly recommended. This allows you to wash the decorative outer cover without damaging the organic material inside, significantly extending the lifespan of your handmade gift.
Once your pieces are cut and marked, pin them with the right sides facing together, ensuring the edges are perfectly aligned. Leave a small 2-inch gap in the middle of one long side; this opening is where you will turn the fabric right side out and later insert your filling. Taking your time during this prep work ensures that the final assembly of your Fabric Wrist Rest- Pattern is smooth and frustration-free.
3. Step-by-Step Sewing Instructions for Your Wrist Rest
Start by securing your thread with a few backstitches at the edge of the 2-inch opening you left in your Fabric Wrist Rest- Pattern. Sew all the way around the perimeter, pivoting carefully at each corner by leaving the needle down and lifting the presser foot. This technique, known as pivoting, creates sharp, clean corners that define the professional silhouette of your ergonomic cushion.
Once the perimeter is sewn, clip the excess fabric at the corners—being careful not to cut through your stitches—to reduce bulk. Turning the Fabric Wrist Rest- Pattern right side out through the small opening is a satisfying moment where the project truly starts to take shape. Use a point turner or a dull knitting needle to gently push out the corners so they look crisp and defined.
Now it is time to fill your Fabric Wrist Rest- Pattern with your chosen material. If you are using a funnel, the process becomes much cleaner and faster, preventing seeds or beads from scattering across your sewing room. Fill the rest until it is firm but still has enough “give” to contour to the shape of your wrists, usually filling it about 3/4 of the way for optimal comfort.
After filling, you must close the opening with a ladder stitch or a very close edge-stitch on your machine. The ladder stitch, also known as an invisible stitch, is the preferred method for high-quality Fabric Wrist Rest- Pattern results because it hides the thread completely. This hand-sewing technique ensures that there are no rough edges or visible seams that might irritate your skin during use.
If you choose to machine-stitch the opening closed, make sure to push the filling away from the needle path to avoid breaking your needle. A topstitching finish around the entire edge can add a decorative touch and extra durability to the seams. This step is often seen in professional sewing patterns as it provides a tailored look that mimics high-end office boutique products.
Finally, give your completed Fabric Wrist Rest- Pattern a light steam press to set the seams and settle the filling. Be careful not to use too much heat if you have used plastic pellets as a filler, as they could melt. Your custom-made ergonomic support is now ready to be placed on your desk, providing you with immediate relief and a stylish upgrade to your computer workstation.
4. Customizing and Sharing Your Fabric Wrist Rest- Pattern
One of the best aspects of the Fabric Wrist Rest- Pattern is how easily it can be adapted for different styles and needs. You can experiment with fussy cutting your fabric to highlight a specific character or floral motif in the center of the rest. This level of personalization makes the project an excellent choice for handmade holiday gifts for coworkers, students, or fellow gamers.
For those who enjoy embroidery, adding a monogram or a small botanical design to the top fabric before sewing can elevate the Fabric Wrist Rest- Pattern significantly. Using contrasting thread colors for your topstitching can also create a modern, “industrial” look that fits well with tech-heavy setups. The possibilities for creative expression are virtually limitless when you use a basic pattern as your foundation.
If you are a content creator, documenting your process of making this Fabric Wrist Rest- Pattern is a great way to engage your audience. Take high-resolution photos of the fabric selection, the sewing process, and the final product in a styled office setting. Sharing these visuals on platforms like Pinterest or Instagram helps other makers find inspiration and improves your own digital footprint in the fiber arts community.
You might also consider making a “travel-sized” version of the Fabric Wrist Rest- Pattern for use with laptops in coffee shops or libraries. By simply scaling down the dimensions, you can create a portable cushion that fits easily into a laptop bag. This versatility is why many sewists return to this specific tutorial whenever they have attractive fabric scraps left over from larger quilts.
Consider the seasonal potential of this project as well; use festive prints for the holidays or cool, linen fabrics for the summer months. You can even create a “weighted” version of the Fabric Wrist Rest- Pattern by using heavy glass beads, which some users find helps with sensory grounding and focus. Each variation you create adds to your skill set and allows you to refine your sewing techniques.
Ultimately, the success of your Fabric Wrist Rest- Pattern project comes down to the joy of making something functional with your own hands. Encouraging others to try this project fosters a sense of community and promotes the benefits of ergonomic wellness and DIY culture. Whether you make one for yourself or a dozen for a craft fair, this pattern is a staple for any modern sewist’s library.
FAQ: Everything You Need to Know About the Fabric Wrist Rest- Pattern
What is the best filling for a DIY fabric wrist rest?
The best filling depends on your preference for weight and scent. Organic options like flaxseed, rice, or buckwheat hulls are popular because they drape well and can be heated in the microwave for a warm compress. If you want a washable option, use plastic poly-pellets or heavy-duty polyester fiberfill.
Can I make this pattern if I am a complete beginner?
Absolutely! This Fabric Wrist Rest- Pattern is one of the easiest projects for beginners because it only requires straight-line sewing and basic measuring. It is a fantastic way to practice your seam allowances and learn how to turn and stuff a 3D object.
How do I clean my fabric wrist rest?
If you used a permanent filling like rice or seeds, you should only spot clean the surface with a damp cloth. However, if you sew a “cover” version of the Fabric Wrist Rest- Pattern, you can simply remove the inner pouch and toss the outer fabric shell into the washing machine with your regular laundry.
What size should a standard keyboard wrist rest be?
A standard full-sized keyboard usually requires a rest that is 17 to 18 inches long. For a “tenkeyless” keyboard (one without the number pad), 14 inches is standard. The height should be around 1 to 1.5 inches to keep your wrists in a neutral position while typing.
Is a fabric wrist rest better than a gel one?
Many users prefer a Fabric Wrist Rest- Pattern because fabric is more breathable and doesn’t get “sweaty” like plastic or gel. Additionally, fabric rests can be customized for firmness and aesthetic, whereas gel rests are often one-size-fits-all and can leak over time.
Conclusion
In this article, we have explored the comprehensive process of creating your own Fabric Wrist Rest- Pattern, from selecting the most durable materials to the final finishing stitches.
We discussed how choosing the right 100% cotton fabric and appropriate fillings like flaxseed can transform your workspace into an ergonomic haven. By following these steps, you now have the knowledge to create a professional, stylish, and highly functional accessory that protects your health and showcases your creative flair.