Finding a high-quality Tea Bag Wallet – Pattern is a game-changer for tea enthusiasts who want to carry their favorite blends with elegance and organization. Whether you are heading to a business meeting, a picnic, or simply want to keep your purse tidy, a handmade tea bag wallet offers a stylish solution to the problem of crushed or lost tea packets. This project is a perfect entry point for those looking to practice precision sewing and fabric folding techniques while creating something truly functional.
The beauty of a Tea Bag Wallet – Pattern lies in its versatility and the minimal amount of fabric scraps required to bring it to life. Using cotton fabric and a bit of lightweight interfacing, you can construct a durable accessory that holds multiple tea bags securely. Many crafters enjoy personalizing these wallets with embroidery, decorative buttons, or elastic closures, making each piece a unique work of art that reflects the maker’s personality.
In this comprehensive guide, we will explore the essential steps to master the Tea Bag Wallet – Pattern, ensuring your finished product is both professional and sturdy. By following SEO-optimized sewing tutorials, you can improve your skills while producing gifts that friends and family will cherish. Let’s dive into the materials, measurements, and assembly techniques needed to create your very own portable tea organizer today.
1. Choosing the Right Materials for Your Tea Bag Wallet – Pattern
To achieve the best results with your Tea Bag Wallet – Pattern, selecting the right textiles is the first critical step. A 100% cotton fabric is highly recommended because it is easy to press, holds its shape well, and comes in endless vibrant prints. Since this is a small-scale project, you can often use fat quarters or leftover pieces from your quilting stash.
Beyond the main fabric, you will need a fusible interfacing to provide the necessary structure. Without this, your sewn tea wallet might feel flimsy and fail to protect the delicate tea bags inside. A mid-weight interfacing ensures that the pockets remain crisp and accessible even after frequent use in a busy handbag or backpack.
Don’t forget the importance of high-quality sewing thread and a sharp universal needle. Since you will be sewing through multiple layers of fabric and interfacing, using a polyester or cotton-wrapped thread ensures the seams are strong. Matching the thread color to your fabric design adds a professional touch to the final aesthetic of the wallet.
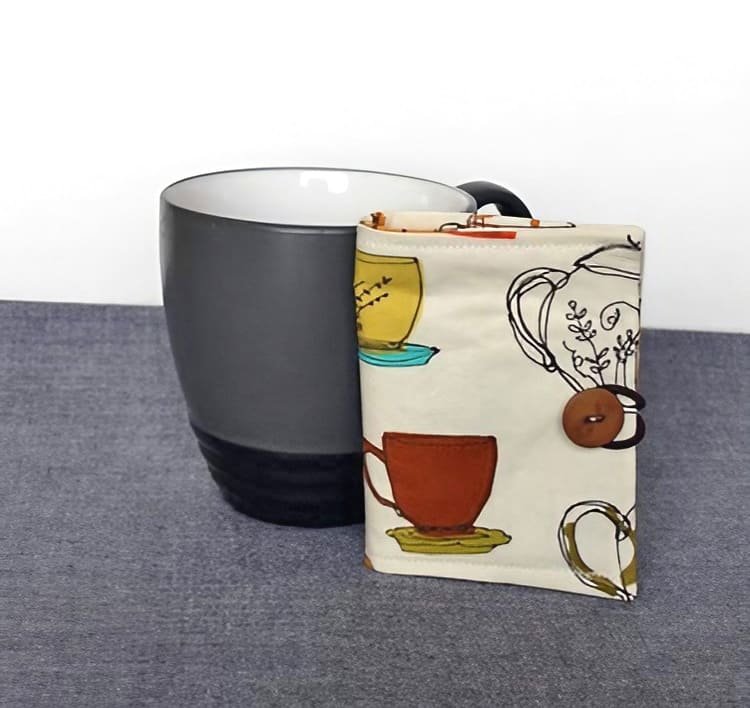
The closure system is another vital component of the Tea Bag Wallet – Pattern. You can choose between a magnetic snap, a velcro strip, or a simple elastic loop and button. Each option changes the look of the finished accessory, so consider who will be using the wallet and how much bulk you want to add.
In addition to the fabric and closures, having the right sewing notions on hand will make the process much smoother. A rotary cutter, a self-healing mat, and a clear acrylic ruler are essential for making the precise cuts required for this geometric sewing project. Accuracy at this stage prevents alignment issues during the final assembly.
Finally, consider adding a personalized label or a small fabric charm to your project. These tiny details elevate the Tea Bag Wallet – Pattern from a simple craft to a boutique-quality item. If you are making these for a craft fair or an Etsy shop, these branding elements are crucial for customer recognition and value.
2. Accurate Cutting and Preparation Techniques
Precision is the hallmark of a successful Tea Bag Wallet – Pattern. Before you even touch your sewing machine, ensure your fabric is pre-washed and ironed to remove any wrinkles or potential shrinkage. Cutting your fabric rectangles according to the specific dimensions of the pattern template ensures that the pockets will perfectly fit standard-sized tea envelopes.
When applying the fusible interfacing, always follow the manufacturer’s instructions regarding heat and steam. Bonding the interfacing to the wrong side of the fabric creates a stable base that makes the subsequent folding and stitching much easier. This step is non-negotiable if you want a DIY tea wallet that looks professional and stands the test of time.
Use your fabric marking pen to denote where the fold lines will be. In a Tea Bag Wallet – Pattern, the interior is often created using an accordion fold or a series of layered pockets. Marking these points accurately ensures that the pockets are symmetrical and that the wallet closes evenly without any awkward bulging on one side.
If your fabric print is directional, pay close attention to the orientation before cutting. There is nothing more frustrating than finishing a beautiful sewing project only to realize your floral pattern or animal print is upside down on the back of the wallet. Take a moment to visualize the folded construction before making your final cuts with the rotary blade.
Once your pieces are cut, it is helpful to stay-stitch the edges if your fabric tends to fray easily. While the seam allowances in a Tea Bag Wallet – Pattern are usually small, keeping the edges neat during the handling process ensures that your seam lines remain accurate. Preparation is 90% of the work in high-end textile crafting.
Lastly, organize your pieces into piles: outer fabric, lining fabric, and pocket strips. Having a clear workspace allows you to focus on the technical assembly without getting distracted by clutter. This organized approach is a favorite tip among professional seamstresses who specialize in small fabric accessories and handheld organizers.
3. Step-by-Step Assembly and Pocket Construction
The most exciting part of the Tea Bag Wallet – Pattern is watching the pockets take shape. To create the interior compartments, you will typically fold a long strip of fabric in a zigzag or accordion style. Pressing each fold with a hot iron is essential; the “memory” of the fold helps the fabric stay in place while you navigate the sewing machine foot.
Once the folds are pressed, you will perform topstitching along the upper edges of the pockets. This not only adds a decorative element but also reinforces the areas that will experience the most wear and tear. Using a slightly longer stitch length for topstitching can provide a cleaner, more industrial look to your handmade wallet.
Basting the folded pockets to the lining fabric is a smart move before the final assembly. By securing the sides within the seam allowance, you prevent the layers from shifting when you attach the outer shell. This technique is a staple in advanced sewing tutorials for ensuring that all interior elements remain perfectly aligned.
When joining the outer fabric and the lining, place them right sides together. You will sew around the perimeter, leaving a small opening for turning the project right-side out. It is important to clip the corners of your Tea Bag Wallet – Pattern to reduce bulk, allowing for sharp, crisp points once the wallet is turned and pressed.
After turning the wallet through the opening, use a point turner or a blunt chopstick to gently push out the corners. Be careful not to poke through the fabric. Once the wallet is turned, give it a final, heavy press with steam. This sets the shape and prepares the piece for the final closing stitch.
The last step in the construction of your Tea Bag Wallet – Pattern is to topstitch around the entire outer edge. This decorative stitch serves a dual purpose: it closes the turning gap and gives the wallet a tailored, high-end finish. At this point, you can also attach your button or snap to complete the functional design.
4. Customizing Your Design for Gift-Giving and Profit
One of the reasons the Tea Bag Wallet – Pattern is so popular in the crafting community is the ease of customization. You can easily adapt the dimensions to create a larger carrier for more tea bags or a slimline version for just two or three favorites. Adding a small zippered pocket on the back can even turn it into a coin purse combo.
For those who love mixed media, consider combining your sewing skills with crochet edging or beadwork. Applying a crochet lace trim to the edges of the pockets adds a vintage charm that appeals to many collectors. These unique touches make your Tea Bag Wallet – Pattern stand out in a crowded market of mass-produced accessories.
If you are gifting the wallet, consider including a selection of organic herbal teas or specialty infusions inside the pockets. This transforms a simple sewn item into a thoughtful, curated gift set. It is an excellent idea for Mother’s Day, teacher gifts, or as a “get well soon” gesture for a tea-loving friend.
For entrepreneurs, the Tea Bag Wallet – Pattern is a low-overhead product with a high perceived value. Because it uses small amounts of material, your profit margins can be quite high. Focus on creating seasonal collections, such as cozy flannels for winter or bright linens for spring, to keep your inventory fresh and appealing.
Don’t forget to photograph your finished projects in natural light to showcase the texture and colors of the fabric. High-quality imagery is essential for SEO ranking on platforms like Pinterest and Instagram. Sharing your creative process and the finished Tea Bag Wallet – Pattern helps build a community around your digital publishing and crafting brand.
Ultimately, the goal of mastering this sewing pattern is to enjoy the process of creation. Whether you are making one for yourself or a hundred for a local market, the Tea Bag Wallet – Pattern offers a satisfying blend of utility and beauty. Keep experimenting with different fabric combinations and techniques to refine your signature style in the world of fiber arts.
FAQ – Frequently Asked Questions
What is the best fabric for a Tea Bag Wallet – Pattern?
The most reliable choice is quilting-weight cotton. It is durable, easy to sew, and comes in various patterns. You should also use lightweight fusible interfacing to give the wallet the necessary structure.
How many tea bags does a standard wallet hold?
A typical Tea Bag Wallet – Pattern is designed to hold between 4 and 6 standard-sized tea envelopes. However, you can easily modify the number of pockets to hold more if desired.
Is this project suitable for beginners?
Yes! The Tea Bag Wallet – Pattern is an excellent project for beginners. It involves straight lines and basic folding, making it a great way to practice sewing accuracy without needing complex garment construction skills.
Can I wash my handmade tea wallet?
If you use 100% cotton and quality interfacing, you can gently hand wash the wallet or use a delicate machine cycle. It is best to air dry and then give it a quick press with an iron to restore its shape.
What can I use instead of a button for the closure?
If you prefer not to sew buttonholes, you can use kam snaps, magnetic closures, or even a ribbon tie. Each closure type provides a different aesthetic and level of security for the tea bag organizer.
How long does it take to sew one wallet?
Once you have the fabric cut and interfaced, the actual sewing process for a Tea Bag Wallet – Pattern usually takes between 30 and 45 minutes, making it a perfect afternoon craft project.
Conclusion
In this article, we have covered everything you need to know about creating a professional and stylish Tea Bag Wallet – Pattern. From selecting the finest cotton fabrics and fusible interfacing to mastering the accordion fold and final topstitching, you now have the blueprint for a successful project. We discussed how precision cutting and proper preparation are the keys to a crisp, high-quality finish that rivals boutique items.
We also explored various ways to customize your handmade tea accessory, whether through decorative embellishments or functional modifications like adding extra pockets. This project is not only a fantastic way to use up your fabric scraps but also a wonderful opportunity to create meaningful, personalized gifts or even start a small craft business.