The Tunisian stitch leaf blanket – Pattern is a breath of fresh air for any fiber artist looking to combine the structural integrity of crochet with the fluid elegance of knitting. This specific crochet technique creates a stunning, embossed botanical effect that looks far more complex than it actually is, making it a favorite for those who want to create heirloom-quality pieces. By mastering the Tunisian stitch leaf blanket – Pattern, you aren’t just making a blanket; you are crafting a texture-rich masterpiece that captures the organic beauty of nature through rhythmic, meditative stitches.
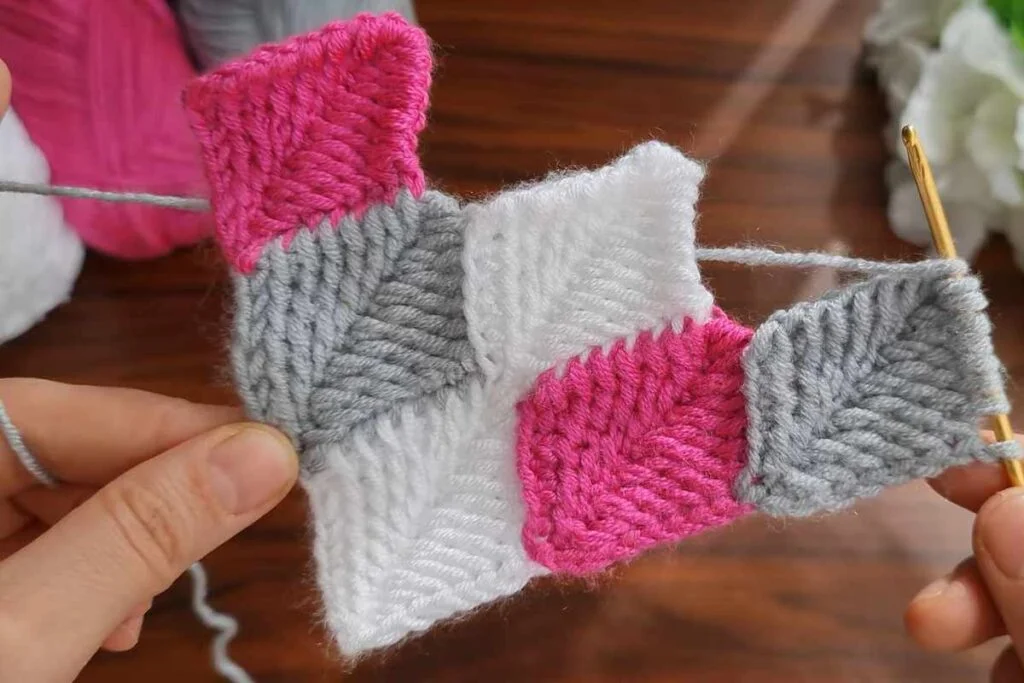
If you are unfamiliar with this style, the Tunisian stitch leaf blanket – Pattern relies on the unique mechanics of Tunisian crochet, often called “Afghan crochet.” Unlike standard crochet, you keep multiple loops on a long hook, working a forward pass to pick up stitches and a return pass to close them. This creates a dense, warm fabric that serves as the perfect canvas for the 3D leaf motifs that define this design. The leaf blanket pattern is particularly popular because it uses strategic increases and decreases to form the “veins” and “edges” of the foliage directly into the rows.
One of the most rewarding aspects of starting a Tunisian stitch leaf blanket – Pattern is the versatility it offers in terms of yarn choice and color palettes. Whether you opt for a monochromatic forest green to lean into the botanical theme or a variegated yarn that mimics the changing colors of autumn, the Tunisian leaf stitch remains the star of the show. This guide will walk you through the essential components of the Tunisian stitch leaf blanket – Pattern, ensuring you have the technical knowledge and the creative inspiration to complete your project with professional results.
1. Understanding the Foundation of the Tunisian Stitch Leaf Blanket – Pattern
The Tunisian stitch leaf blanket – Pattern begins with a solid understanding of the Tunisian Simple Stitch (TSS). This foundation is crucial because the decorative leaves are built upon this grid-like structure. Before you dive into the complex curves of the leaves, you must ensure your tension is consistent, as Tunisian crochet has a natural tendency to curl if the stitches are too tight.
To achieve the best results with your Tunisian stitch leaf blanket – Pattern, choosing the right Tunisian crochet hook is non-negotiable. You will need a hook with a long cable (often called a cabled Tunisian hook) to accommodate the large number of stitches required for a full-sized crochet blanket. Using a hook that is one or two sizes larger than what the yarn label recommends is a pro tip to keep the fabric supple.
The “leaf” element in the Tunisian stitch leaf blanket – Pattern is created using a technique known as short rows or localized increases. By working only a few stitches and then returning, you create a bulge in the fabric that eventually takes the shape of a pointed leaf. This textured crochet method adds a layer of sophistication that standard stitches simply cannot replicate.
In this Tunisian stitch leaf blanket – Pattern, the leaf design is typically arranged in a staggered or repeating grid. This means you will be alternating between “background” stitches and “pattern” stitches. Understanding how to read a crochet chart or a written Tunisian pattern is vital here, as it helps you track where each leaf begins and ends within the wider rows.
Another key term to remember while working on your Tunisian stitch leaf blanket – Pattern is the Return Pass (RP). Every row in this pattern consists of two distinct movements. The return pass is where you “lock” your leaf shapes into place. It’s a rhythmic process of yarn-overs and pulling through loops that becomes second nature once you find your flow.
Finally, the Tunisian stitch leaf blanket – Pattern thrives on high-quality worsted weight yarn or aran yarn. These weights provide the necessary definition to make the leaf veins pop. If the yarn is too thin, the leaf structure might look flimsy; if it’s too thick, the blanket becomes overly heavy and loses its graceful drape.
2. Essential Tools and Materials for the Tunisian Leaf Design
When embarking on a Tunisian stitch leaf blanket – Pattern, your primary tool is the cabled Tunisian crochet hook. Unlike a standard hook, this tool has a stopper at the end of a flexible cord, allowing you to hold hundreds of stitches at once. For a standard leaf pattern blanket, a 6.0mm or 6.5mm hook is usually the “sweet spot” for most medium-weight yarns.
The choice of fiber content is equally important for the Tunisian stitch leaf blanket – Pattern. Acrylic blends are excellent for durability and ease of washing, while wool blends offer superior warmth and “bounce,” which helps the leaf motifs maintain their 3D shape over time. Natural fibers like cotton can be used, but they lack the elasticity often desired for Tunisian stitches.
You will also need a generous supply of stitch markers. In a complex Tunisian stitch leaf blanket – Pattern, it is very easy to lose track of where a leaf increase starts. Placing a marker at the center stitch of each leaf will save you hours of “frogging” (ripping back) your work. These little tools act as your roadmap through the botanical crochet landscape.
Don’t forget a tapestry needle for weaving in ends. Because the Tunisian stitch leaf blanket – Pattern involves structural changes to create the leaves, you may find yourself joining new balls of yarn more frequently than usual. A sturdy needle ensures your ends are tucked away securely, maintaining the seamless look of your handmade blanket.
Blocking tools are the secret weapon for any Tunisian stitch leaf blanket – Pattern. Because this technique creates a thick fabric, wet blocking is essential to open up the stitches and flatten the edges. You’ll need blocking mats and T-pins to stretch your finished leaf blanket into its final, perfect dimensions, highlighting the intricate leaf veins.
Lastly, consider a row counter. The Tunisian stitch leaf blanket – Pattern is often repetitive, but a single missed row can throw off the symmetry of the leaves. Whether it’s a digital app or a physical clicker, keeping track of your progress ensures that every leaf on your crochet project looks identical to the last.
3. Step-by-Step Guide to Creating the Leaf Motif
To start the actual leaf in your Tunisian stitch leaf blanket – Pattern, you will typically work into the vertical bars of the previous row. The “leaf growth” begins with a yarn over (YO) and an increase in a single stitch. This creates the base of the leaf, which will gradually widen as you progress through the pattern instructions.
As you move up the rows of the Tunisian stitch leaf blanket – Pattern, you will perform Tunisian Knit Stitches (TKS) inside the leaf area. The knit stitch provides a smooth, flat texture that contrasts beautifully against the surrounding Tunisian Simple Stitches. This contrast is what makes the leaf pattern appear to “sit” on top of the blanket.
Decreasing is the next phase in the Tunisian stitch leaf blanket – Pattern. To create the pointed tip of the leaf, you will use Tunisian Two Together (Tss2tog). This slants the edges inward. Mastering these decreases is essential for a sharp, realistic leaf shape that characterizes the Tunisian leaf stitch blanket.
The mid-rib of the leaf in your Tunisian stitch leaf blanket – Pattern can be emphasized by using a twisted stitch or a surface slip stitch after the row is completed. Some patterns integrate this directly into the forward pass, while others prefer a post-production embroidery approach to give the crochet leaves extra definition and depth.
Consistency in your Return Pass is what gives the Tunisian stitch leaf blanket – Pattern its structural integrity. If you pull your loops too tight during the return, the leaf will pucker. Aim for a relaxed, even tension so that the leaf lies flat within the surrounding fabric, creating a professional-grade crochet leaf texture.
Once a single leaf is completed in the Tunisian stitch leaf blanket – Pattern, you will usually work a few rows of plain Tunisian stitches before starting the next set. This “negative space” is just as important as the leaves themselves, as it prevents the design from looking cluttered and allows the ornate crochet pattern to breathe.
4. Tips for Perfecting Your Tunisian Blanket Edges
One common challenge with the Tunisian stitch leaf blanket – Pattern is the “side curl.” To combat this, many makers add a border of standard crochet, such as the Single Crochet (SC) or Crab Stitch. A sturdy border provides a frame for your leaf design and ensures the blanket stays rectangular and flat on your bed or sofa.
Maintaining a clean “last stitch” is vital for the Tunisian stitch leaf blanket – Pattern. Always insert your hook through both loops of the edge stitch on the forward pass. This creates a neat, braided appearance along the vertical sides of your Tunisian blanket, making it much easier to attach a border later if you choose to do so.
If you find that your Tunisian stitch leaf blanket – Pattern is leaning to one side (slanting), it’s often due to the way the return pass is worked. Make sure you aren’t accidentally adding or skipping stitches at the beginning of the row. Counting your stitches every few rows is a simple SEO-friendly crochet tip that prevents long-term frustration.
Color changes can elevate a Tunisian stitch leaf blanket – Pattern from simple to sublime. Try changing yarn colors on the last loop of the Return Pass. This creates a clean transition, allowing you to have leaves in one color and the background in another, a technique often called Tunisian Intarsia or Colorwork.
To add a touch of luxury to your Tunisian stitch leaf blanket – Pattern, consider a fringe or tassels. These embellishments complement the organic, earthy feel of the leaf motif. If your blanket is intended for a baby, however, skip the fringe and stick to a secure, scalloped crochet edge for safety.
Finally, remember that the Tunisian stitch leaf blanket – Pattern is a marathon, not a sprint. Because Tunisian rows are shorter in height than standard double crochet, it takes more rows to gain length. Enjoy the process of seeing each crochet leaf bloom under your hook, and you’ll end up with a handmade heirloom that lasts a lifetime.
FAQ: Frequently Asked Questions
1. Is the Tunisian stitch leaf blanket – Pattern suitable for beginners?
While it is helpful to know basic crochet, a determined beginner can certainly tackle this. It is recommended to practice the Tunisian Simple Stitch first before attempting the leaf increases and decreases.
2. How much yarn do I need for a full-sized Tunisian leaf blanket?
Tunisian crochet is known to be a “yarn eater.” For a standard throw, you will likely need between 1,500 to 2,200 yards of worsted weight yarn, depending on how many leaves are included in the pattern.
3. Why does my Tunisian leaf blanket curl so much?
This is a natural characteristic of the stitch. To fix it, use a hook 1-2mm larger than recommended, and ensure you block your finished project. Adding a non-Tunisian border also helps significantly.
4. Can I use a regular crochet hook for this pattern?
Only for small swatches. For a full Tunisian stitch leaf blanket – Pattern, you must use a Tunisian hook with a cable to hold the large number of live loops across the width of the blanket.
5. How do I wash a Tunisian stitch leaf blanket?
It depends on your fiber. If using acrylic, a gentle machine wash is fine. If using wool, hand wash in cool water and lay flat to dry to prevent the leaf motifs from losing their shape.
6. Can I make this blanket in different sizes?
Yes! The Tunisian stitch leaf blanket – Pattern is usually based on a stitch multiple. You can easily adjust the width by adding or subtracting “leaf repeats” in your foundation chain.
Conclusion
Mastering the Tunisian stitch leaf blanket – Pattern is a deeply satisfying journey that bridges the gap between different fiber arts. Throughout this article, we have explored the foundational stitches, the essential tools like the cabled hook, and the specific techniques needed to create realistic 3D leaf motifs.
We also covered the importance of blocking and borders to ensure your handmade blanket looks as professional as possible. By following these steps and using the right materials, you can create a stunning piece of home decor that is both functional and artistic.