The Cat Coaster in Fabric – Pattern is one of the most delightful projects you can undertake if you are looking to combine functionality with an adorable aesthetic. These charming little accessories are not just practical for protecting your furniture from unsightly water rings, but they also add a whimsical touch to your living room or kitchen decor. Whether you are an experienced sewist or a beginner looking for a weekend project, creating a fabric cat coaster allows you to experiment with colors, textures, and small-scale patchwork techniques that bring a unique personality to every piece you make.
When you dive into a Cat Coaster in Fabric – Pattern, you are essentially engaging in a form of creative upcycling or scrap busting. Most of us have a bin filled with beautiful fabric remnants that are too small for a garment but too pretty to throw away; this project is the ultimate solution for those pieces. By using high-quality cotton fabric, you ensure that your coasters are absorbent and durable, making them the perfect companion for your morning coffee or a refreshing iced tea in the afternoon.
Finding the right Cat Coaster in Fabric – Pattern means looking for a design that balances simplicity with character. The beauty of a handmade coaster lies in the details, such as the shape of the ears, the curve of the tail, or the choice of contrasting thread for the whiskers. In this guide, we are going to explore everything you need to know to master this craft, ensuring your final product is professional, SEO-friendly for your blog, and, most importantly, incredibly cute for your home or as a gift.
1. Essential Materials for Your Cat Coaster in Fabric – Pattern
To begin your Cat Coaster in Fabric – Pattern, the first thing you need to gather is high-quality 100% cotton fabric. Cotton is preferred because it handles heat well and is naturally absorbent, which is vital for any drink coaster. You can choose solid colors for a sleek look or vibrant prints to give your cats some extra flair.
Next, you will need some form of insul-bright or cotton batting to place inside the coaster. This middle layer provides the necessary structure and thickness, ensuring that moisture doesn’t seep through to your tabletop. If you are upcycling, old flannel sheets or thick denim scraps can also work as an excellent inner lining for your fabric cat project.
Sharp fabric shears or a rotary cutter are indispensable tools for getting those precise ear shapes. Since this Cat Coaster in Fabric – Pattern involves small curves, having a tool that allows for clean cuts will save you a lot of frustration during the assembly phase. Precision is key when you are working with small-scale sewing patterns.
Don’t forget your embroidery floss or a sturdy polyester thread for the facial details. Adding whiskers, eyes, and a tiny nose is what truly brings the cat coaster to life. You can use a simple backstitch or a satin stitch to create these features, giving each coaster a distinct “expression” that your guests will love.
A reliable sewing machine is standard, but these are small enough that you could easily hand-sew them while watching your favorite show. If using a machine, a walking foot can be very helpful for sewing through the multiple layers of fabric and batting without the layers shifting. This ensures your quilted coaster remains flat and symmetrical.
Finally, have an iron and ironing board nearby. In the world of textile crafts, pressing your seams is the secret to a professional finish. Every time you turn your Cat Coaster in Fabric – Pattern right side out, a quick press will crisp up the edges and make the final topstitching look much cleaner and more intentional.
2. Preparing and Cutting Your Cat Coaster Template
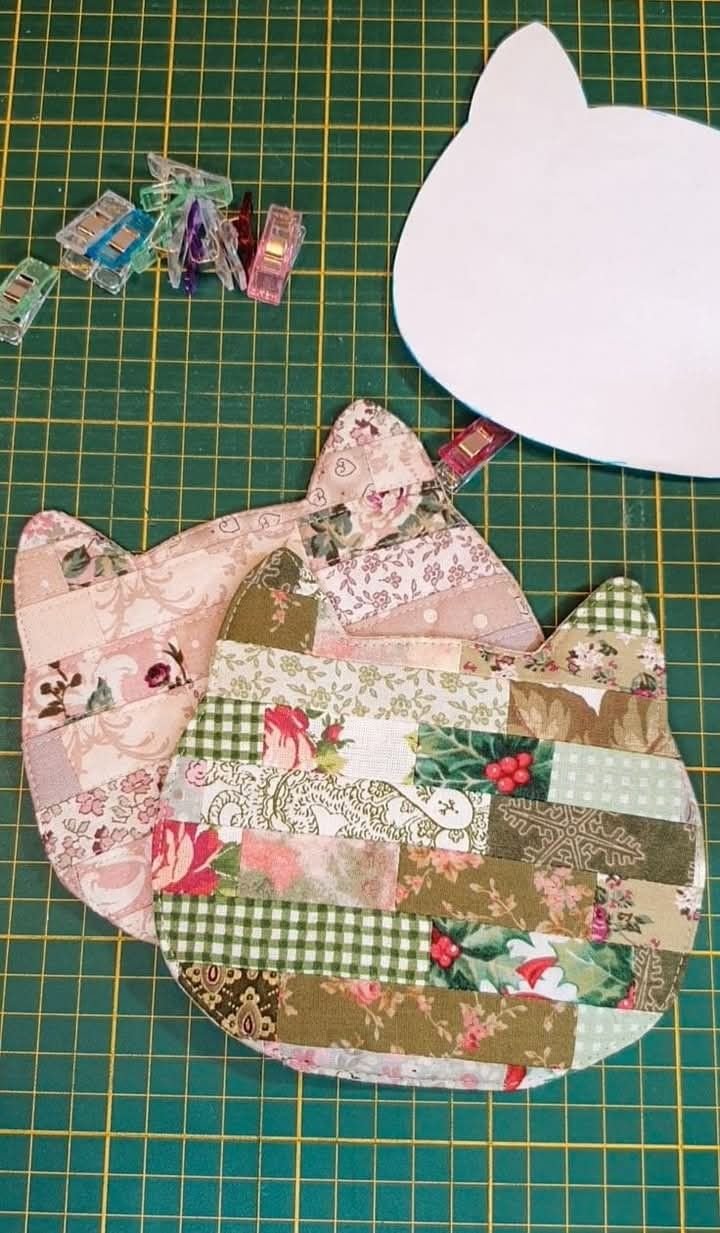
The foundation of a successful Cat Coaster in Fabric – Pattern is a well-proportioned template. You can draw your own cat silhouette or find a printable PDF pattern online. Ensure the main body of the cat is at least 4 to 5 inches wide to accommodate larger mugs, while the ears stay proportional so they don’t flop over.
Once your template is ready, pin it securely to your folded fabric. By cutting two pieces of fabric simultaneously, you ensure that the front and back of your cat coaster match perfectly. If you are using a directional print, pay close attention to the orientation of the fabric so your cats aren’t upside down on the finished product.
You will also need to cut one piece of batting for each coaster using the same template. Some crafters prefer to cut the batting slightly smaller (about 1/4 inch less all around) to reduce bulk in the seam allowance. This technique makes it much easier to turn the Cat Coaster in Fabric – Pattern right side out once it is sewn.
If you want to add a patchwork element, you can piece together different strips of fabric before laying the template down. This scrappy sewing style is very popular in the quilting community and adds a rustic, “shabby chic” vibe to your DIY cat coasters. Just ensure all your seams are pressed flat before cutting the final shape.
Marking the sewing line on the wrong side of the fabric is a helpful tip for beginners. Use a tailor’s chalk or a heat-erasable pen to trace the template. This gives you a clear path to follow with your needle, which is especially important around the tight curves of the cat’s head and ears in this fabric pattern.
Before you start sewing, organize your cut pieces into “sandwiches.” Each coaster should have a back piece (face down), a front piece (face up), and the batting tucked in between or on the bottom depending on your preferred turning method. Keeping your sewing station organized is the best way to maintain a steady creative flow.
3. Sewing Techniques for a Perfect Fabric Finish
When you begin sewing your Cat Coaster in Fabric – Pattern, start along a straight edge—usually the bottom of the cat. Leave a 2-inch gap unsewn; this is the opening you will use to turn the coaster right side out. Use a small stitch length (around 2.0mm) to ensure the curves stay smooth and the seams are strong.
Navigating the ears of the Cat Coaster in Fabric – Pattern requires a bit of patience. When you reach the tip of the ear, leave the needle down in the fabric, lift the presser foot, and pivot the fabric. This “pivot and stitch” method creates sharp, defined points that make your handmade cat look professional and high-quality.
Once the perimeter is sewn, it is time to clip the curves. Use your scissors to make small snips into the seam allowance around the rounded parts of the head, being careful not to cut the stitches. This allows the fabric to spread and lay flat once turned, preventing the Cat Coaster in Fabric – Pattern from looking bunched or distorted.
Turn the coaster right side out through the gap you left at the bottom. Use a point turner or a blunt chopstick to gently push out the ears. Be careful not to push too hard, as you don’t want to pop a stitch. Once turned, give the entire fabric coaster a very thorough press with a hot iron to set the shape.
To close the opening and give the piece a finished look, perform a topstitch around the entire edge. A 1/8-inch edge stitch not only closes the gap but also flattens the edges and adds a decorative border. This is a hallmark of a well-made sewing project and ensures the batting stays in place during future washes.
The final touch is adding the personality! Use your embroidery skills to sew on eyes and whiskers. Some people prefer to do this before sewing the two halves together, while others like to do it at the very end to hide the knots inside the layers. Regardless of when you do it, this is the soul of the Cat Coaster in Fabric – Pattern.
4. Care and Customization for Your Handmade Coasters
Maintenance for your Cat Coaster in Fabric – Pattern is quite simple, provided you used the right materials. Since they are made of cotton, they are generally machine washable. I recommend placing them in a mesh laundry bag and washing on a cold, gentle cycle to preserve the delicate embroidery on the face.
If your coasters get a bit flattened after a wash, a quick steam iron will bring them back to life. Avoid using bleach, especially if you used hand-dyed fabrics or dark colors, as this can cause the “cat” to fade. Proper care ensures that your handmade gift lasts for years as a staple in your home.
Customization is where the Cat Coaster in Fabric – Pattern truly shines. You can vary the size of the template to create “kitten” coasters for smaller glasses or “large cat” trivets for hot teapots. Mixing and matching different fabric textures, like linen or denim, can also create a sophisticated, tactile experience for your coffee table.
For those who love holiday decor, try making themed cats! Use orange and black fabrics for Halloween cat coasters, or festive reds and greens for a Christmas version. Adding a small loop of ribbon between the ears can even turn these into fabric ornaments for your tree, showing the versatility of a single sewing pattern.
If you are making these to sell at craft fairs or on Etsy, consider packaging them in sets of four or six. Tying them together with a bit of bakers twine and a handmade tag adds a premium feel. Buyers love the “story” behind upcycled items, so mention if you used vintage fabrics in your Cat Coaster in Fabric – Pattern.
Lastly, don’t be afraid to experiment with applique. You can sew different colored fabric circles for the eyes or a heart shape on the cat’s chest. The Cat Coaster in Fabric – Pattern is merely a canvas for your creativity; the more you personalize it, the more cherished the final product will be by whoever receives it.
FAQ: Frequently Asked Questions
Which fabric is best for making coasters?
The best choice is 100% cotton or linen. These materials are heat-resistant and absorbent. Avoid synthetic fabrics like polyester for the outer shell, as they may melt if a very hot mug is placed on them and they don’t absorb moisture as well as natural fibers.
Do I need to use batting for a fabric coaster?
Yes, batting or an inner lining is essential. It provides the thickness needed to protect your table from heat and absorbs the “sweat” from cold drinks. Without batting, the Cat Coaster in Fabric – Pattern would be too thin and wouldn’t function effectively as a protective barrier.
Can I make these if I don’t have a sewing machine?
Absolutely! This is a great project for hand sewing. Because the project is small, you can use a basic running stitch or backstitch to assemble the cat. It might take a little longer, but the result is a charming, rustic hand-stitched coaster.
How do I make the whiskers look even?
The best way to ensure symmetry is to use a water-soluble marking pen to draw the whiskers before you start embroidering. Once you are finished with your stitching, a light dab of water will remove the blue or purple lines, leaving only your perfect thread work.
Are these coasters a good project for beginners?
Yes, they are excellent for beginners. The Cat Coaster in Fabric – Pattern teaches basic skills like turning corners, clipping curves, and topstitching. It’s a low-stakes project because it uses very little fabric, making it perfect for practicing your technique.
Conclusion
In this article, we have explored the wonderful world of the Cat Coaster in Fabric – Pattern, covering everything from selecting the right absorbent cotton to the final embroidery details.
We learned how to prepare a template, the importance of using batting for heat protection, and the technical steps of sewing and turning the fabric to achieve a professional look. This project is a fantastic way to practice sustainable crafting by using scraps and creating something both beautiful and functional for your home.