This Chicken Egg Holder Fabric – Tutorial is designed to bring a touch of rustic charm and organizational bliss to your kitchen counter. If you have ever struggled with stray eggs rolling around or simply want a more sustainable and decorative way to store your farm-fresh produce, a handmade fabric egg holder is the ultimate solution. Sewing your own kitchen accessories allows you to customize colors and patterns to match your decor, transforming a functional item into a piece of personalized home art.
In this comprehensive Chicken Egg Holder Fabric – Tutorial, we will explore the step-by-step process of selecting the right materials, cutting precise patterns, and assembling a durable structure. Many home cooks prefer a fabric egg basket over plastic or cardboard because it is washable, eco-friendly, and soft enough to prevent delicate shells from cracking. By the end of this guide, you will have mastered the art of creating a quilted egg caddy that looks like it came straight from a high-end boutique.
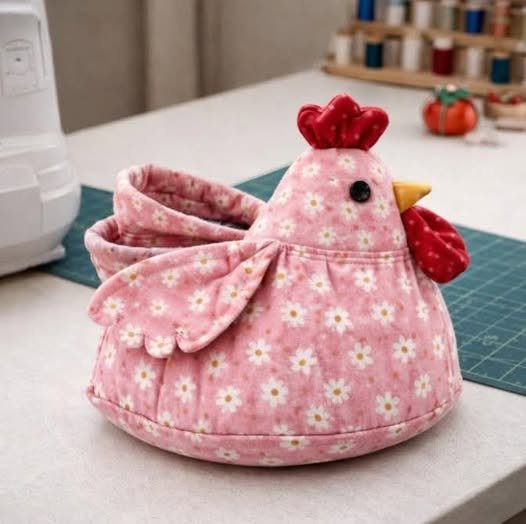
The beauty of following this Chicken Egg Holder Fabric – Tutorial lies in its versatility, as you can adapt the size to hold a half-dozen or a full dozen eggs. We will focus on the “hen” design, a classic motif that evokes a warm, farmhouse feeling, but the technical principles can be applied to any sewing project involving 3D structures. Get your sewing machine ready and prepare your favorite scraps of cotton fabric, because we are about to embark on a creative journey that combines utility with whimsical design.
1. Selecting the Perfect Materials for Your Fabric Project
The success of your Chicken Egg Holder Fabric – Tutorial depends heavily on the quality and type of fabric you choose. For the exterior, a heavy-weight cotton or a canvas fabric is ideal because it provides the necessary stability to hold the weight of the eggs. If you prefer a more traditional look, calico prints with small floral patterns or gingham checks work beautifully for a country-style kitchen accessory.
For the interior lining, a coordinating breathable cotton fabric is recommended to keep the environment around the eggs fresh. You will also need a high-quality cotton batting or fusible fleece to give the holder its “cushion.” This padding is essential in a fabric egg holder because it acts as a shock absorber, protecting the eggs from accidental bumps on the kitchen counter.
In addition to your main fabrics, this Chicken Egg Holder Fabric – Tutorial requires some specialized notions. You will need a walking foot for your sewing machine if you plan on quilting the fabric layers together, which prevents the layers from shifting. High-strength polyester thread is better than 100% cotton thread for this specific project because it offers more durability for items that will be handled frequently.
Don’t forget the small details that bring the chicken design to life, such as scraps of red felt for the “comb” and “wattle,” and small black beads or embroidery floss for the eyes. Using interfacing on these smaller parts will ensure they stay upright and don’t flop over time. Having a sharp rotary cutter and a self-healing mat will also make cutting the curved sections of the hen much easier.
When choosing your colors, consider the Google Adsense friendly tip of looking at current home decor trends; sage green, dusty rose, and mustard yellow are currently very popular in DIY sewing communities. Matching your handmade egg holder to your kitchen curtains or aprons creates a cohesive look. Always pre-wash your fabrics to prevent shrinking later, especially since kitchen items often need to be cleaned.
Finally, make sure you have a good set of sewing clips or pins. Because you will be sewing through multiple layers of fabric and batting, clips often work better than pins as they won’t bend or distort the fabric. Proper preparation is 50% of the work in any Chicken Egg Holder Fabric – Tutorial, ensuring that the assembly phase goes smoothly and without frustration.
2. Cutting the Pattern and Preparing the Pieces
To begin the construction phase of our Chicken Egg Holder Fabric – Tutorial, you must first create or print a “hen” silhouette pattern. This usually consists of two main body pieces, a base circle or oval, and the decorative accents like wings and a beak. Accuracy in cutting is paramount here, as the seam allowance must be consistent for the pieces to fit together perfectly during the final assembly.
Once your pieces are cut from the main fabric, you will repeat the process for the lining fabric and the batting. A pro tip for this Chicken Egg Holder Fabric – Tutorial is to cut the batting slightly smaller than the fabric to reduce bulk in the seams. This makes it much easier for your sewing machine to glide through the edges without skipping stitches or breaking needles.
After cutting, it is time to apply the fusible interfacing to the wrong side of your exterior fabric pieces. This step is often overlooked by beginners, but it provides the “skeleton” for your fabric chicken. Without it, the holder might collapse under its own weight or look wrinkled. Pressing with a hot iron ensures a permanent bond and a crisp, professional finish.
If you want a quilted texture, now is the time to sandwich the batting between the exterior fabric and a scrap of muslin. You can sew simple straight lines or a diamond grid pattern to secure the layers. This quilting technique not only adds a decorative element to your Chicken Egg Holder Fabric – Tutorial but also makes the fabric much sturdier and more “egg-safe.”
Next, prepare the decorative elements such as the wings. Many crafters like to add a bit of topstitching to the wings to mimic the appearance of feathers. This small touch adds significant value and detail to your handmade egg basket. Set these pieces aside and ensure they are symmetrical so your chicken doesn’t look lopsided once it’s fully stuffed and sewn.
The last part of the preparation is marking your stitching lines with a water-soluble fabric pen. Mark where the wings will be attached and where the opening will be for turning the project right side out. Clear markings are a hallmark of a well-executed Chicken Egg Holder Fabric – Tutorial, preventing mistakes before they happen and ensuring a high-quality finished product.
3. Assembling the Body and Creating the Egg Pockets
Now we reach the heart of the Chicken Egg Holder Fabric – Tutorial: the assembly. Start by sewing the decorative accents (comb, beak, and wattle) to the right side of one of the body pieces, pointing inward. When you sew the two body pieces together, these will be “sandwiched” in the middle and will pop out once the piece is turned right side out.
Stitch around the perimeter of the hen body, leaving the bottom edge open. It is vital to use a short stitch length when navigating the curves of the chicken’s head and tail. This ensures the curves are smooth rather than jagged. Once sewn, clip the curves with your scissors—this allows the fabric to stretch and lay flat once flipped, a crucial step in any fabric craft tutorial.
The base of your Chicken Egg Holder Fabric – Tutorial is what allows it to stand upright. Pin the circular base to the bottom opening of the body, matching the centers. Sewing a circle to a straight edge can be tricky, so take it slow and use plenty of clips. This creates the “basket” portion of the holder where the eggs will eventually nestle.
To create the individual egg compartments, some designs use a separate fabric insert with elasticized loops, while others use a “stuffed” base with indentations. In this tutorial, we recommend a padded divider made from the same lining fabric. These dividers prevent the eggs from touching each other, which is the primary goal of a high-quality fabric egg holder.
When inserting the lining into the exterior body, ensure the seams are aligned. You will hand-stitch the top edge or use a topstitch around the opening of the “basket” area. This hidden seam technique makes the Chicken Egg Holder Fabric – Tutorial look like a professional product rather than a DIY project. It provides a clean, finished edge that is easy to wipe clean.
Check the stability of your chicken once the base is attached. If it feels too light, you can add a small bag of poly-pellets or dried beans to the very bottom of the base before sealing it. This acts as a weight, ensuring your chicken egg caddy stays firmly on the counter even when it’s only half-full of eggs.
4. Final Details and Care Instructions
The final stage of the Chicken Egg Holder Fabric – Tutorial involves adding the eyes and any last-minute embellishments. Using embroidery thread to satin-stitch the eyes is a safer option than beads if the holder will be around small children. You can also add a small “Made with Love” tag to the tail for a personalized touch that enhances the artisanal quality of your work.
Once your sewing is complete, give the entire piece a final press with a steam iron. This helps the seams settle and gives the fabric a crisp, clean look. If you used a water-soluble marker for your guidelines, a quick mist of water will disappear the ink. Your Chicken Egg Holder Fabric – Tutorial is now officially a finished masterpiece ready for use.
Maintenance is an important part of owning fabric kitchen accessories. Because eggs can sometimes have traces of dirt or bacteria, it is a good idea to spray your holder with a fabric protector before the first use. This makes it easier to spot-clean any messes without having to put the entire chicken through a heavy wash cycle.
When a deep clean is necessary, we recommend hand-washing your fabric egg holder in cool water with a mild detergent. Avoid wringing the fabric, as this can distort the batting and ruin the shape of the hen. Instead, reshape the chicken while it’s damp and let it air dry in a sunny spot, which also helps naturally sanitize the cotton.
For those looking to monetize their hobby, these items are excellent sellers at craft fairs and on platforms like Etsy. Mentioning that you followed a Chicken Egg Holder Fabric – Tutorial can help buyers understand the labor and care that went into the construction. They make wonderful housewarming gifts or Easter decorations that serve a purpose all year round.
Thank you for following this guide! You have successfully transitioned from a few scraps of cloth to a beautiful, functional piece of farmhouse decor. This Chicken Egg Holder Fabric – Tutorial is just the beginning; you can now experiment with different sizes, colors, and even different bird shapes to create a whole flock of organizational helpers for your home.
FAQ – Frequently Asked Questions
1. Is this fabric egg holder safe for unwashed farm eggs?
Yes, but it is recommended to use a washable cotton lining. If you use unwashed eggs, you should clean the holder more frequently to maintain kitchen hygiene.
2. How many eggs can this chicken holder typically carry?
Following this specific Chicken Egg Holder Fabric – Tutorial, the standard size usually holds between 8 to 12 medium-sized eggs, depending on how tightly you sew the dividers.
3. Can I use a sewing machine for the whole project?
Most of the project is machine-sewn. However, closing the final turning hole and attaching some very small details is often easier and neater when done with a hand-stitch like the ladder stitch.
4. What is the best way to stabilize the chicken’s neck?
Using a firm fusible interfacing or adding a bit of extra polyester stuffing in the head area will keep the neck from drooping, ensuring your chicken always looks “alert.”
5. Is this project suitable for a beginner sewer?
It is considered an adventurous beginner project. If you can sew a curve and manage multiple layers of fabric, you will find this Chicken Egg Holder Fabric – Tutorial very manageable.
6. Can I scale the pattern up or down?
Absolutely! You can scale the pattern by 150% to create a large centerpiece basket, or scale it down to 75% for a cute decorative piece that holds just a few chocolate eggs during the holidays.
Conclusion
In this Chicken Egg Holder Fabric – Tutorial, we have walked through the entire creative process of building a functional and charming kitchen companion.
We learned how to select durable fabrics, the importance of interfacing and batting for structure, and the techniques required to assemble a 3D hen shape. This project is a perfect example of how DIY sewing can solve everyday problems like egg storage while adding a unique, “humanized” touch to your living space. By following the steps outlined, from cutting the pattern to the final steam press, you now have a high-quality handmade egg caddy that is both beautiful and built to last.