This Quilt French Braid – Tutorial is your gateway to creating one of the most visually stunning and dynamic designs in the world of quilting. If you have ever looked at a quilt and wondered how those cascading, interwoven colors seem to flow down the fabric like a sophisticated hairstyle, you have encountered the French Braid pattern. This technique is famous for its ability to create a sense of movement and depth, making it a favorite for those who want to showcase a gradient of colors or a specific collection of designer fabrics.
In this detailed Quilt French Braid – Tutorial, we will break down the construction of these elegant columns so that even a beginner can achieve professional results. Many quilters are intimidated by the angled appearance of the braid, but the secret is that it is actually made of simple rectangular strips sewn at 45-degree angles. By mastering this “braiding” method, you can turn a pile of jelly rolls or fabric scraps into a masterpiece that looks far more complex than it actually is to assemble.
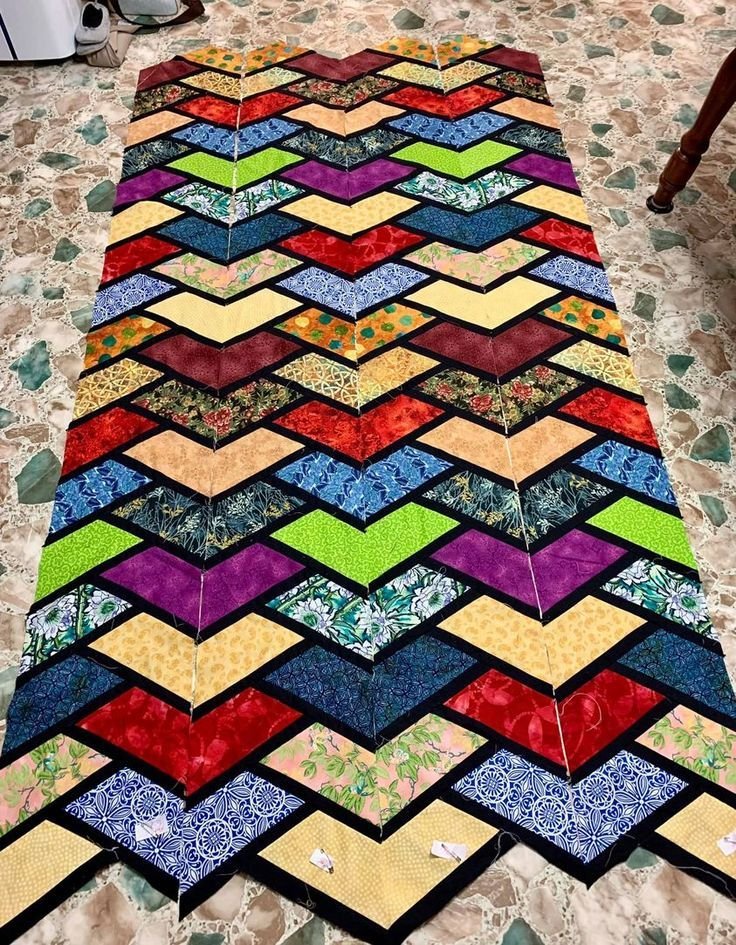
The beauty of a Quilt French Braid – Tutorial lies in its versatility, as it can be used for everything from a small table runner to a full-sized bedspread. We will focus on the importance of color value—the light to dark transition—which is what truly makes the “braid” pop and gives it that signature 3D effect. Whether you are sewing for a gift or for your own home, this quilt pattern is a rewarding journey that combines precision with artistic flair, resulting in a timeless piece of handmade home decor.
1. Preparing Your Fabric and Cutting the Strips
The foundation of any successful Quilt French Braid – Tutorial begins with the selection of your color palette. To achieve the classic “braided” look, you need a clear progression of colors; many quilters choose a monochromatic scale (such as light blue to navy) or a rainbow transition. Using high-quality 100% cotton quilting fabric is essential here, as it minimizes stretching and ensures that your angles remain crisp and aligned throughout the sewing process.
For this specific Quilt French Braid – Tutorial, you will need to cut your fabric into uniform strips, typically 2.5 inches wide by about 5 to 10 inches long. If you are using a pre-cut jelly roll, half the work is already done for you, as the width is consistent. The length of the strips can vary depending on how wide you want your columns to be, but consistency across all your pieces is the key to preventing a “wavy” quilt top later on.
Before you touch your sewing machine, organize your strips into “sets” according to their color value. A common mistake in the Quilt French Braid – Tutorial is mixing up the order, which can break the visual flow of the braid. Labeling your fabric piles as “Light,” “Medium,” and “Dark” will help you stay organized as you begin the repetitive assembly process. Proper organization at the start saves hours of frustration and “ripping out” seams later.
In addition to the braid strips, you will need a central square to start each column. This square acts as the “anchor” for your braid and is usually the same width as your strips (e.g., a 2.5″ x 2.5″ square). Choosing a contrasting color for the anchor can create a beautiful focal point at the top of your quilt. Make sure your rotary cutter has a fresh blade to ensure that every cut is perfectly straight and clean.
Another essential material for this Quilt French Braid – Tutorial is a clear acrylic ruler with 45-degree markings. While the braid itself is made of rectangles, the top and bottom of the finished columns will need to be trimmed at an angle to create a straight edge for the quilt border. Having the right quilting tools on hand makes these technical steps much easier and ensures that your final quilt top is perfectly square and ready for the longarm.
Finally, consider using a light spray starch on your fabric before cutting. Since the French Braid quilt involves many seams and can easily be pulled off-grain, starching the fabric provides extra stability. This “stiffening” effect helps the fabric behave during sewing, which is especially helpful when you are working with long columns that can become heavy. Preparation is the secret ingredient to a handmade quilt that looks like it was made by a professional.
2. Starting the Braid and Mastering the Angle
The actual sewing in this Quilt French Braid – Tutorial starts with your center anchor square and two initial strips. You will sew the first strip to the right side of the square and the second strip to the top. This creates a “V” shape that serves as the beginning of the braid. It is vital to use a consistent 1/4-inch seam allowance throughout the project to ensure that the “legs” of the braid remain equal in length as the column grows.
As you continue the Quilt French Braid – Tutorial, you will alternate sides—adding a strip to the left, then a strip to the right. This “zig-zag” motion is what creates the interwoven appearance of the fabric. Always sew the new strip along the edge created by the previous two pieces. This repetitive process is quite meditative, but you must remain focused on your seam nesting to ensure the points where the strips meet are sharp and professional.
One of the most important SEO-friendly quilting tips is to press your seams as you go. In a French Braid pattern, pressing the seams toward the new strip being added is generally the best practice. This reduces bulk at the intersections and helps the braid lay flat. If your seams are too bulky, the quilt will be difficult to quilt later on, and the blocks may not align correctly when you join the columns together.
Accuracy in the Quilt French Braid – Tutorial is measured by the symmetry of the braid. If one side of the braid starts looking longer than the other, you may need to check your cutting precision or your seam allowance. A helpful trick is to use a walking foot on your sewing machine, which feeds the layers of fabric through at the same rate, preventing the top layer from “stretching” as you sew long columns.
As the braid column grows longer, you will start to see the color gradient taking effect. This is the moment where the Quilt French Braid – Tutorial truly comes to life. If you are making a table runner, you might only need one or two columns; for a queen-sized quilt, you will need to repeat this process many times. The uniformity between columns is what creates the sophisticated “braided” texture across the entire surface of the bed.
The last step of the assembly phase in this tutorial is to decide on the length of your columns. Once you reach your desired length, you will stop adding strips. Your column will have “jagged” ends at the top and bottom, which is perfectly normal. In the next section, we will discuss how to transform these irregular columns into a structured quilt top that is ready for borders and binding.
3. Joining Columns and Squaring Up the Quilt
Once you have completed several columns following the Quilt French Braid – Tutorial, it is time to join them together. To make the braid stand out even more, many quilters insert a sashing strip (a long, solid piece of fabric) between each column. This acts as a “frame” for the braid, giving the eyes a place to rest and making the colors appear even more vibrant. White, gray, or black sashing are the most common choices for a modern look.
When pinning the columns together, align the “points” of the braid if you want them to match up perfectly across the quilt. However, some people prefer a “staggered” look where the braids are slightly offset. Whichever style you choose for your Quilt French Braid – Tutorial, consistency is key. Use plenty of quilting pins or clips to prevent the long columns from shifting or bowing as you sew them together on your machine.
Squaring up the quilt top is the next critical phase. Because the braid is built on an angle, the top and bottom of your columns will have “steps.” Using your large acrylic ruler, you will trim these steps into a straight line. This requires careful measurement to ensure you don’t cut off the “points” of your braid. A well-trimmed top is essential for a professional French Braid quilt finish, making the border application much smoother.
Adding borders is the final step of the top construction in this Quilt French Braid – Tutorial. A simple inner border in a dark color followed by a wider outer border in a print can really “anchor” the movement of the braids. When sewing borders, always measure the center of your quilt and cut your border strips to that length; this prevents the common “wavy border” syndrome that affects many DIY quilts.
Throughout this Quilt French Braid – Tutorial, we have emphasized the importance of the 45-degree angle. If your columns feel “twisted,” it is likely because the fabric was pulled during the joining process. To fix this, always sew your columns in alternating directions—sew the first two from top to bottom, and the next two from bottom to top. This counteracts the natural “pull” of the sewing machine and keeps the quilt square.
By the end of this construction phase, you will have a complete French Braid quilt top. It should lay perfectly flat on your floor or cutting table. If it doesn’t, a good steam pressing can often resolve minor ripples. You are now ready for the “quilt sandwich” phase, where you will add the batting and the backing to transform your beautiful patchwork into a functional, warm blanket.
4. Quilting Designs and Finishing Techniques
Choosing the right quilting design for your Quilt French Braid – Tutorial is about enhancing the flow of the pattern. Because the braid already has so much movement, “straight line quilting” that follows the angles of the strips is very effective. Alternatively, a free-motion swirling pattern can provide a beautiful contrast to the geometric lines of the braid, giving the quilt a softer, more organic feel.
If you are quilting on a domestic machine, “stitch-in-the-ditch” is a reliable method that hides the thread in the seams of the braid. This highlights the patchwork without adding too much visual noise. In this Quilt French Braid – Tutorial, we suggest using a thread color that matches your sashing to keep the focus on the vibrant braid columns. High-quality cotton thread is best for a traditional matte finish.
The binding is the final “frame” of your masterpiece. For a French Braid quilt, a bias binding or a striped fabric cut on the bias can add an extra touch of whimsy. Ensure your corners are perfectly mitered for a crisp look. Hand-stitching the binding to the back of the quilt provides a “hidden” finish that is highly prized in quilting competitions and high-end craft circles.
In this Quilt French Braid – Tutorial, we also recommend adding a quilt label to the back. Include your name, the date, and the name of the pattern. Since a French Braid quilt is such a labor of love, documenting its creation ensures that its history is preserved for future generations. It turns a “blanket” into a family heirloom that tells a story of patience and creativity.
Care for your finished quilt is just as important as the construction. Because of the many seams in a French Braid design, always wash your quilt on a gentle cycle with a color catcher sheet to prevent the darker colors from “bleeding” into the lighter strips. Air drying or tumble drying on low heat will keep the fibers healthy and ensure that your braided quilt remains a treasure for years to come.
Congratulations on completing the Quilt French Braid – Tutorial! You have mastered a technique that combines mathematical precision with artistic expression. Whether you keep the quilt or give it away, you have created something truly special. The skills you’ve learned here—from value selection to angled assembly—will serve you well in all your future quilting projects.
FAQ – Frequently Asked Questions
1. Is the French Braid quilt pattern suitable for beginners?
Yes! While it looks complex, this Quilt French Braid – Tutorial shows that it is made of simple rectangles. If you can sew a straight 1/4-inch seam, you can make this quilt. The most important part is staying organized with your color values.
2. Can I use scrap fabric for a French Braid quilt?
Absolutely! This is one of the best “scrap-busting” patterns available. Just make sure your scraps are all cut to the same width and roughly the same length. A “scrappy” Quilt French Braid can look incredibly eclectic and artistic.
3. What is the best way to choose colors for the braid?
Try the “squint test.” When you look at your fabrics and squint your eyes, you should clearly see which fabrics are light, medium, and dark. A successful Quilt French Braid – Tutorial outcome depends on having enough contrast between these values.
4. How do I stop my long columns from bowing or curving?
The “bowing” effect usually happens if you pull the fabric while sewing. To prevent this, use a walking foot and alternate the direction in which you sew your columns together (top-to-bottom, then bottom-to-top).
5. How much fabric do I need for a lap-sized French Braid quilt?
Generally, one jelly roll (40 strips) plus about 2 yards of sashing and border fabric is enough for a generous lap quilt. Always buy a little extra for the binding and to account for any cutting mistakes.
6. Why are my braid points not lining up?
This usually comes down to seam allowance or pressing. Ensure you are using a precise 1/4-inch seam and that you have pressed all your seams in a consistent direction. If one strip is even 1/8th of an inch off, it will affect the alignment of the whole column.
Conclusion
In this Quilt French Braid – Tutorial, we have explored the intricate yet accessible world of the French Braid pattern. We covered everything from selecting fabrics with high contrast to the step-by-step assembly of the braid columns, the technical “squaring up” process, and the final quilting touches.
This pattern is a masterclass in using simple shapes to create complex visual movement, making it a staple for any quilter looking to expand their skills. By following the techniques outlined, such as nesting seams and using sashing to frame your work, you have created a piece of art that radiates warmth and sophistication.