Rose Crochet – Tutorial is one of the most rewarding projects for any fiber artist, offering a timeless way to bring the beauty of nature into your home without ever worrying about petals wilting. Whether you are looking to create a stunning bouquet for a gift, embellish a warm winter hat, or add a delicate touch to a handmade blanket, mastering the Rose Crochet – Tutorial techniques will elevate your crafting repertoire. This guide is designed to be a comprehensive resource, walking you through every stitch and secret to ensure your finished blossoms look professional, lush, and incredibly realistic.
Creating a crochet rose is not just about following a pattern; it is about understanding the tension and flow of the yarn to mimic the organic curves of a flower. In this Rose Crochet – Tutorial, we focus on a method that is accessible for beginners yet detailed enough for advanced crafters seeking perfection. By using the right weight of cotton yarn and a properly sized crochet hook, you can achieve a structural integrity that allows your rose to hold its shape for years to come. We will dive deep into the specific stitches that create that signature “rolled” look, ensuring your project is a success from the very first chain.
As you prepare to start this Rose Crochet – Tutorial, remember that patience is your most valuable tool. Fiber arts are a form of slow fashion and mindful creation, and a handmade crochet rose is a perfect example of how simple loops of thread can transform into a complex work of art. In the following sections, we will break down the materials, the step-by-step construction, and the finishing touches that make a crochet flower truly stand out. Get your hooks ready, find a comfortable spot with good lighting, and let’s begin this journey into the elegant world of floral crochet.
1. Essential Materials and Preparation for Your Rose Crochet – Tutorial
Before diving into the stitches of our Rose Crochet – Tutorial, having the correct supplies is paramount for a high-quality result. For a realistic look, I highly recommend using a mercerized cotton yarn in a weight like Sport or DK. This type of yarn has a slight sheen and excellent stitch definition, which is crucial when you want the individual “petals” of your crochet rose to be clearly visible and crisp.
The size of your crochet hook should typically be slightly smaller than what the yarn label suggests. If the yarn calls for a 3.5mm hook, try a 3.0mm or even a 2.5mm to ensure your crochet stitches are tight. This prevents the stuffing or the underside of the work from showing through and helps the rose maintain its upright, perky structure once it is rolled and sewn together.
In addition to your yarn and hook, you will need a few standard notions to complete this Rose Crochet – Tutorial. A sharp pair of embroidery scissors is necessary for clean cuts, and a tapestry needle (or yarn needle) is absolutely vital for the assembly phase. Since this rose is worked in a long strip and then coiled, you will be doing a bit of hand-sewing at the end to secure the shape.
If you plan on turning your creation into a long-stemmed flower, you should also have some floral wire or thick gauge jewelry wire on hand. Many crafters also like to use a bit of fabric stiffener or even a light spray of hairspray once the flower is finished. This is a pro-tip in any Rose Crochet – Tutorial to keep the outer petals from sagging over time, especially if the rose is large.
Don’t forget about the color palette, which is where your creativity can truly shine. While classic red is always a favorite, this Rose Crochet – Tutorial works beautifully with variegated yarn or ombre shades that transition from a dark center to lighter outer edges. Experimenting with different hues can turn a simple pattern into a sophisticated piece of floral decor that matches any room.
Lastly, ensure you have a few stitch markers nearby. While the pattern for a crochet rose is often repetitive, it is easy to lose count of your petal clusters when working on a long foundation chain. Keeping track of your repeats ensures that your flower is symmetrical and that the petals graduate in size correctly, leading to a much more professional-looking Rose Crochet – Tutorial outcome.
2. Step-by-Step Stitch Guide for the Foundation and Petals
The journey of our Rose Crochet – Tutorial begins with a foundation chain that determines the final size of your flower. For a medium-sized rose, you will typically start with a long chain—anywhere from 50 to 70 stitches. The beauty of this Rose Crochet – Tutorial is its flexibility; if you want a tiny bud, simply shorten the chain, and if you want a giant cabbage rose, keep on chaining until your heart is content.
Once your chain is ready, the first row usually involves creating a series of “V-stitches” or mesh spaces. This creates the “skeleton” upon which the petals will be built. In this Rose Crochet – Tutorial, we emphasize the importance of skipping the correct number of chains to allow the strip to naturally curve. This slight curling of the fabric is actually helpful, as it mimics the natural way a rose grows in a spiral.
The second row is where the magic happens and the petals take shape. You will be working multiple double crochet or treble crochet stitches into the spaces created in the previous row. By varying the height of the stitches—starting with a half double crochet, moving to several double crochets, and ending back with a half double crochet—you create the rounded, organic shape of a real petal.
As you progress along the strip in this Rose Crochet – Tutorial, you might want to increase the number of stitches in each petal cluster. The petals near the beginning of your chain (which will become the center of the rose) should be smaller and tighter. As you move toward the end of the strip, increasing the stitch count makes the outer petals larger and more “open,” giving the crochet rose a blooming appearance.
One technical tip for this Rose Crochet – Tutorial is to maintain a very consistent yarn tension. If your stitches are too loose, the petals will look floppy and won’t hold the spiral shape well. If they are too tight, the rose will be difficult to roll. Aim for a firm but supple fabric that feels substantial to the touch, ensuring your handmade flower feels like a premium item.
After you have completed the final petal, you will finish off the work, leaving a very long yarn tail. Do not cut it short! This tail is what you will use to sew the rose together. A common mistake in any Rose Crochet – Tutorial is cutting the yarn too soon, leading to unnecessary knots. In the next section, we will explain how to turn this long, wavy strip of lace into a gorgeous 3D flower.
3. Assembly and Shaping Your Crochet Masterpiece
Now that you have your long strip of petals, the assembly phase of the Rose Crochet – Tutorial begins. Lay your crochet strip flat on a table with the “right side” facing up. Starting from the end with the smallest petals, begin to roll the strip inward slowly. Imagine you are rolling up a sleeping bag or a ribbon; the goal is to keep the bottom edge (the foundation chain) perfectly aligned and flat.
As you roll, you will see the Rose Crochet – Tutorial come to life before your eyes. The center should be tight to look like a rosebud, while the outer layers should be slightly looser to allow the petals to fan out. Use your fingers to manipulate the petals as you go, “blooming” them by pushing the edges outward. This manual shaping is what differentiates a flat-looking craft from a realistic crochet art piece.
Once you are happy with the look, pick up your tapestry needle and thread that long yarn tail you saved. Flip the rose over so you are looking at the flat bottom. You need to sew through all the layers of the foundation chain to secure them. Pass the needle back and forth across the diameter of the base several times, ensuring every single “turn” of the spiral is caught by the thread in this Rose Crochet – Tutorial.
While sewing, be careful not to pull the thread so tight that you distort the flower’s shape, but ensure it is secure enough that it won’t unravel if someone pulls on a petal. This structural integrity is a hallmark of a well-executed Rose Crochet – Tutorial. If you are adding a stem, this is the perfect moment to insert your floral wire through the center of the base and wrap it with green yarn.
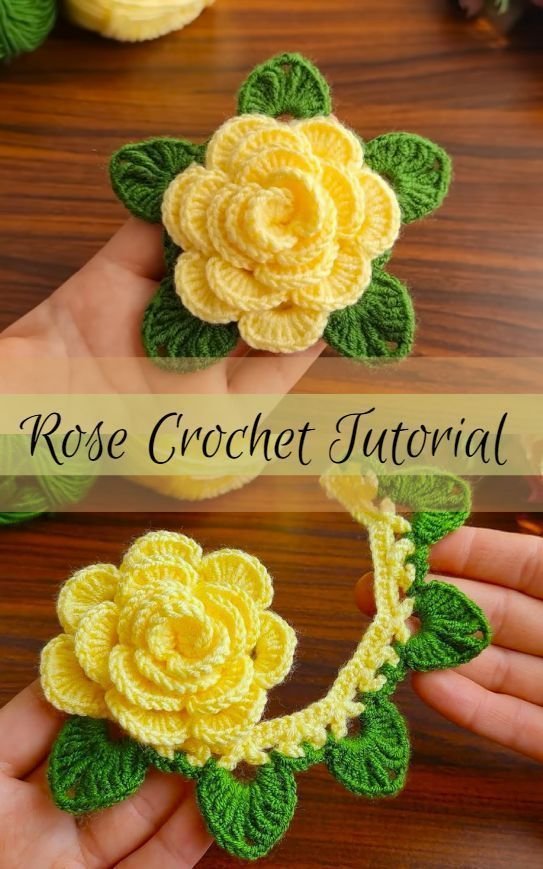
For those who want an extra touch of realism, you can crochet a small “calyx”—the green leafy part at the base of a flower. Most Rose Crochet – Tutorial enthusiasts will create a simple star-shaped green piece to sew onto the bottom. This hides your sewing stitches and provides a beautiful contrast between the vibrant petal colors and the natural green of the “plant” elements.
Final adjustments are key to finishing your Rose Crochet – Tutorial. Gently tug on the edges of the petals to give them a slight “point” if you prefer a tea rose look, or keep them rounded for a romantic English rose style. If your rose feels a bit soft, you can use the fabric stiffener mentioned earlier. Now, your blossom is ready to be showcased as a brooch, a home accent, or part of a bridal bouquet.
4. Advanced Tips for Customizing Your Rose Designs
Once you have mastered the basic Rose Crochet – Tutorial, you can start experimenting with advanced techniques to make your work unique. One popular method is adding a “picot stitch” at the very peak of each petal. This creates a tiny, pointed tip that makes the rose look more like a variety found in a formal garden. Small details like this elevate the SEO-optimized crochet content you might be creating for your own blog.
Another way to enhance your Rose Crochet – Tutorial results is through “surface crochet” or embroidery. Using a thinner thread in a darker shade, you can add “veins” to the petals or a darker edge to create a “tipped” effect. This adds incredible depth and a 3D quality that makes people want to reach out and touch the fabric to see if it’s real.
You can also vary the yarn textures. While cotton is standard, trying this Rose Crochet – Tutorial with a soft mohair or a fuzzy wool can create a “shabby chic” or vintage look that is very popular in modern home decor. The fuzziness of the yarn can mimic the soft, velvety texture of real rose petals, providing a sensory experience beyond just the visual.
Size variation is another way to expand on the Rose Crochet – Tutorial. By using micro-crochet techniques with lace-weight thread and a 0.5mm hook, you can create tiny roses for jewelry like earrings or rings. Conversely, using “jumbo” t-shirt yarn and a 10mm hook will result in a giant rose cushion that serves as a statement piece in a living room or nursery.
Don’t forget the power of scent! A secret tip not often found in a Rose Crochet – Tutorial is to hide a small cotton ball soaked in rose essential oil inside the center of the flower as you roll it up. This turns your crochet project into a long-lasting, natural air freshener. It’s these “humanized” touches that make handmade gifts so much more special than store-bought ones.
Finally, think about how you can group these flowers. A single rose is beautiful, but a cluster of three in different stages of “bloom” (one bud, one half-open, one full) creates a professional floral arrangement. Mastering the Rose Crochet – Tutorial is just the beginning; the real joy comes from combining these techniques to create complex, beautiful compositions that showcase your skill as a fiber artist.
FAQ – Frequently Asked Questions
1. What is the best yarn for this Rose Crochet – Tutorial?
The best yarn is generally a 100% mercerized cotton. It provides the stiffness needed to hold the petal shapes and has a beautiful sheen that mimics a real flower’s glow. Avoid very fuzzy yarns for your first attempt, as they can hide your stitches and make the assembly more difficult.
2. How long does it take to finish one Rose Crochet – Tutorial project?
For an intermediate crocheter, a single rose takes about 30 to 45 minutes from start to finish, including assembly. Beginners might take an hour or more as they get used to the petal increases and the rolling technique. It is a perfect “one-sitting” project!
3. My rose looks more like a blob than a flower. What am I doing wrong?
The most common issue is the “roll.” If you roll the strip too tightly, the petals can’t fan out. If you roll it too loosely, the center falls out. Also, ensure you are sewing through the foundation chain at the bottom to lock the spiral in place. Tension is key in a Rose Crochet – Tutorial.
4. Can I wash my crochet roses?
Yes, if you use cotton or acrylic yarn, they are washable. However, it is best to hand wash them in cool water and reshape the petals while they are damp. If you used wire or fabric stiffener, avoid soaking them and stick to spot cleaning to preserve the internal structure.
5. How can I use the roses made from this Rose Crochet – Tutorial?
The possibilities are endless! You can sew them onto hats, scarves, or bags. They make great wedding favors, “forever” bouquets, hair clips, or even decorative accents for gift wrapping. Many crafters also use them to create crochet wall art or wreaths.
Conclusion
In this Rose Crochet – Tutorial, we have covered everything from selecting the perfect mercerized cotton yarn to the final assembly of your floral masterpiece.
You’ve learned how to build a foundation, create graduating petals using varied crochet stitches, and how to expertly roll and sew your work into a realistic 3D shape. This project is a wonderful way to practice your tension and explore the sculptural side of fiber arts, resulting in a timeless piece of decor or a heartfelt gift.