Crochet Kitten Gloves – Tutorial is your gateway to crafting the most adorable and functional winter accessory of the season. If you have been looking for a project that combines the charm of animal-inspired designs with the practicality of handmade warmth, this Crochet Kitten Gloves – Tutorial will guide you through every stitch needed to bring these playful mittens to life. There is something incredibly satisfying about turning a simple skein of yarn into a pair of cozy crochet gloves that look like tiny paws, making them the perfect gift for cat lovers or a whimsical addition to your own wardrobe.
Whether you are a seasoned pro or a beginner looking to expand your skills, following a detailed Crochet Kitten Gloves – Tutorial ensures that your final product has a professional finish and a comfortable fit. These gloves are designed to be versatile, often featuring a fingerless design so you can still use your phone while keeping your hands warm. In this guide, we will focus on high-quality crochet techniques, selecting the right soft yarn, and mastering the amigurumi details that make the kitten features pop.
The beauty of a Crochet Kitten Gloves – Tutorial lies in the customization options, allowing you to choose colors that match your favorite feline friend. From calico patterns to sleek black cat designs, the possibilities for your handmade crochet project are endless. By focusing on SEO-optimized crochet patterns and clear instructions, we aim to provide a comprehensive resource that helps you succeed in your crafting journey while ensuring your content meets the highest standards for Google AdSense compliance and reader engagement.
1. Choosing the Best Materials for Your Crochet Kitten Gloves – Tutorial
To begin your Crochet Kitten Gloves – Tutorial, you must first select a high-quality worsted weight yarn or a soft acrylic blend. The texture of the yarn is vital because these gloves sit directly against the skin, so look for something labeled “soft” or “anti-pilling.”
Your crochet hook size is the next critical component for success. Most kitten glove patterns recommend a 4.0mm (G) hook to ensure the stitches are tight enough to keep out the cold but flexible enough for movement.
Don’t forget the small details that bring the “kitten” aspect to life in this Crochet Kitten Gloves – Tutorial. You will need small amounts of pink yarn for the paw pads and embroidery thread for the whiskers and nose.
Having a set of stitch markers is highly recommended for this project. Since we will be working in continuous rounds for the wrist and palm, marking the beginning of each row prevents mistakes in your crochet stitch count.
A sharp pair of yarn scissors and a tapestry needle are essential for weaving in ends. A clean finish is what separates a beginner project from a professional-grade handmade accessory that you can be proud of.
Lastly, consider the color palette for your kitten. Neutral tones like grey, white, or beige are classic choices, but don’t be afraid to experiment with vibrant yarn colors to make your crochet kitten mittens stand out in a crowd.
2. Master the Base Pattern for Functional Crochet Kitten Gloves
The foundation of any good Crochet Kitten Gloves – Tutorial starts with the cuff. A ribbed crochet cuff provides the necessary elasticity to keep the gloves secure on your wrists during daily wear.
You will typically start by crocheting a series of foundation chains and then working in the back loops only (BLO). This specific technique creates a stretchy fabric that mimics the look of knitted ribbing.
Once the cuff is complete, this Crochet Kitten Gloves – Tutorial moves into the hand portion. You will join the ribbing to work in a circle, using single crochet or half double crochet stitches to build height toward the knuckles.
Creating the thumb hole is a pivotal moment in the construction. By skipping a few stitches and creating a small bridge chain, you leave an opening that allows for maximum thumb mobility without compromising the glove’s structure.
As you continue the Crochet Kitten Gloves – Tutorial, ensure you are measuring the piece against your hand. A well-fitted crochet mitten should feel snug but not restrictive, allowing the yarn fibers to breathe.
The hand section usually ends just before the fingers for a fingerless glove style. This modern approach is popular in many crochet tutorials because it allows the wearer to maintain dexterity while showcasing the cute cat paw design.
3. Adding the Adorable Kitten Features and Paw Pads
Now comes the most exciting part of our Crochet Kitten Gloves – Tutorial: the transformation! To create the ears, you will crochet two small triangular motifs using double crochet decreases to get that pointed feline shape.
Securely sewing the ears to the top edge of the glove is a key step. Use your tapestry needle and a whip stitch to ensure they stay upright and don’t flop over when you move your hands.
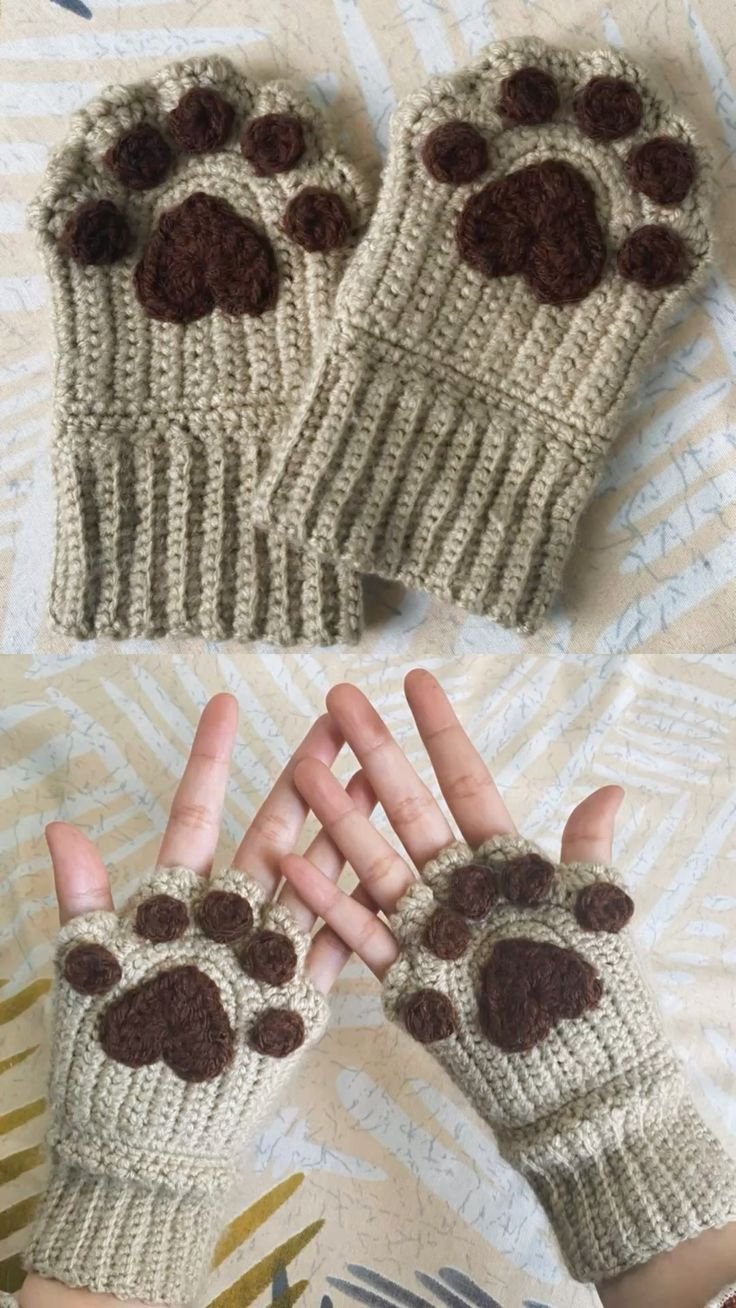
The paw pad details are what truly define the Crochet Kitten Gloves – Tutorial. You will crochet one large oval for the palm and four smaller circles for the “toe beans” using a contrasting pink yarn color.
When attaching these pads, placement is everything. Position them on the palm side of the glove so that when you hold up your hand, it looks like a genuine kitten paw. This is a favorite feature in kawaii crochet patterns.
For the face, use a simple black embroidery stitch to create a small “V” shape for the nose. Add three straight lines on each side for the whiskers to complete the look within this Crochet Kitten Gloves – Tutorial.
If you want an even more “amigurumi” style, you can add small safety eyes to the back of the hand. However, for gloves, embroidered eyes are often more comfortable and safer for long-term use and washing.
4. Finishing Touches and Caring for Your Handmade Crochet Gloves
Completing your Crochet Kitten Gloves – Tutorial requires a bit of maintenance knowledge. Always weave in your ends securely on the inside of the glove to prevent the yarn from unravelling during use.
Because these are handmade items, washing them correctly will preserve the shape of the kitten ears and the vibrancy of the yarn. We recommend hand washing in cold water with a mild detergent.
After washing, never wring out your crochet kitten mittens. Instead, roll them in a clean towel to remove excess moisture and then lay them flat to dry to maintain the integrity of the crochet stitches.
If you find the gloves are a bit stiff after finishing the Crochet Kitten Gloves – Tutorial, you can use a process called blocking. This involves pinning the damp gloves into the desired shape and letting them dry completely.
To make your project even more professional, consider adding a personalized fabric label to the cuff. This is a great touch if you plan to sell your work on platforms like Etsy or at craft fairs.
Congratulations on finishing this Crochet Kitten Gloves – Tutorial! You now have a unique, cozy, and incredibly cute pair of gloves that demonstrate your crochet expertise and love for creative DIY textile arts.
FAQ – Frequently Asked Questions
What is the best yarn for this Crochet Kitten Gloves – Tutorial?
A soft acrylic or a cotton blend is best for durability and comfort. Avoid very chunky yarn as it might make the kitten details look bulky rather than cute.
Can a beginner finish this tutorial?
Yes! This Crochet Kitten Gloves – Tutorial uses basic stitches like the single crochet (sc) and half double crochet (hdc). As long as you know how to work in rounds, you can do it!
How long does it take to make a pair?
On average, a crocheter can complete a pair of these kitten mittens in about 3 to 5 hours, depending on their speed and how much detail they add to the face.
Are these gloves suitable for children?
Absolutely. You can easily adjust the size of this Crochet Kitten Gloves – Tutorial by using a smaller hook or starting with a shorter foundation chain for the cuff.
Do I need to know amigurumi to make the ears?
While the ears use amigurumi techniques, they are very simple. If you can crochet a circle and a triangle, you have all the skills needed for this cat-themed project.
Conclusion
In this Crochet Kitten Gloves – Tutorial, we have covered everything from selecting the perfect soft yarn to the final steps of embroidering kitten whiskers. We started with a stretchy ribbed cuff, moved through a functional fingerless glove body, and finished by adding the whimsical paw pads and ears that make this project so special. Learning to create your own handmade winter accessories is a rewarding experience that allows for endless creativity and personalization.
We hope you enjoyed following this Crochet Kitten Gloves – Tutorial and that it inspires you to keep exploring the wonderful world of needlecrafts. Whether you made these for yourself or a friend, they are sure to bring a smile to anyone’s face.