Crochet Flower – Tutorial is one of the most rewarding projects you can undertake, whether you are a complete beginner or a seasoned crafter looking for a quick, beautiful project. There is something uniquely magical about taking a simple strand of yarn and transforming it into a blooming, tactile piece of art. In this comprehensive guide, we will explore everything you need to know to create your own stunning textile blossoms, ensuring your stitching journey is both relaxing and incredibly successful.
Mastering a crochet flower tutorial allows you to unlock a world of creative possibilities, enabling you to embellish clothing, create stunning home decor, or design thoughtful, handmade gifts for your loved ones. The beauty of this craft lies in its versatility, as a single pattern can look completely different just by swapping out the yarn weight, color palette, or hook size. By learning the fundamental stitches and understanding how they interact, you will gain the confidence to experiment and eventually design your own custom floral patterns.
To help you achieve the best possible results, this step-by-step crochet guide will break down the essential techniques, materials, and terminology required for floral crafting. We will delve into specific methods like working in the round, creating perfect tension, and selecting the ideal tools for your projects. Let us grab our hooks, select our favorite colorful yarns, and dive straight into the wonderful world of handmade fiber art.
1. Essential Materials and Tools for Your Crochet Flower – Tutorial
When embarking on your first crochet flower tutorial, selecting the right materials is the crucial first step that determines the final look and feel of your project. For beginners, a medium-weight worsted weight yarn made of 100% cotton or acrylic is highly recommended because it offers excellent stitch definition and does not split easily. Cotton yarn is particularly fantastic for flowers because it provides a sturdy structure that helps the petals hold their shape beautifully over time.
Equally important is matching your yarn with the correct crochet hook size, which is usually indicated on the yarn label, though sizing down slightly can create tighter, more defined petals. A standard 4.0mm (G/6) or 3.5mm (E/4) ergonomic hook is typically ideal for standard worsted yarn, ensuring your hands do not get fatigued during long crafting sessions. Having a comfortable grip allows you to maintain consistent control, which directly influences the symmetry of your finished blossom.
Beyond the hook and yarn, you will need a few essential notions to complete your handmade crochet project with a professional flair. A sharp pair of crafting scissors is necessary for clean cuts, preventing the yarn fibers from fraying when you finish your work. You will also need a blunt-ended yarn needle (sometimes called a tapestry needle) to weave in your loose ends securely so your hard work never unvels.
For those looking to add an extra touch of elegance, consider gathering embellishments like decorative beads, pearls, or vintage buttons to sew into the center of your flowers. If you plan on turning your floral creations into wearable accessories, having some blank brooch pins, hair clips, or keychain rings on hand is an excellent idea. Lastly, stitch markers can be incredibly helpful for keeping track of the beginning of your rounds, especially when working with complex petal layouts.
Properly preparing your workspace with these tools ensures a smooth, uninterrupted crafting experience that makes learning the crochet flower tutorial incredibly enjoyable. Taking the time to organize your materials beforehand allows you to focus entirely on your rhythm, tension, and stitch placement. Once you have your toolkit ready, you are fully prepared to master the core abbreviations and foundational stitches that bring these textile designs to life.
As you gain experience, you can experiment with specialty threads, such as lace weight cotton or metallic yarns, to create delicate, intricate jewelry pieces. The choice of material completely redefines the purpose of the flower, moving from a cozy blanket applique to a high-end fashion statement. Keep your tools organized, stay patient with your practice, and enjoy the tactile process of selecting your materials.
2. Master the Foundation and Core Stitches
Before diving into the actual petals, every successful crochet flower tutorial relies on a solid understanding of foundational techniques. The project almost always begins with either a slip knot followed by a short chain ring, or the highly versatile magic ring (also known as a magic circle). The magic ring is preferred by many modern crafters because it allows you to pull the center loop completely tight, eliminating any unwanted holes in the middle of your flower.
Once your foundation loop is established, you will typically work a series of single crochet (sc) stitches into the center to create the core of your blossom. The single crochet is the most basic building block in fiber arts, offering a tight, dense texture that anchors the larger petal stitches securely. Mastering the even placement of these initial stitches ensures that your flower will lay perfectly flat rather than buckling or curling inward.
To transition smoothly between your foundation rows and to join your rounds seamlessly, you must utilize the slip stitch (sl st). The slip stitch does not add any height to your work; instead, it acts as an invisible bridge that connects the end of a round to its beginning. It is also frequently used to travel across stitches without adding bulk, which is essential for shaping the gaps between individual petals.
To give your petals their classic rounded shape, the half double crochet (hdc) and double crochet (dc) stitches are introduced into the pattern. These stitches add height and fluid curves to your work, allowing you to create the natural rise and fall of a real flower petal. By combining a single crochet, a double crochet, and a single crochet all within the same loop, you easily create a beautiful, soft gradient edge.
For larger, more dramatic floral designs, advanced crafters frequently rely on the treble crochet (tr) stitch, which provides maximum height and elegance. Incorporating trebles allows you to design layered, dimensional blossoms like roses, carnations, or large sunflowers that stand out vividly. Understanding how to wrap the yarn around your hook multiple times for these taller stitches is key to expanding your crochet pattern repertoire.
Practicing these core stitches consistently will dramatically improve your stitch gauge and overall tension, resulting in beautifully uniform petals. Remember that consistency is far more important than speed when you are first learning how to manipulate the yarn. With these fundamental building blocks securely mastered, you are ready to follow the step-by-step sequence to assemble your very first complete blossom.
3. Step-by-Step Assembly and Shaping Techniques
Now that you are familiar with the stitches, let us walk through the actual assembly phase of our crochet flower tutorial to bring the shape together. Start by creating your magic ring and securing it with a single chain stitch, ensuring the loop is wide enough to work into comfortably. Round one typically involves stitching 10 or 12 single crochets directly into that ring, then pulling the tail firmly to close the central hole.
To begin round two, which forms the base of your petals, you will join the circle with a slip stitch into the very first single crochet you made. You will then chain two or three stitches to create the necessary height required for your chosen petal style. Working into the next available stitch, you will place multiple double or treble crochets to create the widest, most dramatic part of the individual petal.
To finish the first petal and move elegantly to the next, you will decrease the height of your stitches symmetrically. This means following your tall double crochets with a shorter stitch, then completing a slip stitch into the following base loop to anchor the petal down. Repeating this specific sequence of increasing and decreasing stitch heights all the way around the circle will yield a beautiful five or six-petaled flower.
As you work your way around, maintaining an even yarn tension is absolutely critical to ensuring that all your petals look identical in size and shape. If you pull too tightly on one section, that specific petal will look smaller and distorted compared to the rest of the blossom. Conversely, working too loosely can cause the fabric to become floppy, losing the crisp, defined structure that makes handmade flowers so appealing.
Once the final petal is complete, fast track your success by mastering the invisible fasten off technique to secure your yarn beautifully. Cut your working yarn, leaving a six-inch tail, pull the loop straight through, and use your needle to weave it backwards through the initial stitches. This clever method hides the knot completely, ensuring that the back of your crochet applique looks just as neat and professional as the front.
Finally, do not underestimate the power of blocking your crochet work once you have finished weaving in all your loose yarn ends. Lightly misting your finished textile flower with water and pinning it flat onto a foam board allows the fibers to relax and settle into their permanent shapes. This simple finishing touch elevates your project from a casual hobby craft to a stunning, boutique-quality piece of art.
4. Creative Applications and Advanced Variations
Completing your first crochet flower tutorial is just the beginning of a massive, incredibly fulfilling creative journey filled with endless design variations. Once you have mastered the simple flat blossom, you can begin experimenting with layered 3D crochet flowers by working into the front or back loops only. This advanced technique allows you to attach multiple rows of petals behind one another, creating deep, realistic textures resembling marigolds or dahlias.
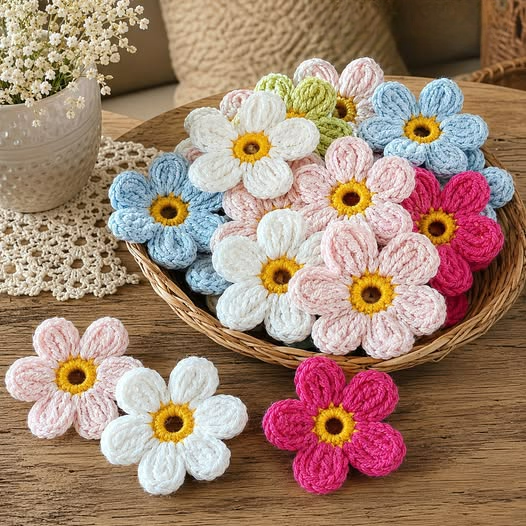
Color theory plays a massive role in the outcome of your fiber art, so do not hesitate to experiment with variegated yarn or frequent color changes. By switching to a bright yellow yarn for the center ring and a crisp white or pastel pink for the outer petals, you instantly create classic daisies. Using ombre gradients can give your finished pieces an incredibly realistic, organic appearance that mimics the subtle shifts found in nature.
These versatile fabric creations serve as wonderful embellishments for a massive array of everyday items, instantly adding a cozy, personalized touch. You can sew your completed pieces onto crochet beanies, winter scarves, canvas tote bags, or denim jackets to refresh your wardrobe with custom flair. They also make wonderful, non-perishable additions to home decor when attached to decorative throw pillows, curtain tie-backs, or festive holiday wreaths.
For special occasions, you can create an entire crochet bridal bouquet by attaching your finished fabric blossoms to cloth-covered floral wires. Unlike real flowers, a handmade yarn bouquet will never wilt or fade, serving as a beautiful, sentimental keepsake that lasts a lifetime. Mixing different floral species like roses, lavender sprigs, and tiny forget-me-nots keeps the arrangement visually dynamic, engaging, and unique.
If you enjoy micro-crafting, you can utilize fine embroidery floss and tiny steel hooks to create delicate crochet jewelry pieces. These miniature blossoms can be transformed into stunning dangle earrings, elegant statement necklaces, or dainty hair pins that make wonderful gifts for friends. The level of detail you can achieve with smaller threads is truly remarkable, offering a refined, sophisticated outlet for your crafting skills.
Ultimately, the absolute best way to grow as a fiber artist is to keep experimenting with different textures, materials, and creative layouts. There are no rigid rules in creative crafting, so allow your personal style to shine through every single loop and knot you make. Gather your supplies, trust the process, enjoy the meditative rhythm of your hook, and watch your yarn garden bloom beautifully.
Frequently Asked Questions (FAQ)
Which yarn is absolute best for making crochet flowers?
For the vast majority of projects, 100% mercerized cotton yarn is considered the gold standard for floral crafting. Cotton provides exceptional stitch definition, has a beautiful subtle sheen, and offers the structural rigidity needed to keep petals from sagging. However, premium acrylic yarns are also an excellent, budget-friendly alternative that works wonderfully for soft blanket appliques.
How do I prevent my crochet flower from curling up tightly?
Curling is usually caused by keeping your yarn tension way too tight or not having enough stitches in your initial foundation rounds. Try relaxing your hands while working, or switch to a slightly larger hook size to naturally loosen up your stitches. Additionally, ensuring your pattern has the correct balance of increases will keep the piece laying perfectly flat.
Can a total beginner successfully complete this flower tutorial?
Yes, absolutely! Flowers are actually among the best projects for beginners because they are small, quick to complete, and introduce you to all the foundational stitches in a single sitting. Because they do not require hours of commitment like a sweater or a blanket, they offer instant gratification and a fantastic way to practice consistency.
What is the best way to attach these flowers to clothing or bags?
The cleanest and most secure method is to use the long yarn tail left over from your fabric fasten-off and sew it directly onto the item using a blunt tapestry needle. If you want the flowers to be completely removable for washing purposes, you can sew a metal brooch pin or a snap fastener to the back of the flower instead.
How do I wash items that have crochet flowers attached to them?
It is highly recommended to hand wash items with delicate floral appliques in cool water using a mild, fiber-friendly detergent, then reshape them and lay them flat to dry. If you must use a washing machine, place the garment inside a mesh lingerie bag and run it on a strict delicate cycle to protect the petals from friction.
Conclusion
In this comprehensive guide, we have explored the wonderful world of textile art through our detailed Crochet Flower – Tutorial. We covered everything from selecting the ideal cotton yarns and ergonomic hooks to mastering foundational elements like the magic ring, single crochet, and double crochet stitches.
We also learned how proper tension, shaping sequences, and professional finishing techniques like blocking can elevate your handmade blossoms into gorgeous, boutique-quality designs suitable for wardrobes, home decor, or lasting gifts.