Fabric Heart Keychains – Tutorial is the ultimate guide you need today to dive into a delightful, rewarding, and highly accessible crafting project. If you are looking for a creative way to use up your favorite fabric scraps, express your artistic flair, or make heartfelt, personalized gifts for your loved ones, creating custom key rings is the perfect solution. This step-by-step walkthrough is designed to accommodate crafters of all skill levels, ensuring that even absolute beginners can achieve professional, beautiful results while exploring the wonderful world of textile arts.
In this comprehensive Fabric Heart Keychains – Tutorial, you will discover how easy it is to transform small pieces of cloth into charming, everyday accessories. Sewing your own accessories allows you to control every single detail, from the color palette and texture to the embellishments and overall style. These little fabric hearts are not only incredibly fun to make, but they also serve as a wonderful introduction to basic hand-stitching or machine-sewing techniques, making it an ideal weekend project for anyone who loves unique, handmade items.
As we dive deeper into this guide, you will find that making a Fabric Heart Keychain is an incredibly versatile project that opens up endless creative possibilities. Whether you want to create a sweet token of appreciation for a friend, add a pop of color to your own keyring, or even produce items to sell at local craft fairs, this tutorial covers everything you need to succeed. Let’s gather our materials, clear off the workspace, and explore the simple, joy-filled process of bringing these beautiful fabric creations to life.
1. Gathering Materials and Selecting Your Perfect Fabrics
Selecting the right materials is the foundational step of our Fabric Heart Keychains – Tutorial, and it completely defines the final look of your craft. For this project, cotton woven fabrics work best because they are easy to cut, do not stretch out of shape, and come in thousands of beautiful prints and vibrant colors. You can easily use your favorite leftover quilting scraps, old clothing, or fat quarters to give your project a unique, charming personality.
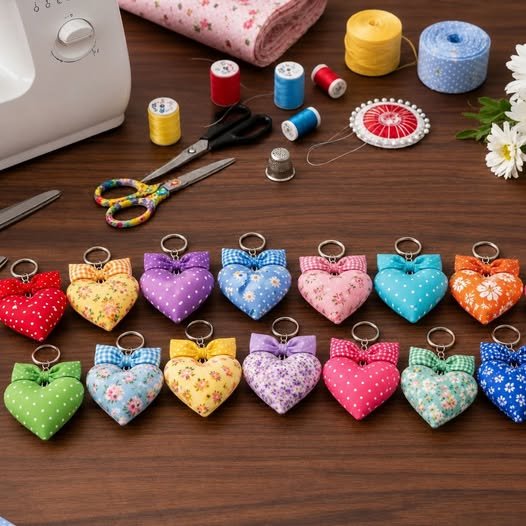
Beyond the main textile, you will need a few essential sewing supplies that you likely already have in your crafting toolkit. Make sure to gather sharp fabric scissors, high-quality sewing thread that matches or contrasts nicely with your cloth, a standard sewing needle, or a fully threaded sewing machine. Having the right tools on hand ensures clean edges, straight lines, and a smooth, frustration-free crafting experience from start to finish.
To give your heart its signature plush, three-dimensional look, you will also require a small amount of premium polyester fiberfill or alternative eco-friendly stuffing materials. If you prefer a sturdier, flatter finish, you can opt for layers of cotton batting or heavy fusible interfacing instead. The stuffing density is entirely up to you, allowing you to create either a soft, pillowy cloud or a firm, structured heart.
No keychain is complete without the hardware, so you will need to source sturdy metal split rings, swivel lobster clasps, or ball chains. To attach the metal hardware securely to the fabric body, a small piece of matching ribbon, twill tape, or a hand-sewn fabric strip is absolutely necessary. Choosing high-quality metal components ensures that your finished item is durable enough to withstand daily wear and tear inside a busy bag.
Before cutting into your precious textiles, it is highly recommended to press your cloth thoroughly with a hot iron to remove any stubborn wrinkles or deep creases. Working with smooth, flat material guarantees that your pattern pieces align perfectly, making your cutting lines much more accurate and your final seams incredibly neat. Taking a few extra minutes to prep your materials always yields a far more polished and professional end product.
Lastly, consider adding fun embellishments like delicate lace trims, vintage buttons, colorful embroidery floss, or tiny glass beads to make your creation truly one-of-a-kind. Personalization is what elevates a simple project into a memorable keepsake or a highly sought-after artisanal product. Once you have arranged all your materials neatly on your table, you are officially ready to move on to the next exciting step.
2. Preparing the Heart Pattern and Cutting the Fabric
The next vital phase of our Fabric Heart Keychains – Tutorial involves preparing your template and cutting out the precise shapes from your selected materials. To begin, you can easily draw a symmetrical heart shape on a piece of sturdy cardstock, or you can fold a small piece of paper in half and cut out a semi-heart to ensure both sides match perfectly. A standard, ideal size for a comfortable handheld keychain is usually around three to four inches wide at the largest point.
Once you are completely happy with the shape and symmetry of your paper template, place it carefully onto the wrong side of your prepared fabric. Use a water-soluble fabric marker, a piece of tailor’s chalk, or even a standard pencil to lightly trace around the outer edges of the pattern. Remember to trace two identical heart pieces for every single keychain you plan to create, keeping your lines as clean as possible.
If you are planning to sew your heart using a standard sewing machine, it is incredibly important to factor in a small seam allowance around your traced line. Leave about a quarter of an inch of extra space outside your main line, which will serve as your actual cutting guide. If you prefer the look of rustic, raw-edged hand sewing with pinking shears, you can cut directly on your original traced line without any extra allowance.
Carefully hold your fabric layers steady and use your sharpest sewing scissors to cut out the two matching heart shapes along your designated cutting lines. Avoid pulling, stretching, or distorting the fabric while cutting, as this can alter the final symmetry of your heart once it is sewn together. Taking your time during this step ensures that your two fabric pieces match up flawlessly when placed face-to-face.
At this stage, you should also cut your chosen ribbon or fabric strip to a length of approximately two to three inches. This small but crucial loop will hold your metal keyring securely in place, so it needs to be cut straight and handled with care to prevent premature fraying. If you are using a ribbon that frays easily, you can carefully seal the cut ends with a tiny bit of fray check or a flame.
With your two fabric hearts and your ribbon loop cut and ready, lay them out on your workspace to visualize the final composition. This is the absolute perfect moment to plan out any front-surface decorations, such as sewing on a beautiful button or embroidering an initial, before the two halves are permanently stitched together. Once your pieces are perfectly prepped, you are ready to begin the assembly.
3. Stitching the Fabric Layers and Securing the Loop
Now we arrive at the heart of our Fabric Heart Keychains – Tutorial, where we securely stitch the pieces together to create a beautiful, durable structure. Take your pre-cut ribbon loop, fold it in half to form a clean U-shape, and slide the raw metal keyring or clasp onto it if you want it permanently attached. Place this ribbon loop on the right side of one fabric heart, pointing the loop downward toward the center of the heart and aligning the raw edges with the top center dip.
Next, place the second fabric heart directly on top of the first piece, ensuring that the right sides of both fabrics are facing each other, sandwiching the ribbon loop completely inside. Pin the layers together securely using a few sewing pins or quilting clips to prevent the slippery fabric from shifting around while you sew. Make sure the raw edges of the ribbon loop are perfectly aligned with the raw top edge of your fabric hearts.
Begin sewing your pieces together, starting along one of the straight lower sides of the heart rather than at the curves or the tricky bottom point. If you are using a sewing machine, use a secure straight stitch and reverse-stitch at the beginning to lock your threads tightly in place. Carefully sew around the perimeter, maintaining a consistent seam allowance and pivoting slowly when you reach the sharp bottom point.
As you approach the top center dip where the ribbon loop is sandwiched, slow down your pace significantly to ensure maximum precision. Sew directly over the raw edges of the ribbon loop, and use a reverse stitch back and forth over this specific section a couple of times to add extra reinforcement. Since this loop will experience constant pulling when used as a keychain, reinforcing this area is essential for longevity.
Continue sewing around the remaining curved side of the heart, but stop about an inch and a half before reaching your original starting point. This deliberate gap is absolutely crucial, as it leaves an open pathway that allows you to turn the fabric right side out and add your plush stuffing later. Backstitch firmly at this ending point to ensure your stitches do not unravel during the turning process.
Before turning the heart right side out, use your scissors to make small, careful clips into the seam allowance at the top center dip and trim the bottom point close to the stitches. This simple technique relieves fabric tension, allowing the curves to lie perfectly flat and smooth once turned, preventing any awkward bunching. Reach inside the open gap, gently pull the fabric right side out through the hole, and use a blunt tool to push out the edges.
4. Stuffing the Heart and Finishing with Professional Touches
The final assembly phase of our Fabric Heart Keychains – Tutorial is where your project truly comes to life, shifting from a flat piece of cloth into a beautiful accessory. Grab small pinches of your polyester fiberfill and gently push them through the open gap, using a chopstick or a turning tool to guide the stuffing into the far corners. Fill the two upper lobes of the heart first, ensuring they are evenly plump and free of any hollow spots or lumps.
Continue adding small amounts of stuffing until the entire heart feels pleasantly firm, plush, and holds its gorgeous shape naturally without stretching the seams too tightly. Be careful not to overstuff the keychain, as excessive pressure can make closing the open gap neatly quite difficult and might cause your stitches to pull apart over time. Find a beautiful balance that feels soft yet resilient to the touch.
Once you are completely satisfied with the fluffiness of your heart, tuck the raw edges of the open gap inward by about a quarter of an inch, aligning them perfectly with the rest of the sewn seam. Use a couple of pins to hold these folded edges flat and flush against each other, creating a clean, continuous line along the side of your heart. Pressing this folded area lightly with an iron can help keep it crisp and manageable.
To close the opening professionally, thread a hand-sewing needle with a matching thread and use an invisible ladder stitch (also known as a slip stitch). Pass your needle back and forth through the folds of both sides, pulling the thread gently as you go to make the stitches disappear entirely into the seam. If you prefer a faster approach, you can topstitch the gap closed using a sewing machine, though hand stitching offers a cleaner look.
After securing the final knot and burying the thread tail inside the heart, give your completed keychain a gentle massage to distribute the internal stuffing perfectly evenly. Take a moment to admire your handiwork, checking that the ribbon loop is strong and that the entire heart shape looks beautifully balanced and neat. Your brand new, handmade textile accessory is now officially complete and ready to use or gift.
If you want to take your creation a step further, consider misting it lightly with a fabric-safe scent spray or adding a tiny decorative charm next to the metal ring. These small, thoughtful additions enhance the overall sensory experience of your handmade item, making it even more special for the recipient. Now that you master this simple process, you can easily mass-produce them in a wide variety of stunning color combinations.
Frequently Asked Questions (FAQ)
What is the best type of fabric to use for making heart keychains?
Woven 100% cotton fabric is universally considered the best choice for this specific project because it is stable, easy to cut, and doesn’t fray excessively during handling. However, you can also experiment with lightweight denim, linen, soft felt, or flannel depending on the specific texture and aesthetic style you want to achieve.
Do I absolutely need a sewing machine to complete this tutorial?
Not at all! This project is small enough that it can be easily sewn entirely by hand using a simple running stitch or backstitch for the main body, and a ladder stitch to close the gap. Hand sewing gives you incredible control over the small curves and is a wonderful, relaxing activity to do while watching your favorite show.
How do I prevent the ribbon loop from pulling out of the keychain over time?
To ensure your ribbon loop remains securely attached, always backstitch over the ribbon section multiple times when sewing the main perimeter. This extra reinforcement locks the loop into the seam, allowing it to withstand the daily pulling, tugging, and weight associated with carrying a set of keys.
Can I wash these fabric keychains if they get dirty from daily use?
Yes, if you use washable materials like cotton and polyester fiberfill, you can gently hand wash your keychain in warm, soapy water. Avoid submerging the metal hardware for too long to prevent rust, reshape the heart gently after washing, and allow it to air dry completely in a well-ventilated area.
What can I use as an alternative to polyester fiberfill stuffing?
If you don’t have polyester fiberfill on hand, you can easily use tiny scraps of fabric, yarn leftovers, chopped-up cotton cotton balls, or even clean unspun wool. Using fabric and thread scraps as stuffing is an excellent, zero-waste way to upcycle your sewing leftovers while giving your keychain a nice, heavy feel.
How can I make these heart keychains in bulk for a craft fair or gifts?
To create them efficiently in bulk, use assembly-line style crafting: trace and cut all your fabric pieces at once, prepare all your ribbon loops, sew them in batches, and then do all the stuffing and closing together. This method saves an immense amount of time and keeps your stitches highly consistent across all your finished products.
Conclusion
In summary, this Fabric Heart Keychains – Tutorial has guided you through the entire creative process of transforming simple cloth scraps into beautiful, functional accessories.
We explored how to choose and prepare the perfect fabrics, create a reliable pattern template, securely stitch the layers while anchoring a durable ribbon loop, and professionally stuff and close the final product. With these fundamental skills, you can now confidently create an endless variety of keyrings, zipper pulls, and personalized gifts that showcase your unique crafting style.