Creating a perfect amigurumi crochet ball is one of the most rewarding milestones for crafters, and this tutorial is designed to guide you through every step of the process with ease. Whether you are a complete beginner just picking up a hook or an experienced crocheter looking to perfect your stitches, mastering this fundamental shape opens the door to a massive world of creative possibilities. The amigurumi crochet ball serves as the essential foundation for countless projects, including adorable animal heads, bodies, holiday ornaments, and interactive baby toys.
Many people view crochet as a complex art form, but breaking down this classic sphere into manageable steps makes it incredibly approachable and fun. This tutorial focuses on providing clear, humanized guidance that eliminates guesswork, ensuring your final piece turns out beautifully round, firm, and seamless. By focusing on the right techniques, tension control, and material choices, you will soon be able to whip up these delightful spheres confidently and efficiently.
As we dive into this comprehensive amigurumi crochet ball – tutorial, you will discover that the secret to success lies in understanding the rhythm of increasing and decreasing stitches. We will explore everything from selecting the ideal yarn to mastering the invisible decrease, which prevents unsightly gaps and stuffing leakage. Get your materials ready, find a comfortable spot to sit, and let’s explore the wonderful, relaxing world of crochet together as we build your very first perfect sphere.
1. Choosing the Best Materials for Your Amigurumi Crochet Ball
Selecting the right supplies is the crucial first step for any successful amigurumi crochet ball project, as the texture and weight of your yarn heavily impact the final look. For beginners, a standard worsted weight cotton yarn or a high-quality acrylic blend is highly recommended because they offer excellent stitch definition and durability. Cotton yarn is particularly fantastic for this tutorial because it holds its shape exceptionally well, doesn’t stretch too much under pressure, and ensures your sphere stays perfectly round.
Your choice of crochet hook is just as vital as your yarn selection when working on this amigurumi crochet ball – tutorial. In traditional crochet projects like blankets or scarves, you want a loose and flowing drape, but amigurumi requires the exact opposite approach. You should select a hook that is one or two sizes smaller than what the yarn label recommends, typically ranging between 2.5mm and 3.5mm for worsted weight yarn. This conscious choice creates tight, dense stitches that effectively prevent the fiberfill stuffing from peeking through your finished piece.
In addition to your yarn and hook, a few essential notions will make your crafting experience much smoother and more enjoyable. You will definitely need a reliable stitch marker to keep track of the continuous spiral rounds, as missing a stitch can easily warp the shape of your sphere. A pair of sharp embroidery scissors and a blunt-tipped yarn needle are also necessary for cutting yarn tails and weaving in your ends cleanly. Lastly, high-quality polyester fiberfill stuffing is required to give your sphere its plush, bouncy, and resilient shape.
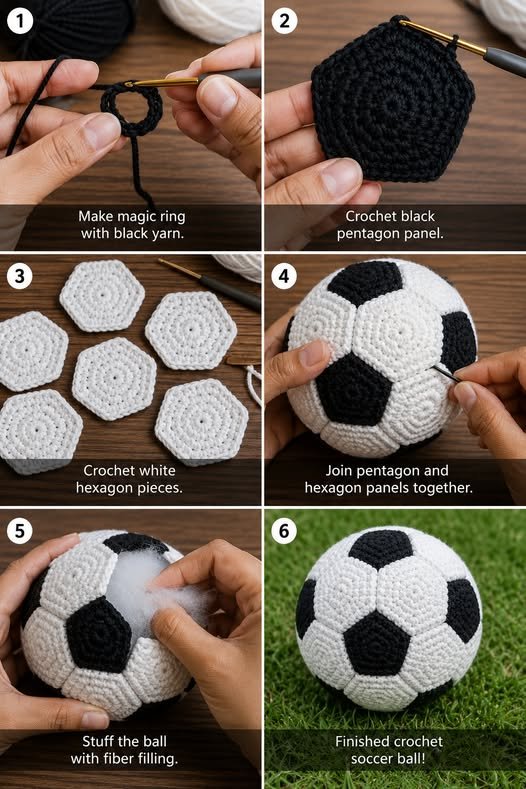
2. Step-by-Step Guide to Crating the Perfect Sphere Foundation
To begin your amigurumi crochet ball, you will want to start with a technique known as the magic ring, which creates a tightly closed center without any visible hole. This tutorial favors the magic ring over a standard chain loop because it allows you to pull the center completely shut, ensuring no stuffing escapes from the top. Once your magic ring is formed, secure it with a single chain and work six single crochet stitches directly into the adjustable loop.
For the second round of your amigurumi crochet ball, you will double your stitch count by working an increase into every single stitch around. An increase simply means placing two single crochet stitches into the exact same loop from the previous row, bringing your total stitch count from six up to twelve. It is vital to place your stitch marker in the very first stitch of this round so you always know exactly where your new rows begin and end.
The third round introduces a steady mathematical pattern that we will follow to gradually expand the size of your sphere smoothly. For this round of the tutorial, you will alternate between working one single crochet in the first stitch and one increase in the next stitch all the way around. Repeating this simple sequence a total of six times will bring your overall stitch count up to eighteen, maintaining a flat, even circle.
The expansion continues symmetrically in the fourth round, where you will work one single crochet into each of the next two stitches, followed by an increase in the third. This consistent progression bumps your stitch count to twenty-four, and following the same logic for the fifth round brings you to thirty stitches. These early rounds lay down the foundational blueprint for a flawless, dimple-free amigurumi crochet ball, making accuracy here incredibly important for the final shape.
Once you finish the increasing stage, you will transition into the sustaining phase of our amigurumi crochet ball – tutorial, often referred to as the even rounds. For rounds six through ten, you will simply place one single crochet into every single stitch around without adding any further increases, maintaining a steady count of thirty stitches per row. This section of the project builds the height and curvature of your sphere, causing the flat circle to cup upward into a beautiful bowl shape.
During these even rows, it is an excellent habit to pause briefly and check the tension of your stitches to ensure consistency throughout the piece. Your tension should be firm but comfortable, allowing your hook to glide through the loops without forcing it or straining your hands. If you notice your stitches look a bit loose or uneven, try pulling slightly tighter on your working yarn or switching down to a slightly smaller hook size.
3. Mastering the Art of Decreasing and Stuffing Cleanly
As we move into the shaping phase of this amigurumi crochet ball project, we must mirror the increases we made earlier by systematically decreasing our stitches. To achieve a professional, smooth finish, this tutorial highly recommends using the invisible decrease technique instead of a standard decrease. To execute this, insert your hook into the front loops only of the next two stitches, yarn over, pull through both front loops, yarn over again, and pull through the remaining loops.
The first decreasing round requires you to work one single crochet into each of the next three stitches, followed immediately by an invisible decrease. Repeating this pattern around the row will reduce your total stitch count from thirty down to twenty-four, gently pulling the edges inward. The subsequent round follows the exact same logic, featuring two single crochets followed by a decrease, which drops your total stitch count down to eighteen.
Now that the opening of your amigurumi crochet ball is starting to narrow significantly, it is the absolute perfect time to begin adding your polyester fiberfill. Take small clumps of stuffing at a time, teasing them apart with your fingers to prevent dense lumps, and push them gently into the core of your sphere. You want to stuff the ball firmly enough so that it holds its shape when squeezed, but not so tightly that the stitches stretch open and expose the interior.
With the stuffing securely in place, you can proceed to the next round of this tutorial, which consists of one single crochet followed by a decrease. This row reduces your count to twelve stitches, and you can add a tiny bit more stuffing to fill out the remaining upper cavity if it feels a bit empty. The final active round consists entirely of six consecutive decreases, leaving you with a very small opening and a total of six remaining stitches.
To finish your amigurumi crochet ball cleanly, cut your working yarn, leaving a generous tail of about six to eight inches for sewing. Pull the yarn tail completely through the last loop on your hook to secure it, and thread the end onto your blunt yarn needle. Carefully weave the needle through the front loops of the remaining six stitches from the outside moving inward, and pull firmly to close the hole tightly like a drawstring.
The final touch in this part of the tutorial is to insert your needle directly into the center of the closed hole and push it out through a random spot on the side. Pull the yarn tail taut, snip it close to the surface of the fabric, and massage the ball slightly so the cut end pops back inside. This clever trick hides the yarn end completely within the stuffing, leaving you with a beautiful, seamless, and professionally finished crochet sphere.
4. Creative Ways to Customize and Use Your Crochet Spheres
Now that you have successfully mastered the basic amigurumi crochet ball, you can begin exploring a wide variety of fun personalizations. One of the simplest and most effective ways to modify this tutorial is by experimenting with vibrant color changes or bold stripes. By switching your yarn color at the start of any even round, you can create eye-catching beach balls, festive holiday ornaments, or colorful decorative spheres.
You can also easily scale the size of your amigurumi crochet ball up or down simply by changing your yarn weight and hook sizes. Using a chunky, plush chenille yarn with a large hook will yield a giant, squishy cushion using the exact same stitch pattern from this guide. On the other hand, using thin embroidery floss and a tiny steel hook allows you to create miniature versions perfect for dainty jewelry or keychains.
For those looking to create interactive items, adding a small plastic rattle box or a couple of metal bells inside the stuffing turns the ball into a wonderful baby toy. If you choose to make toys for infants or pets, always ensure your stitches are incredibly tight and avoid using glued-on plastic safety eyes. Instead, use your yarn needle and some black contrast yarn to embroider safe, durable facial features directly onto the surface of the sphere.
Transforming your basic sphere into an adorable animal character is another fantastic way to apply the skills learned in this amigurumi crochet ball – tutorial. By crocheting small, separate flat circles for ears and sewing them onto the top, you can instantly create a cute bear, cat, or mouse. The creative possibilities are truly infinite once you view the humble sphere as a blank canvas waiting for your unique artistic touch.
If you enjoy practical home decor, you can make a collection of these spheres in rustic, earthy tones like cream, taupe, and sage green. Placing a handful of these textured balls into a decorative wooden bowl or a glass vase creates an instant, cozy farmhouse accent for your living room. You can even infuse the polyester stuffing with a few drops of your favorite essential oils to turn them into beautiful, long-lasting room fresheners.
Finally, practicing this amigurumi crochet ball pattern repeatedly is the absolute best way to build muscle memory, improve your stitch consistency, and boost your overall crafting confidence. The skills you have polished throughout this guide—such as tension control, magic rings, and invisible decreases—are the core pillars of all advanced amigurumi projects. Enjoy the relaxing, meditative rhythm of the stitches, and celebrate the wonderful handmade art you can create with just a hook and a skein of yarn.
FAQ
How do I prevent gaps from showing in my amigurumi crochet ball?
To prevent gaps, always use a crochet hook that is one or two sizes smaller than the size recommended on your yarn label. Additionally, mastering the invisible decrease technique instead of a standard decrease keeps the fabric tight, dense, and perfectly uniform.
What is the best type of yarn for a beginner starting this tutorial?
A medium-weight (worsted weight) 100% cotton yarn or a premium acrylic blend is ideal for beginners. These yarns offer excellent stitch definition, do not split easily, and hold their shape beautifully when stuffed, making it much easier to count your rows.
Why is my crochet ball turning out oval or flat instead of perfectly round?
An uneven shape usually happens if your tension changes mid-project, or if a round’s increase or decrease count was miscalculated. Make sure to use a stitch marker at the start of every single round and double-check your stitch counts to maintain perfect mathematical symmetry.
Can I wash my finished amigurumi crochet ball?
Yes, most completed spheres can be washed, provided you used washable cotton or acrylic yarn and high-quality polyester fiberfill stuffing. It is best to place the item inside a mesh laundry bag and wash it on a gentle cycle with cold water, then let it air dry completely.
How do I know when I have added enough stuffing to the sphere?
Your sphere should feel firm to the touch and spring back into shape easily when gently squeezed, without looking lumpy or distorted. If you can see the white polyester fiberfill pushing through the gaps between your stitches, you have overstuffed the ball and should remove a small amount.
Conclusion
Throughout this amigurumi crochet ball – tutorial, we have covered all the fundamental steps required to create a flawless, professionally finished crochet sphere.
From selecting the perfect yarn and downsized hook to mastering the magic ring, even rounds, and the essential invisible decrease, you now possess the core skills that form the foundation of all amigurumi art. By maintaining consistent tension and stuffing your project carefully, you can create beautiful, gap-free spheres that can easily be transformed into toys, decor, or adorable characters.