Crochet Baby Shoes – Tutorial is the ultimate guide you need to create the softest, most adorable footwear for the precious little ones in your life. There is something incredibly magical about crafting a handmade gift, and nothing quite matches the charm of tiny, stitched booties. Whether you are an experienced crafter or a passionate beginner looking for a rewarding new project, mastering the art of creating crochet baby booties is a wonderful milestone that allows you to blend creativity with utility.
Handmade items carry a unique warmth and sentimental value that mass-produced store items simply cannot replicate. Parents deeply appreciate the time, effort, and love woven into every single stitch of a pair of handmade baby shoes. Beyond being an absolute joy to look at, these tiny shoes serve an essential purpose by keeping delicate little feet warm, protected, and cozy during those first crucial months of life.
In this comprehensive guide, we are going to walk you through everything required to succeed, ensuring your finished project looks polished, professional, and beautiful. By following this detailed step-by-step crochet tutorial, you will learn how to select the perfect materials, master the foundational construction techniques, and avoid common mistakes. Get your hooks ready, choose your favorite yarn colors, and let us dive straight into this delightful crafting journey together.
1. Choosing the Right Yarn and Materials for Baby Booties
When starting a project centered around a Crochet Baby Shoes – Tutorial, the absolute most critical decision you will make is selecting the appropriate yarn. A baby’s skin is incredibly delicate, sensitive, and prone to irritation, which means you must prioritize ultra-soft, hypoallergenic fibers. Look for yarns specifically labeled as “baby yarn” or choose high-quality organic cotton, bamboo blends, or premium soft acrylics that offer both comfort and durability.
In addition to softness, you must consider the weight of the yarn, as it directly impacts the final size and structure of your crochet infant shoes. A lightweight category 3 (DK weight) or a category 2 (sport weight) yarn is generally recommended for achieving those neat, tight stitches that hold their shape well. Avoid scratchy wools, heavy chunky yarns, or fibers with loose halo properties like mohair, which can shed and potentially get into a baby’s mouth or eyes.
Naturally, the right yarn must be paired with the correct crochet hook size to achieve the perfect tension. For most standard newborn and infant patterns, a 3.5mm (E/4) or a 4.0mm (G/6) hook works beautifully to create a flexible yet sturdy fabric. Using an ergonomic hook can also prevent hand fatigue, especially since working on miniature items requires a bit more precision and fine motor control.
Do not forget the small but essential notions that make the crafting process much smoother and more enjoyable. You will need a couple of locking stitch markers to keep track of the beginning of your rounds, which is vital when working on symmetrical footwear. A sharp pair of scissors and a blunt tapestry needle for weaving in those loose ends securely are also absolute must-haves for your workspace.
Safety should always remain your top priority when designing and making any kind of handmade children’s clothing. If your design includes embellishments like ties, straps, or decorative accents, ensure they are attached with extreme security to prevent choking hazards. Instead of plastic buttons, consider crocheting small decorative elements or using secure embroidery stitches to add beautiful, safe details to your work.
Lastly, keep washability in mind when purchasing your supplies, as baby items inevitably require frequent, thorough cleaning. Opt for machine-washable and dryable fibers so that the busy new parents can easily maintain the shoes without fearing shrinkage or fraying. Taking the time to select the ideal materials ensures that your hard work will be cherished, used often, and safely enjoyed by the family.
2. Understanding the Anatomy and Sizing of a Crochet Shoe Sole
To successfully complete a Crochet Baby Shoes – Tutorial, it helps immensely to understand how a miniature shoe is constructed from the bottom up. Every great bootie starts with the sole, which acts as the foundation for the entire shape, length, and width of the footwear. The sole is typically worked in continuous or joined rounds, starting with a central chain that runs down the middle of the foot.
Achieving the correct sizing is often the most challenging part for beginners tackling crochet baby patterns. Standard baby shoe sizes are usually categorized by age ranges, such as 0-3 months, 3-6 months, and 6-12 months. However, because every child grows at their own unique pace, measuring the actual foot length from heel to big toe is always the most accurate method.
For a standard newborn size (0-3 months), the finished sole should ideally measure approximately 3.5 inches (about 9 centimeters) in length. For older babies in the 3-6 month range, aim for a sole length of roughly 4 inches (10 centimeters). Keeping a flexible tape measure right at your workstation allows you to double-check your progress frequently before moving on to the sides.
The shaping of the sole is achieved by strategically placing increases—crocheting two or more stitches into a single loop—at the heel and toe ends. The toe area will naturally require a few more increases than the heel to create that realistic, anatomically correct wider front shape. Maintaining an accurate stitch count during these foundational rounds is absolutely paramount for a perfectly symmetrical pair of shoes.
If your tension tends to be loose, you might find that your finished sole turns out much larger than the pattern intends. To fix this common issue, you can try switching to a slightly smaller hook size or consciously tightening your grip on the working yarn. Conversely, tight crocheters should consider sizing up their hook to prevent the sole from curling up prematurely into a tight cup.
Once you have successfully completed both soles, place them directly on top of one another to ensure they are identical in size and shape. There is nothing more frustrating than finishing an entire bootie only to realize one is noticeably larger than its partner. With a solid, matching pair of soles ready, you are fully prepared to build upward and form the body.
3. Step-by-Step Instructions for the Bootie Body and Toe Decreases
Now that your foundation is complete, this Crochet Baby Shoes – Tutorial moves into the exciting phase of building the actual body of the shoe. To create a crisp, clean border between the flat sole and the rising walls, work your first round of the body into the back loops only (BLO). This specific technique generates a beautiful ridge that clearly defines the bottom of the shoe and helps the sides stand upright.
Work a few rounds evenly around the perimeter without adding any increases, which will cause the fabric to naturally curve upward like a small bowl. This section forms the sides and the heel support of your diy crochet baby booties, giving them the necessary depth to stay securely on a moving foot. Consistency in your stitch tension during these rounds guarantees clean, straight lines all the way around.
The real magic happens when you reach the front section of the shoe, where you will implement decreases to form the toe cap. By crocheting two stitches together (such as a half double crochet decrease or double crochet decrease), you will rapidly pull the fabric inward. This strategic shaping creates that classic, rounded toe pocket that comfortably houses those tiny, wiggling toes.
It is highly recommended to use your stitch markers to pinpoint the exact center of the toe before you begin decreasing. This simple trick ensures that your toe cap is perfectly centered and does not lean awkwardly to the left or the right side. Count your stitches carefully on both sides of the marker to maintain perfect balance throughout the shaping process.
As you finish the final decrease rounds, you will notice the opening of the shoe narrowing down to a realistic ankle size. This transformation is incredibly satisfying to watch as a flat piece of yarn officially takes on the three-dimensional form of footwear. Take your time during these decrease rows, as smooth transitions here prevent unsightly gaps or holes in the fabric.
Before moving on to the final decorative touches, gently stuff the toe area with a little bit of clean tissue or scrap yarn to check the overall shape. This allows you to view the silhouette clearly and ensure that your decreases look uniform and smooth from every angle. Once satisfied, you are ready to transition into finishing the ankle cuff and adding personal flair.
4. Customizing Your Shoes with Straps, Cuffs, and Edgings
The absolute best part of a Crochet Baby Shoes – Tutorial is the endless opportunity for customization and personal creative expression. Once the main body of your shoe is established, you can choose to leave it as a sleek low-cut loafer, or extend it into a cozy boot. Adding a simple ribbed cuff using alternating front post and back post double crochet stitches creates a wonderful, stretchy sock-like top.
If you prefer a classic Mary Jane style, you can easily attach yarn to one side of the ankle rim and crochet a short chain to serve as a strap. Fasten the strap across the top of the foot to the opposite side using a tiny, securely sewn coordinating button or a crocheted loop. This style is not only timelessly elegant but also highly practical for keeping the shoes from slipping off.
For a modern, sporty look, you can weave a contrasting color of yarn or a soft satin ribbon through the stitches around the ankle to create functional laces. This enables parents to gently tie the crochet infant slippers securely around the baby’s ankle, ensuring they stay put even during active playtime. Always keep these ties relatively short to maintain total safety and avoid any potential tangles.
You can also elevate the overall design by adding delicate decorative borders around the sole ridge or the top rim using a contrasting yarn color. A simple slip stitch border or a scallop shell edging adds a beautiful layer of texture and visual interest to the project. These subtle contrast colors can tie the entire design together beautifully, making the finished product look incredibly high-end.
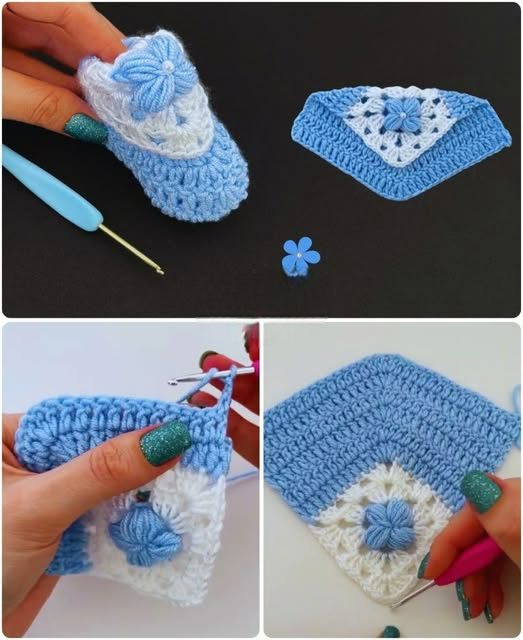
Do not hesitate to experiment with small appliqués like crocheted flowers, tiny bows, or embroidered animal faces on the toe caps. A pair of gray booties can easily turn into adorable little elephants, while bright yellow yarn can become cheerful springtime baby chicks. Let your imagination run wild during this phase to create a truly personalized, memorable keepsake gift.
When you have completed both shoes and added all your custom features, use your tapestry needle to meticulously weave in every single loose yarn tail. Ensure that you weave them through the inside stitches multiple times in different directions so they do not pop out during washing. Give the finished pair a gentle shape with your hands, and your gorgeous handmade creation is officially ready to be gifted.
Frequently Asked Questions (FAQ)
What is the best yarn for making crochet baby shoes?
The best yarn for making crochet baby slippers is one that is exceptionally soft, skin-friendly, and easy to wash. Premium acrylics, organic cotton, and bamboo blends are the top choices because they do not cause irritation to sensitive infant skin. Always look for lightweight options like DK or sport weight to ensure your stitches remain neat and delicate.
How do I make sure both baby shoes turn out the exact same size?
To ensure both shoes are perfectly identical, you should maintain consistent yarn tension and count your stitches meticulously on every single round. It can be incredibly helpful to crochet both soles first, compare them directly, and then proceed to build the bodies. Using the exact same crochet hook and brand of yarn for both shoes is also essential.
Can a total beginner successfully complete this crochet tutorial?
Yes, a beginner can absolutely complete this Crochet Baby Shoes – Tutorial if they are already familiar with foundational stitches like the chain, single crochet, and half double crochet. Miniature projects require a bit of patience and precise stitch counting, but following a step-by-step guide makes the entire process highly manageable and rewarding.
How do I prevent the booties from constantly sliding off the baby’s feet?
To keep the booties securely in place, you can incorporate design features like an ankle strap, an adjustable drawstring ribbon, or a stretchy ribbed cuff. Babies love to wiggle their feet, so creating a slightly snugger ankle opening or a functional tie system ensures the footwear stays put during daily activities.
How should I wash and care for handmade crochet baby clothing?
If you used machine-washable cotton or premium acrylic yarn, the shoes can be placed inside a mesh lingerie bag and washed on a gentle, cold cycle. However, to preserve the shape and delicate details of your handmade baby shoes for as long as possible, gentle hand washing and air drying flat on a clean towel is always highly recommended.
Conclusion
In conclusion, this Crochet Baby Shoes – Tutorial has provided you with all the foundational knowledge, material insights, and structural steps needed to create beautiful, comfortable, and safe footwear for infants.
From selecting the softest, baby-safe yarns to mastering the essential toe decreases and exploring creative customization options, you now possess the skills to craft a truly timeless keepsake. Handmade gifts like these carry an immense amount of love and thoughtfulness, making them stand out as unforgettable treasures for any new parent.