If you have been searching for a fun, rewarding, and incredibly practical sewing project, learning how to make fabric baskets with this comprehensive tutorial is the perfect place to start. Home organization doesn’t have to rely on boring plastic bins when you can craft custom, beautiful storage that matches your personal decor style. Whether you want to tidy up your sewing room, organize a nursery, or create beautiful gift baskets for friends, mastering the art of the fabric basket is a game-changer for DIY enthusiasts.
This step-by-step fabric baskets – tutorial is designed for crafters of all skill levels, guiding you through the process of turning simple textile pieces into sturdy, structured containers. By choosing your own colors, patterns, and sizes, you gain complete creative control over your organizational setup. Plus, it is an excellent way to use up your fabric stash and practice essential sewing techniques like pivoting corners and working with stabilizing materials.
In this guide, we will cover everything from selecting the right materials to achieving crisp, professional corners that stand up on their own. By the end of this fabric baskets – tutorial, you will have all the knowledge needed to mass-produce these handy bins in various sizes. Grab your sewing machine, pick out your favorite cotton prints, and let’s dive into the ultimate guide to crafting durable and gorgeous fabric baskets!
1. Choosing the Right Materials and Tools for Fabric Baskets
When starting your journey with this fabric baskets – tutorial, selecting the right materials is the absolute foundation of your success. For the exterior, medium to heavyweight woven fabrics like cotton canvas, linen, or lightweight denim work beautifully because they inherently offer more structure. For the interior lining, a high-quality quilting cotton is ideal as it comes in endless colors and provides a smooth finish inside your basket.
The secret ingredient to making fabric baskets that actually stand up on their own without collapsing is the interfacing. You will want to invest in a good fusible fleece or a heavy-duty stiff stabilizer, which is ironed directly onto the wrong side of your exterior fabric. This adds the necessary bulk and stiffness, transforming limp cloth into a resilient, rigid wall that holds its shape even when empty.
In terms of tools, make sure you have a reliable sewing machine equipped with a sharp universal or denim needle to pierce through multiple layers easily. You will also need standard sewing notions: a rotary cutter, a self-healing cutting mat, an acrylic ruler, fabric shears, pins or Wonder Clips, and a fabric marking pen. A good steam iron is also mandatory, as crisp pressing makes a massive difference in the final look.
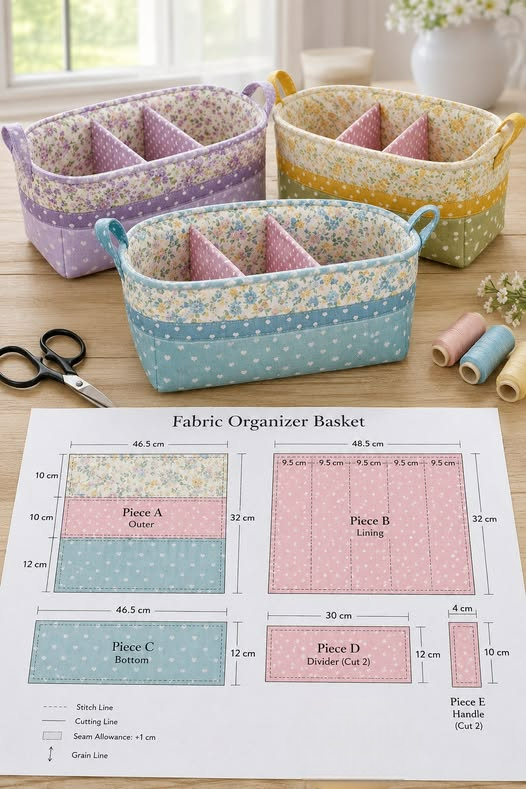
2. Cutting Your Pieces and Prepping with Interfacing
To begin the construction phase of our fabric baskets – tutorial, you need to decide on the dimensions of your finished container. For a standard, versatile storage bin, cut two matching rectangles for the main exterior and two matching rectangles for the inner lining. If you want to include sturdy handles, cut two additional long, narrow strips of fabric at this stage as well.
Once your pieces are cut, it is time to replicate those exact measurements on your fusible interfacing or fleece. Cut two pieces of interfacing that match the exterior fabric dimensions exactly, ensuring you trim away any excess that might cause bulk in your seams later. Proper preparation during this cutting phase ensures that all your panels align perfectly when you begin sewing.
Now, head over to your ironing board to fuse the stabilizing material to the wrong side of your exterior fabric panels. Follow the manufacturer’s instructions, using plenty of steam and firm, even pressure with your iron to ensure a permanent bond. This step is crucial for fabric baskets because a poor fuse will result in unsightly wrinkles and a saggy basket over time.
3. Assembling the Outer Shell and Creating Flat Bottoms
With your pieces prepped, place the two exterior fabric panels right sides together, aligning all the edges perfectly, and pin them securely in place. Sew down the two sides and across the bottom edge using a standard half-inch seam allowance, leaving the top opening completely untouched. Remember to backstitch at the beginning and end of each seam to secure your stitches properly.
To give your fabric baskets a functional, flat bottom rather than a flat envelope shape, you need to create boxed corners. Pinch the bottom corner of the bag, pulling the front and back fabrics apart until the side seam aligns perfectly with the bottom seam, forming a sharp triangle. Mark a straight line perpendicular to the seam line at your desired width, which determines the depth of your basket.
Sew directly along this marked line, backstitching carefully at both ends to reinforce the corner, and then trim away the excess fabric triangle. Repeat this exact process on the other bottom corner to ensure your basket has a symmetrical, sturdy base. Turn the exterior shell right side out, pushing the newly formed corners out gently with your fingers or a point turner.
4. Sewing the Lining and Finishing Your Fabric Basket
Now, repeat the assembly process for the lining fabric by placing the two lining pieces right sides together and sewing the sides and bottom. However, there is a crucial trick in this fabric baskets – tutorial: leave a four-inch opening in the middle of the bottom seam for turning the basket later. Box the corners of the lining in the exact same manner as you did for the exterior shell.
If you chose to add handles, fold your handle fabric strips lengthwise, press, sew along the edge, and baste them onto the right side of the exterior shell. Next, insert the right-side-out exterior basket directly into the wrong-side-out lining basket, ensuring the right sides of both fabrics are facing each other. Align the top raw edges and side seams perfectly, pinning or clipping all the way around the perimeter.
Sew completely around the top rim of the basket, removing pins as you go and ensuring all layers remain flush. Reach through the opening you left in the lining bottom and carefully pull the entire exterior basket through, flipping the whole project right side out. Sew the lining hole closed, tuck the lining down inside the exterior shell, press the top edge crisply, and topstitch around the rim for a professional finish.
FAQ – Frequently Asked Questions
How do I make fabric baskets stiff enough to stand up on their own?
The key to stiffness is using the right heavy-duty stabilizer, such as Pellon Fast 2 Fuse, Décor-Bond, or a thick fusible fleece. You can also layer multiple types of interfacing or use stiffer outer fabrics like canvas or duck cloth to add extra support.
Can I wash these DIY fabric baskets if they get dirty?
Yes, depending on the type of interfacing you used during the fabric baskets – tutorial. If you used high-quality fusible fleece or woven interfacing, you can gently hand wash the basket or machine wash it on a delicate cycle, then reshape it and let it air dry.
What is the best fabric to use for a beginner sewing project like this?
100% quilting cotton is the absolute best choice for beginners because it doesn’t slip, stretch, or fray excessively while you are cutting and sewing. It behaves beautifully under the sewing machine and comes in thousands of vibrant prints.
How do I change the size of the basket to make it larger or smaller?
To alter the size, simply increase or decrease the initial cutting measurements of your rectangles. Keep in mind that the depth of your boxed corners dictates how wide the base will be, so adjust your corner measurements proportionally.
Do I absolutely need a sewing machine to complete this tutorial?
While a sewing machine makes this fabric baskets – tutorial much faster and ensures stronger seams for heavy storage, you can technically sew it by hand using a strong backstitch. It will simply require more time and patience to complete.
Conclusion
In this fabric baskets – tutorial, we have explored how easy and rewarding it is to design and sew your own custom storage containers. From selecting heavy-duty interfacing to mastering the technique of boxing corners, you now possess the skills to transform basic cotton pieces into functional art.
These versatile bins are perfect for decluttering your home, organizing craft supplies, or acting as eco-friendly gift wrap for loved ones.