The Lone Star quilt is one of the most iconic and recognizable quilt patterns. This beautiful and intricate design is a favorite among quilters for its striking appearance and the challenge it presents.
In this tutorial, we will break down the steps to create your own Lone Star quilt, including fabric selection, cutting, piecing, and assembly.
Whether you are a seasoned quilter or a beginner looking for a new project, this guide will help you create a stunning Lone Star quilt.
Selecting Your Fabric
Choosing Colors and Patterns
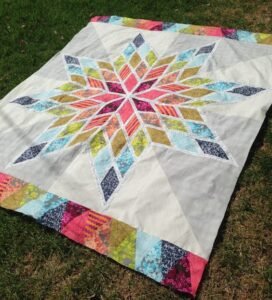
The Lone Star quilt is known for its dramatic use of color and pattern. When selecting fabrics, consider using a mix of solids and prints to add depth and interest to your quilt.
A good rule of thumb is to choose at least six different fabrics that blend well together. You can use a color wheel to help you pick complementary colors that will make your star pop.
Fabric Requirements
For a standard-sized Lone Star quilt, you will need approximately:
- 1 yard of fabric for each of the six star colors
- 2 yards of background fabric
- 1 yard of border fabric
- 1 yard of binding fabric
- 4 yards of backing fabric
Pre-washing and Cutting
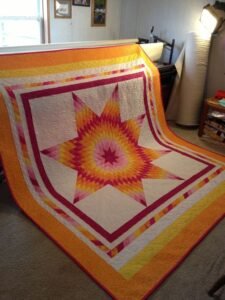
Pre-wash all your fabrics to prevent any shrinking or color bleeding after the quilt is finished. Once your fabrics are washed and pressed, you can begin cutting.
The Lone Star quilt is made up of diamond shapes, so you will need a rotary cutter, a cutting mat, and a quilting ruler.
Cut the fabric into strips, ensuring they are all the same width. For this tutorial, we will use 2.5-inch wide strips. You will need to cut a total of 96 strips (16 strips of each of the six fabrics).
Piecing the Star
Assembling the Diamonds
The key to a beautiful Lone Star quilt is precise cutting and piecing. Start by sewing the strips together in sets of six. Make sure to alternate the colors according to your design plan. Press the seams open to reduce bulk.
Next, cut the strip sets into diamond shapes using a 45-degree angle. Each diamond will consist of six strips of fabric. You will need a total of 64 diamonds to complete the star.
Sewing the Diamonds Together
Lay out your diamonds on a flat surface to form the star pattern. This will help you visualize the final design and ensure the colors are placed correctly. Begin sewing the diamonds together in pairs, making sure to match the seams accurately.
Once you have sewn the pairs, join them to form larger sections. Continue this process until you have eight large sections. Press all the seams open as you go to ensure a flat and even surface.
Completing the Star
Sew the eight large sections together to form the star. This step requires patience and precision, as it is crucial to match all the seams perfectly. Pin the sections together before sewing to prevent any shifting. Once the star is complete, press the entire piece thoroughly.
Adding the Background and Borders
Cutting the Background Pieces
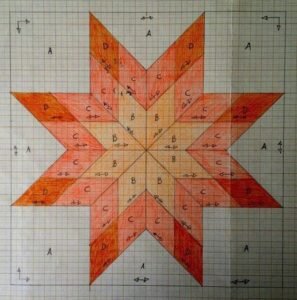
The background fabric frames the Lone Star and makes it stand out. Cut four large squares from the background fabric. The size of these squares will depend on the size of your star. For this tutorial, we will use 18-inch squares.
Attaching the Background
Cut each of the background squares in half diagonally to create triangles. These triangles will be sewn to the edges of the star. Begin by sewing the triangles to the top and bottom of the star, then add the triangles to the sides.
Press the seams towards the background fabric to reduce bulk. Trim any excess fabric to create a neat and even edge.
Adding the Borders
Borders not only frame the quilt but also help to stabilize it. Cut strips of border fabric to your desired width. For this tutorial, we will use 3-inch wide strips. Sew the border strips to the top and bottom edges of the quilt, then add the side borders. Press the seams towards the border fabric.

Quilting and Finishing
Layering the Quilt
To prepare your quilt for quilting, you will need to create a quilt sandwich. This consists of the quilt top, batting, and backing fabric. Lay the backing fabric right side down, place the batting on top, and then add the quilt top right side up. Smooth out any wrinkles and pin the layers together.
Quilting the Layers
There are many ways to quilt a Lone Star quilt. You can choose to hand quilt, machine quilt, or even use a longarm quilting machine. For this tutorial, we will focus on machine quilting.
Start by stitching in the ditch along the seams of the star. This will help to stabilize the quilt and keep the layers from shifting. Next, add additional quilting designs in the background and border areas. You can use straight lines, free-motion quilting, or any other design that complements your star.

Binding the Quilt
The final step in finishing your Lone Star quilt is adding the binding. Cut 2.5-inch wide strips of binding fabric and sew them together to create a continuous strip. Fold the strip in half lengthwise and press.
Sew the binding to the front edge of the quilt, mitering the corners as you go. Fold the binding over to the back of the quilt and hand stitch it in place. This will give your quilt a neat and professional finish.
Caring for Your Lone Star Quilt
Washing and Drying
To keep your Lone Star quilt looking its best, it is important to wash and dry it properly. Use a gentle cycle and cold water when washing your quilt. Avoid using bleach or harsh detergents, as they can damage the fabric.
Storing Your Quilt
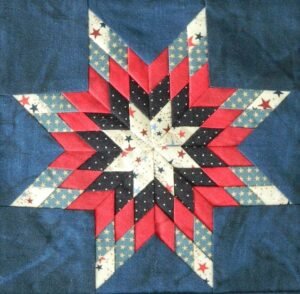
When not in use, store your quilt in a cool, dry place. Avoid exposing it to direct sunlight, as this can cause the colors to fade. If you need to fold your quilt for storage, place a sheet of acid-free tissue paper between the folds to prevent creases.
Displaying Your Quilt
A Lone Star quilt is a work of art and deserves to be displayed. You can hang your quilt on a wall using a quilt hanger or rod. Alternatively, drape it over a bed or sofa to show off its beauty and craftsmanship.
In conclusion, creating a Lone Star quilt is a rewarding and challenging project that showcases your quilting skills. By following this step-by-step tutorial, you can make a stunning quilt that will be cherished for years to come. Happy quilting!
