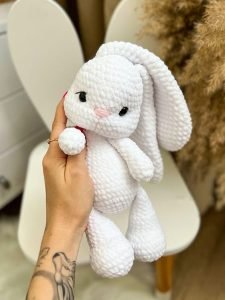
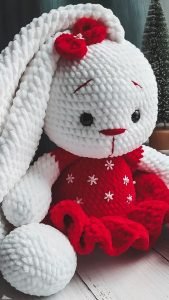
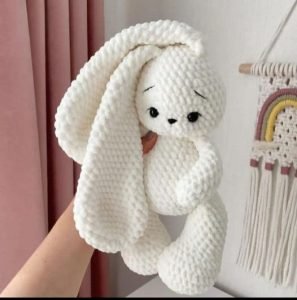
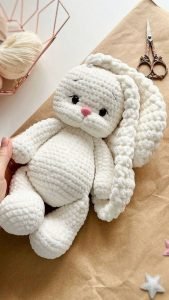
Creating a Bunny Amigurumi is a delightful crochet project that brings a touch of charm and whimsy to your craft collection. Amigurumi, the art of crocheting small stuffed toys, has captured the hearts of crafters around the world.
This tutorial will guide you through the process of making an adorable bunny, perfect for gifting or adding to your collection.In this article, we will cover everything you need to know to create a bunny amigurumi, from selecting materials to crocheting the individual parts and assembling the final product.
By following this step-by-step guide, you’ll be able to craft a beautiful bunny that showcases your crochet skills.

Materials and Tools for Bunny Amigurumi
Before you start your bunny amigurumi, it’s important to gather all the necessary materials and tools. Having everything on hand will make the crafting process smoother and more enjoyable.
- Yarn: Choose a soft, medium-weight yarn in the color of your choice for the bunny’s body. You’ll also need contrasting yarn for the inner ears and details like the nose.
- Crochet Hook: A 3.5mm crochet hook is commonly used for amigurumi projects, but you can adjust based on your preferred yarn and tension.
- Stuffing: Polyfill or another suitable stuffing material will give your bunny its plush and cuddly shape.
- Safety Eyes: 10mm safety eyes or black yarn for embroidering the eyes.
- Tapestry Needle: Used for sewing the parts together and weaving in the ends.
- Stitch Marker: To keep track of your rounds, especially as you work in continuous spirals.
- Scissors: For cutting your yarn.
Using high-quality materials will ensure your bunny amigurumi is soft and durable. Choosing the right tools will also help achieve a polished finish for your project.
Crocheting the Bunny’s Body
Step 1: Starting the Body
The body of the bunny is typically crocheted in continuous rounds, beginning at the base and working upward. This allows you to create a smooth, rounded shape without visible seams.
Body Pattern:
- Round 1: Begin with a magic ring and work 6 single crochets (SC) into the ring.
- Round 2: Increase in each stitch around, resulting in 12 SC.
- Round 3: 1 SC, increase around to get 18 SC.
- Round 4: 2 SC, increase around, bringing the total to 24 SC.
Continue increasing until you reach the desired width for the bunny’s body. Once you have the base size, work even rounds (no increases or decreases) to build the body’s height. Make sure to stuff the body as you go to maintain its shape.
Step 2: Shaping the Top
As you approach the top of the body, begin decreasing to form a rounded shape that will meet the head. Properly shaping the top ensures that the head will sit naturally on the body.
- Round 10: 3 SC, decrease around.
- Round 11: 2 SC, decrease around.
- Round 12: 1 SC, decrease around.
Before closing the final round, add more stuffing if necessary to make sure the body is firm. Once you’re satisfied with the shape, fasten off and leave a long tail for sewing the head onto the body.

Creating the Bunny’s Head
Step 1: Crocheting the Head
The head is one of the most critical parts of the bunny amigurumi, as it gives the toy its character. Like the body, the head is crocheted in continuous rounds.
Head Pattern:
- Round 1: Start with a magic ring and 6 SC.
- Round 2: Increase in each stitch to make 12 SC.
- Round 3: 1 SC, increase around to get 18 SC.
- Round 4: 2 SC, increase around, totaling 24 SC.
- Round 5: 3 SC, increase around, ending with 30 SC.
Work even rounds to build the head’s height, then decrease in the same manner as the body. Before closing, insert the safety eyes between rounds 8 and 9, spaced appropriately apart. After positioning the eyes, stuff the head firmly and close the top with decreases.
Step 2: Attaching the Head
Once the head is completed and stuffed, it’s time to attach it to the body. Use the long tail left from the body to sew the head onto the body, making sure it’s centered. Secure it with small, tight stitches for durability.
Positioning the head correctly is essential for giving your bunny the right look. Take your time to align it properly before finalizing the stitches.
Crafting the Ears, Arms, and Legs
Step 1: Making the Ears
The bunny’s ears are one of its most distinctive features. They are crocheted separately and then attached to the head. The ears can be made long and floppy or short and upright, depending on your preference.
Ear Pattern:
- Round 1: Start with a magic ring and 6 SC.
- Round 2: Increase in each stitch to get 12 SC.
- Round 3: 1 SC, increase around, totaling 18 SC.
- Rounds 4-10: Work even rounds to achieve the desired length.
After completing both ears, sew them onto the top of the head. Ensure the ears are evenly spaced and aligned for a symmetrical appearance.
Step 2: Creating the Arms and Legs
The arms and legs are crocheted in the same way, but the legs are slightly longer. These parts are worked in rounds, similar to the body and head.

Arms and Legs Pattern:
- Round 1: 6 SC into the magic ring.
- Round 2: Increase in each stitch to get 12 SC.
- Round 3: Work even rounds until the arms are the desired length.
- For the legs, continue working rounds to make them slightly longer than the arms.
Stuff the arms and legs lightly, leaving the tops unstuffed for easier attachment. Sew the arms onto the sides of the body and the legs to the bottom, making sure everything is aligned correctly.
Adding the Tail and Final Details
Step 1: Crocheting the Tail
The bunny’s tail is a simple yet essential part of the amigurumi. It can be crocheted as a small round ball or as a pom-pom, depending on the look you want to achieve.
Tail Pattern:
- Round 1: 6 SC into the magic ring.
- Round 2: Increase in each stitch around to get 12 SC.
- Round 3: Work even rounds for a few rows to form a small ball.
- Round 4: Decrease around until closed.
Attach the tail to the back of the bunny’s body, making sure it’s centered and positioned appropriately.
Step 2: Adding Facial Features
To bring your bunny to life, add facial features such as a nose, mouth, and whiskers. The nose can be embroidered with a small triangle shape using pink or black yarn. For the mouth, a simple straight or “V” shape will do.
Whiskers can be added using thin yarn or embroidery thread. These small details make a big difference in giving your bunny a unique and expressive face.
Customizing Your Bunny Amigurumi
Step 1: Experimenting with Colors
One of the joys of crocheting amigurumi is the ability to customize colors. While traditional bunnies are often gray, white, or brown, feel free to experiment with pastel shades, bright colors, or even variegated yarns to create a one-of-a-kind bunny.
Step 2: Adding Accessories
Consider adding accessories like a small bow, scarf, or even a tiny crochet carrot. These additions can give your bunny extra personality and make it more fun and interesting.
Step 3: Adjusting Size
You can adjust the size of your bunny amigurumi by changing the yarn weight and hook size. Using a thicker yarn and larger hook will result in a bigger bunny, while finer yarn and a smaller hook will make a more delicate and tiny version.
Advanced Techniques for Bunny Amigurumi
Technique 1: Working in Continuous Rounds
Amigurumi is often worked in continuous rounds rather than turning rows. This method avoids visible seams and creates a smoother finish. Use a stitch marker to keep track of the beginning of each round.
Technique 2: Invisible Decrease
The invisible decrease is a technique that reduces the number of stitches without leaving noticeable gaps or bumps. It’s especially useful when shaping the head, body, and limbs of your bunny.
Technique 3: Seamless Joining
For a professional-looking finish, practice seamless joining techniques when sewing the parts together. This method ensures that your bunny has a clean and polished appearance, with no visible seams or loose ends.

Creating a Bunny Amigurumi is a rewarding and enjoyable crochet project that allows you to express your creativity. By following this tutorial, you can craft a cute and cuddly bunny that’s perfect for gifting or keeping as a cherished handmade toy.
This tutorial is optimized with the keyword “crochê” to improve search engine visibility, helping more crochet enthusiasts discover this delightful project. With careful attention to detail and a little creativity, your bunny amigurumi will be a unique and treasured piece of art.
