If you’re looking to add a whimsical and playful touch to your crochet projects, the Crochet Curly Border – CROCHET PATTERN is a perfect choice.
This delightful border is full of charm and movement, making it an excellent option for finishing off items like blankets, scarves, pillows, and even garments.
The Crochet Curly Border – CROCHET PATTERN adds a fun spiral or curly effect that can bring life to the edges of any piece.
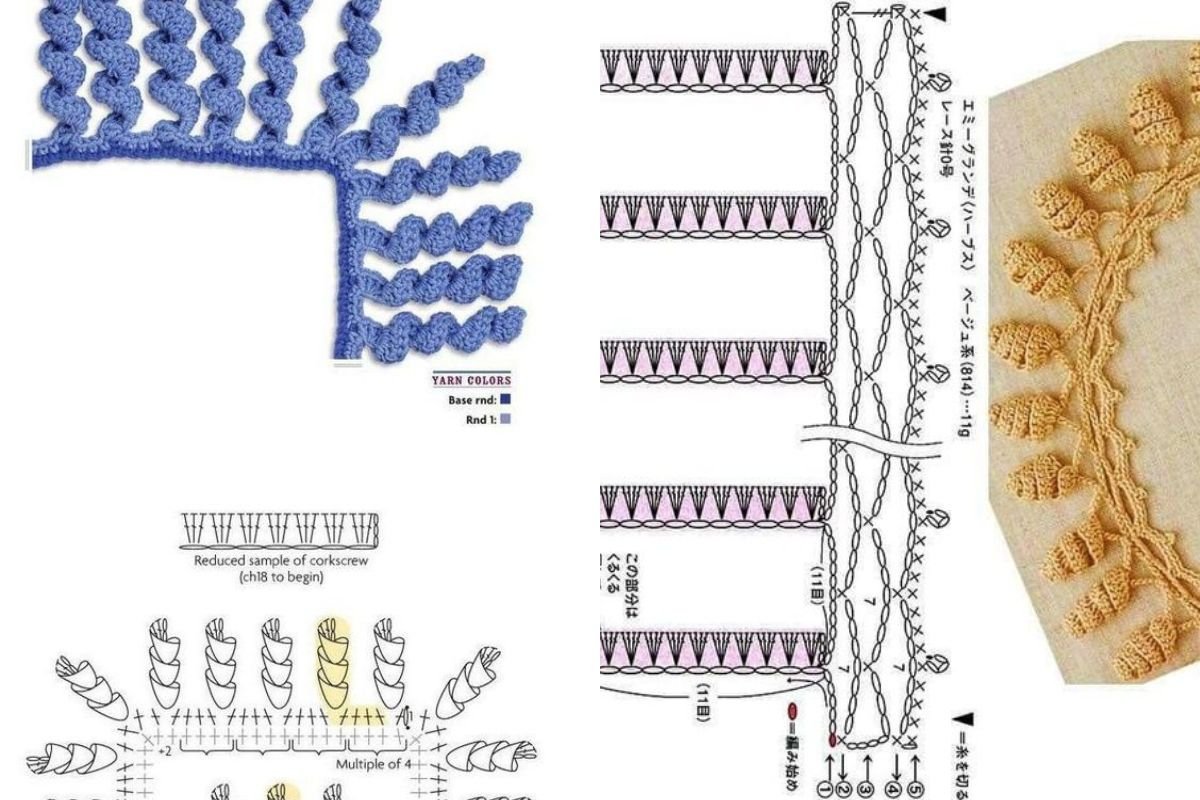
The Crochet Curly Border – CROCHET PATTERN is a simple, yet elegant design that is ideal for both beginners and experienced crocheters alike. Whether you’re creating a cute baby blanket or a cozy throw, this border will add an extra level of creativity to your work. Plus, its versatility means you can play around with different yarns and colors to match your project perfectly.
In this article, we will guide you through the steps of creating the Crochet Curly Border – CROCHET PATTERN. We will explore the materials you need, provide a detailed step-by-step tutorial, and give you tips for personalizing your curly border design. By the end of this guide, you’ll be ready to add this stunning border to your crochet projects and elevate your work to the next level.
1. Materials Needed for the Crochet Curly Border – CROCHET PATTERN
Before diving into the Crochet Curly Border – CROCHET PATTERN, it’s important to gather the necessary materials. Fortunately, this pattern requires just a few basic supplies, which makes it an accessible option for crocheters of all skill levels. Here’s what you will need to get started:
- Yarn: Choose a yarn that complements your main project. You can use any type of yarn, but for the Crochet Curly Border – CROCHET PATTERN, a medium weight yarn (like worsted weight) works best. If you want to create a more delicate, airy border, you could opt for a lighter yarn, such as sport or lace weight. Consider using yarn in a contrasting color to make the curly border pop against the main piece.
- Crochet Hook: The size of the crochet hook you choose will depend on the yarn you’re using. A hook that is one size smaller than the recommended size for the yarn is usually ideal for creating a tighter, more defined border. However, feel free to experiment with different hook sizes to adjust the look of the border.
- Scissors: You’ll need a pair of scissors to cut the yarn at the end of your project. A good-quality pair of scissors ensures clean cuts, especially when you need to snip yarn at the edges.
- Tapestry Needle: A tapestry needle is useful for weaving in any loose ends once you’ve completed the curly border. This step helps keep your project neat and polished.
- Stitch Markers (Optional): If you’re new to the Crochet Curly Border – CROCHET PATTERN, stitch markers can help you keep track of your starting point and ensure you maintain the proper stitch count as you work around the edges.
Once you have all the materials ready, you’ll be set to begin creating your unique curly border. Don’t worry—this pattern is both fun and easy to follow, and with a bit of practice, you’ll master the technique in no time!
2. Step-by-Step Instructions for the Crochet Curly Border – CROCHET PATTERN
Now that you have your materials, it’s time to get started! Follow these simple steps to create the Crochet Curly Border – CROCHET PATTERN. This tutorial assumes you already have a completed crochet project that is ready for a border.
- Start by Adding a Foundation Row: Begin by making a foundation row around the edge of your crochet project. To do this, attach your yarn to the corner of your project using a slip knot. Chain 1 and then work a single crochet stitch evenly along the edge of your piece. Make sure to place a single crochet stitch in each space, going around the entire perimeter.
- Begin the Curly Stitch: After completing the foundation row, it’s time to start the curly stitch. To do this, chain 3 (or more for larger curls) and then yarn over and insert your hook into the same stitch where you just completed the chain. Now, work a slip stitch into this space. This creates the first loop of your curly border.
- Create the Spiral Effect: Continue by chaining 3 and working a slip stitch in the same stitch. Repeat this process for the entire edge, placing one curly loop every few stitches along the foundation row. The number of loops you make will depend on how tightly or loosely you want the curls to appear.
- Work in Corners: When you reach the corners of your project, make sure to place 3 to 4 curly loops in each corner stitch. This will help the border flow smoothly around the corners and keep the spiral effect intact.
- Adjust the Loops: If you prefer a tighter curl, reduce the number of chains in each loop, or work the loops closer together. For looser curls, increase the number of chains in each loop. This flexibility allows you to personalize your Crochet Curly Border – CROCHET PATTERN to match the style of your project.
- Finish the Border: Once you’ve completed the curly border all the way around your project, cut the yarn and use a tapestry needle to weave in any loose ends. Take your time to ensure that all ends are securely tucked in for a clean, polished finish.
3. Tips for Customizing Your Crochet Curly Border – CROCHET PATTERN
The Crochet Curly Border – CROCHET PATTERN is incredibly versatile, and there are several ways you can personalize it to make it uniquely yours. Here are a few tips for customizing your border:
- Experiment with Colors: Use contrasting yarn colors for the curly border to make it stand out against the main body of your project. You can also use multiple colors for the curly loops to create a vibrant, rainbow-like effect.
- Use Different Yarn Types: Mix and match different types of yarn for the border. For instance, you could use a sparkly yarn or a textured yarn to create a border that’s even more eye-catching.
- Play with Loop Size: Vary the size of your curls by changing the number of chains in each loop. Larger loops will create more dramatic curls, while smaller loops will result in a subtler effect.
- Try Adding Beads or Embellishments: For an extra special touch, you can add beads or sequins to the curly loops. This works particularly well for projects like shawls, scarves, or blankets that will be used in formal settings.
- Layer Multiple Borders: For a more intricate look, consider layering multiple borders, such as adding a straight or scalloped border underneath the curly border. This can add even more texture and dimension to your project.
- Use for Different Projects: While the Crochet Curly Border – CROCHET PATTERN is often used for blankets or scarves, it can also be a beautiful finishing touch for smaller projects like crochet coasters, dishcloths, or baby blankets. The versatility of this pattern means you can use it for almost any crochet project.
By experimenting with these customizations, you can create a unique and personalized Crochet Curly Border – CROCHET PATTERN that perfectly suits your style.
4. Common Mistakes to Avoid in the Crochet Curly Border – CROCHET PATTERN
While the Crochet Curly Border – CROCHET PATTERN is relatively easy to master, there are a few common mistakes that beginners (and even some experienced crocheters) might make. Here are a few things to keep in mind to avoid frustration:
- Uneven Stitch Placement: Be sure to place your curly loops evenly along the edge of your project. If the loops are too spaced out or too bunched together, it can disrupt the flow of the border.
- Inconsistent Tension: If your tension is too tight or too loose, the curls may not form correctly. Try to maintain a consistent tension as you work, especially when making the chains for each curly loop.
- Skipping Stitches: It’s easy to get carried away when working on the curly border, but be careful not to skip stitches in your foundation row. This can lead to gaps in the border, which can disrupt the pattern.
- Too Many Loops in the Corners: While you do need extra loops in the corners, don’t overdo it. Adding too many curly loops to the corners can make the border look too bulky or uneven.
- Not Securing Ends Properly: After finishing your curly border, make sure to weave in all loose ends securely. If left unattended, these ends can unravel over time and affect the overall appearance of your project.
- Not Adjusting for Different Project Sizes: If you’re working with a larger project, you might need to add more stitches or loops to the border to make it look balanced. For smaller projects, you may want to keep the curls more compact to prevent the border from overwhelming the design.
By avoiding these common mistakes, you can ensure that your Crochet Curly Border – CROCHET PATTERN turns out beautifully every time.
FAQ: Frequently Asked Questions about the Crochet Curly Border – CROCHET PATTERN
1. Can I use a different type of stitch for the curls?
Yes, you can experiment with different stitches like half-double crochet or double crochet to create different types of curls. This will change the overall appearance of the border.
2. How can I make the curls tighter or looser?
To make tighter curls, reduce the number of chains in each loop. For looser curls, increase the number of chains. The number of chains you use will affect the size and tightness of the curls.
3. Can I use this pattern for scarves or shawls?
Absolutely! The Crochet Curly Border – CROCHET PATTERN works wonderfully for scarves, shawls, and other accessories, adding a playful and decorative touch.
4. How long will it take to complete the curly border?
The time it takes to complete the border depends on the size of your project and your skill level. Generally, adding a curly border takes a few hours, but it can take longer for larger items.
5. Can I make the border more dramatic?
Yes, you can make the border more dramatic by using thicker yarn or adding more loops in each stitch. Experiment with different techniques to get the effect you desire.
6. Do I need any special techniques to make this border?
No, the Crochet Curly Border – CROCHET PATTERN is beginner-friendly. You only need to know how to make basic crochet stitches like chains, slip stitches, and single crochets.
Conclusion
The Crochet Curly Border – CROCHET PATTERN is a fun and creative way to finish off your crochet projects with a unique and whimsical touch. By following the simple steps outlined in this article, experimenting with different
yarns and techniques, and avoiding common mistakes, you can easily master this pattern and enhance your crochet work.
We hope this guide has helped you understand how to create a beautiful curly border for your crochet projects. If you have any questions or want to share your experiences, please leave a comment below. We’d love to hear from you! Happy crocheting!