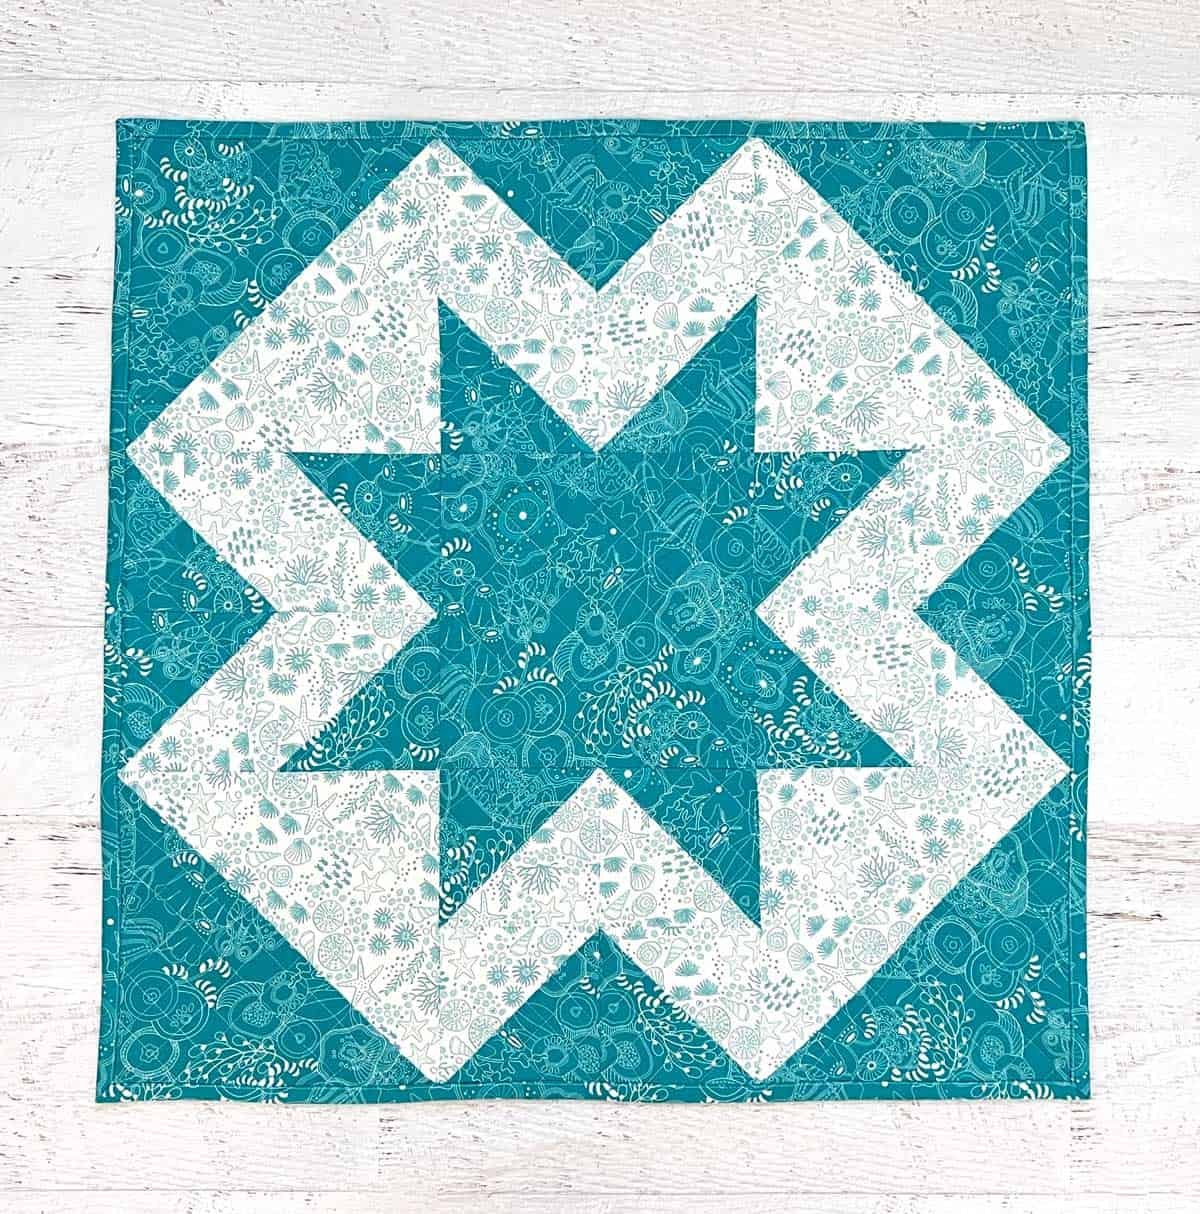
The Star Flower Mini Quilt – PATTERN is a delightful and intricate quilting design that brings a fresh, vibrant feel to your home decor.
If you love working with fabric and are looking for a fun, detailed, and visually striking quilt pattern, this project is perfect for you.
The star flower motif can add a touch of elegance and charm to any room, making it an excellent choice for creating mini quilts for your own collection or as thoughtful, handmade gifts.
The beauty of the Star Flower Mini Quilt – PATTERN lies in its balance of complexity and accessibility. While it may look intricate, the steps involved are quite manageable for quilters of all skill levels. Whether you are a beginner or a seasoned quilter, this pattern offers a chance to practice and refine your skills while producing a stunning piece that showcases your creativity.
In this guide, we will break down the Star Flower Mini Quilt – PATTERN into simple, easy-to-follow steps, covering everything from the materials you’ll need to the final touches that will bring your quilt to life. Along the way, we will discuss key techniques, provide helpful tips, and offer a few creative suggestions to personalize your quilt. So, let’s dive into this colorful project and create something beautiful together!
1. Materials You Will Need for the Star Flower Mini Quilt – PATTERN
Before starting on your Star Flower Mini Quilt, it’s essential to gather all the necessary materials. The right fabrics and tools will help ensure that your project turns out just as you envision it. Here’s a list of what you’ll need:
- Fabric: Select several coordinating fabrics to create the star flower design. You will need fabrics in contrasting colors for the petals and the background. Popular choices for this type of quilt include cotton fabrics, which are soft, durable, and easy to work with. Think about using bright, bold colors for the star flowers and a neutral tone for the background to make the flowers pop.
- Quilt Batting: A soft batting is crucial for giving your quilt structure and warmth. Choose a quilt batting that suits your desired level of thickness and softness. Cotton batting is an excellent option for a lightweight quilt, while polyester batting provides a bit more loft.
- Quilt Backing: Choose a fabric for the back of your quilt. This can be a solid color or a fun print that complements your quilt top design. Make sure that the backing fabric is large enough to cover the entire quilt once the layers are stitched together.
- Quilt Binding: To finish the edges of your quilt, you will need quilt binding. You can either purchase pre-made binding or make your own by cutting fabric strips and folding them into a long strip.
- Rotary Cutter and Mat: A rotary cutter and self-healing cutting mat will allow you to cut your fabric pieces accurately and efficiently. Precision is key for creating sharp, clean edges in your quilt design.
- Needles and Thread: For piecing together the quilt top, use a quilting needle, which is specifically designed to handle multiple layers of fabric. Choose high-quality cotton or polyester thread in a color that matches your quilt design.
Having these materials on hand will ensure that you have everything you need to start working on your Star Flower Mini Quilt – PATTERN. With the right fabrics and tools, you’re ready to begin the fun part—creating your quilt!
2. Step-by-Step Instructions to Create the Star Flower Mini Quilt – PATTERN
Now that you have gathered all your materials, it’s time to start working on your Star Flower Mini Quilt. Below are the step-by-step instructions to help you through the process of making your mini quilt.
- Cutting the Fabric Pieces: Begin by cutting your fabric into squares and triangles. The Star Flower Mini Quilt pattern typically consists of several smaller squares for the flower petals, as well as triangles that will form the points of the star. Use your rotary cutter and mat for precise cuts, and make sure all your pieces are the correct size as outlined in the pattern.
- Creating the Star Flower Blocks: Once your fabric pieces are cut, start by piecing together the star flower blocks. Begin with the flower’s center, and then attach the triangular pieces to create the petals. Pay close attention to seam allowances to ensure the points meet properly when sewn together. You may want to use a quarter-inch seam to achieve the cleanest and most accurate result.
- Arranging the Blocks: Once you have completed several star flower blocks, arrange them on a flat surface to determine the overall layout of your mini quilt. Experiment with different configurations until you’re happy with the design. You can arrange the blocks symmetrically or asymmetrically, depending on your preference.
- Sewing the Blocks Together: After deciding on the layout, begin sewing the blocks together. Attach them in rows, and then join the rows to form the quilt top. Be sure to align the seams carefully to maintain the star flower pattern and prevent any misalignment.
- Adding the Quilt Batting and Backing: Once your quilt top is complete, it’s time to add the quilt batting and backing. Lay the quilt top on a flat surface, then place the batting on top, followed by the quilt backing fabric. Pin or baste the layers together, making sure everything is smooth and wrinkle-free.
- Quilting and Binding: The final step is quilting your layers together. You can choose to hand quilt or machine quilt, depending on your preference. Once the quilting is finished, trim the excess fabric from the edges and apply the quilt binding. Attach the binding by folding it over the raw edges of the quilt and sewing it in place.
By following these steps, you’ll have completed your Star Flower Mini Quilt – PATTERN. This lovely quilt will be the perfect addition to any room, adding a burst of color and charm wherever you display it.
3. Tips for Making the Perfect Star Flower Mini Quilt – PATTERN
Creating a quilt can be a rewarding experience, but there are a few tips that can help you make the process easier and your finished project even more beautiful. Here are some expert tips to keep in mind as you work on your Star Flower Mini Quilt:
- Use a Design Wall: If possible, set up a design wall or large flat surface to lay out your quilt blocks. This allows you to easily see the entire design and make adjustments before you start sewing the blocks together.
- Press Your Seams: Pressing the seams after each step will help prevent bulky seams and ensure that your quilt lays flat. Use an iron set to the appropriate temperature for your fabric type and always press seams to one side or open, depending on the pattern instructions.
- Take Your Time: Quilting is an enjoyable process, so don’t rush through it. Take your time to match your seams and ensure that your blocks are accurately pieced together. The more patience you have, the better the result will be!
- Experiment with Fabric Choices: While the pattern might suggest specific fabric colors, feel free to get creative with your fabric choices. Mix prints and solids to add dimension and texture to your quilt. You can even use fabric from old clothes or repurposed textiles for a unique touch.
- Use Quilting Clips: If you’re having trouble with pins, try using quilting clips to hold the layers of your quilt together. These clips are especially helpful when working with thicker fabrics and batting.
- Finish the Edges Neatly: When attaching the quilt binding, take care to fold it neatly over the raw edges. Make sure that the binding is sewn evenly around the entire quilt to give it a professional, finished look.
4. How to Personalize Your Star Flower Mini Quilt
One of the joys of quilting is the ability to personalize your creations. The Star Flower Mini Quilt offers many opportunities for customization, allowing you to infuse your own unique style into the design. Here are some ideas for making your quilt even more special:
- Add Embroidery or Appliqué: Consider adding small embroidered details or appliqué to your quilt to give it a more personalized touch. For example, you can add initials, dates, or motifs that reflect your personality or the season.
- Use Different Fabric Textures: Experiment with different fabric textures to create visual interest. You could incorporate velvet, linen, or even silk fabrics to add depth to the design.
- Play with Color Schemes: While the classic star flower design often features bright colors, you can opt for a more muted color palette or even a monochrome look for a more modern feel. The possibilities are endless!
- Incorporate Decorative Stitching: Add decorative stitching around the edges of the flowers or in the background for extra texture. You can use a contrasting color to make these stitches stand out or keep them subtle for a more understated effect.
- Use Fun and Unique Backing Fabrics: The backing fabric is often an overlooked part of the quilt, but it’s a great place to get creative. Choose a playful print or a fabric that ties the whole quilt together. The backing is an excellent opportunity to showcase your personal taste.
- Create a Matching Set: If you’re making a mini quilt for a specific space or event, consider creating a matching set of coasters, table runners, or even larger quilts that incorporate the same star flower pattern.
FAQ: Frequently Asked Questions about the Star Flower Mini Quilt – PATTERN
1. How long does it take to make the Star Flower Mini Quilt?
The time it takes to complete a mini quilt depends on your experience and how much time you dedicate to the project. On average, it may take several hours over a few days to finish the quilt.
2. Can I make a larger version of this quilt?
Yes, you can easily scale up the Star Flower Mini Quilt pattern to create a larger quilt. Simply adjust the number of blocks you create and increase the size of the fabric pieces accordingly.
3. What is the best fabric to use for quilting?
Cotton fabric is the most popular choice for quilting because it’s durable, easy to work with, and available in a wide range of prints and solids. Choose a high-quality cotton fabric for the best results.
4. Do I need to use a specific quilting technique for the Star Flower Mini Quilt?
This pattern can be made using basic quilting techniques like piecing, pressing, and quilting. You can choose to hand quilt or machine quilt, depending on your preference.
5. Can I add my own design to the quilt?
Absolutely! While the Star Flower Mini Quilt pattern is beautiful on its own, you can personalize it by adding additional designs or embroidery to make it uniquely yours.
6. How do I care for my finished quilt?
To keep your quilt in great shape, gently hand wash or machine wash it on a gentle cycle, then air dry or tumble dry on low. Avoid using harsh chemicals or bleach.
Conclusion
The Star Flower Mini Quilt – PATTERN is a beautiful and rewarding project that allows you to create a stunning, handmade quilt with just a few simple steps. Whether you’re a beginner or an experienced quilter, this pattern offers endless possibilities for customization, allowing you to create a quilt that reflects your personal style. With the materials, techniques, and tips provided, you’re ready to embark on your quilting journey and create something special. We hope you’ve found this guide helpful and would love to hear your thoughts and suggestions! Feel free to share your finished quilts and tell us how you personalized your design.