The Friendship’s Chain Quilt – Pattern is a beloved design that combines simple elegance with an enduring sense of warmth and connection.
This quilt pattern, often passed down through generations, is a beautiful choice for quilters of all skill levels.
The interlocking chains within the pattern symbolize the strength and unity of friendship, making it not only a visually appealing project but also one with deep meaning.
Whether you’re creating a quilt for a special occasion or simply to add to your collection, the Friendship’s Chain Quilt – Pattern offers endless possibilities for creativity.
Creating a quilt using this pattern allows for personal touches in color choices, fabric combinations, and the overall design. Many quilters love the versatility of the Friendship’s Chain Quilt – Pattern, as it can be customized to suit any style or setting. Whether you prefer traditional prints or modern, bold fabrics, the design adapts beautifully to different themes and tastes. This pattern is an excellent way to showcase your quilting skills and create something truly meaningful for friends, family, or yourself.
As you dive into making your Friendship’s Chain Quilt – Pattern, you’ll discover that the steps are straightforward, and with a little patience, you’ll end up with a stunning piece of art. In this article, we will explore the ins and outs of the Friendship’s Chain Quilt – Pattern, covering everything from the materials you need to how to sew the pieces together. By the end, you’ll be well-equipped to start your quilting journey and create a quilt that reflects your unique style.
1. Understanding the Friendship’s Chain Quilt Pattern
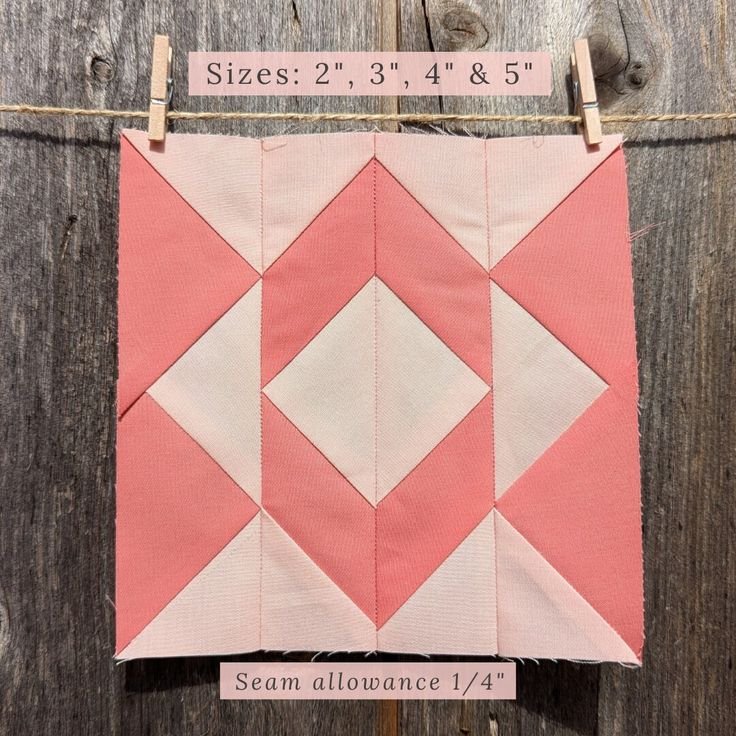
The Friendship’s Chain Quilt – Pattern is composed of a series of interwoven shapes that represent the strong bonds between friends. These shapes are typically square or rectangular blocks that are sewn together to form a chain-like pattern. The key to mastering this design lies in the careful arrangement of the fabric pieces to ensure the interlocking chains create a cohesive and balanced visual flow.
In the traditional Friendship’s Chain Quilt – Pattern, the quilt blocks often alternate between two or more colors. This gives the quilt a dynamic and eye-catching look. Some quilters prefer using a monochromatic color scheme, while others may opt for a more colorful approach. The pattern’s flexibility allows it to work well with a variety of fabric choices, from solids to floral prints to geometric designs.
One of the unique features of the Friendship’s Chain Quilt – Pattern is its use of negative space, which enhances the overall composition of the quilt. Negative space refers to the blank or unfilled areas between the quilt blocks. These empty spaces help to highlight the interwoven chains and add a sense of balance and harmony to the quilt.
To successfully execute this pattern, it’s important to carefully cut your fabric pieces to the correct size. Precision is key, as this ensures that the blocks fit together seamlessly. If you are new to quilting, it’s helpful to measure and cut your pieces multiple times to double-check that everything lines up correctly.
2. Materials You’ll Need for the Friendship’s Chain Quilt Pattern
Before you begin working on your Friendship’s Chain Quilt – Pattern, it’s essential to gather the right materials. The fabric you choose will largely determine the final look and feel of your quilt, so select colors and prints that resonate with your personal style. Below are the materials you’ll need to get started:
- Fabric: Choose a variety of fabrics in different colors or patterns for the quilt blocks. You’ll need a combination of light and dark fabrics to create contrast and highlight the chain design.
- Quilt Batting: Quilt batting provides the quilt with warmth and thickness. Select a batting that suits the type of quilt you want to create, whether it’s lightweight for a summer quilt or heavier for a warm winter quilt.
- Quilt Backing: The backing fabric will be used to cover the entire back of the quilt. This can be a solid color or a coordinating pattern, depending on your preference.
- Thread: Choose a high-quality thread in a color that complements your fabric choices. For quilting, it’s best to use a strong, durable thread that will hold up over time.
- Cutting Tools: A rotary cutter, quilting ruler, and self-healing mat are essential for cutting fabric accurately and efficiently. These tools ensure that your fabric pieces are cut precisely to the correct size.
- Quilting Needle: Use a quilting needle designed for sewing through multiple layers of fabric. A 90/14 or 80/12 needle is commonly used for quilting.
Having these materials on hand will set you up for success as you begin working on your Friendship’s Chain Quilt – Pattern.
3. Step-by-Step Guide to Assembling the Quilt
Now that you have your materials, it’s time to start assembling the quilt. The process for creating the Friendship’s Chain Quilt – Pattern is relatively simple and consists of three key steps: cutting the fabric pieces, piecing the blocks together, and sewing the quilt top, batting, and backing.
- Step 1: Cutting the Fabric: Begin by cutting your fabric into squares or rectangles, depending on the block size you’ve chosen. The size of the blocks will vary based on your personal preference, but common dimensions for Friendship’s Chain Quilt – Pattern blocks are 4 inches by 4 inches or 6 inches by 6 inches. Be sure to cut your fabric pieces accurately to ensure a clean, professional finish.
- Step 2: Piecing the Blocks: Arrange your fabric pieces into the desired layout. This can include alternating colors or patterns, depending on the look you want. Using a quarter-inch seam allowance, sew the pieces together to create each individual block. Once all the blocks are sewn, press the seams flat with an iron to reduce any bulk.
- Step 3: Assembling the Quilt Top: Once all the blocks are pieced together, it’s time to assemble the quilt top. Lay out the blocks in a grid pattern and sew them together row by row. After you’ve sewn all the rows, join the rows together to complete the quilt top.
- Step 4: Quilting and Finishing: Once the quilt top is complete, layer the quilt top with the batting and backing fabric. Pin or baste the layers together, and then quilt through all three layers. You can choose from hand quilting or machine quilting, depending on your preference. After quilting, trim any excess batting or backing fabric and add the binding to the edges.
4. Tips for Customizing Your Friendship’s Chain Quilt
While the Friendship’s Chain Quilt – Pattern is beautiful in its traditional form, there are plenty of ways to customize the design to make it your own. Below are a few tips for adding personal touches to your quilt:
- Experiment with Color: Don’t be afraid to play with different color schemes. You could create a monochromatic design using shades of the same color, or mix bold, contrasting colors to make the quilt more striking.
- Add Borders: A decorative border can help frame the quilt and give it a finished look. You can use the same fabric as the blocks or choose a contrasting fabric for a unique touch.
- Change the Block Size: If you want to make your quilt larger or smaller, try adjusting the size of the blocks. Larger blocks can speed up the process, while smaller blocks create a more intricate design.
- Use Scrappy Fabrics: If you have a collection of leftover fabrics from other projects, consider using them for your Friendship’s Chain Quilt – Pattern. This scrappy approach gives the quilt a charming, eclectic look.
- Add Applique or Embroidery: For an extra layer of creativity, consider adding appliqué or embroidery details to your quilt. This could include adding flowers, names, or other decorative elements to some of the blocks.
- Try Different Quilting Techniques: Explore different quilting techniques, such as free-motion quilting or echo quilting, to create unique patterns on the surface of the quilt.
FAQ – Friendship’s Chain Quilt Pattern
1. What is the Friendship’s Chain Quilt pattern?
The Friendship’s Chain Quilt pattern is a quilt design consisting of interlocking blocks that form a chain-like structure. This pattern is known for its simplicity, beauty, and symbolism of unity and friendship.
2. How do I choose fabrics for this quilt?
Choose fabrics that complement each other and work well together. You can opt for traditional fabrics or modern prints, depending on your style. It’s also a good idea to use a mix of light and dark fabrics to create contrast within the chain design.
3. What is the typical size of a Friendship’s Chain Quilt?
The size of the quilt depends on the number of blocks and their dimensions. Common sizes range from small lap quilts to large bed-sized quilts. You can adjust the block size to make the quilt larger or smaller based on your needs.
4. Is this pattern suitable for beginners?
Yes, the Friendship’s Chain Quilt pattern is suitable for quilters of all skill levels. The design is relatively simple, and with careful cutting and piecing, even beginners can create a beautiful quilt.
5. How do I customize the Friendship’s Chain Quilt?
You can customize the Friendship’s Chain Quilt by experimenting with colors, adding borders, changing the block sizes, or incorporating appliqué or embroidery for additional details.
Conclusion
In this article, we’ve explored the timeless beauty of the Friendship’s Chain Quilt – Pattern, providing you with a comprehensive guide to creating your own. From understanding the pattern and gathering materials to assembling the quilt and adding personal touches, this guide has given you the tools to create a meaningful quilt that celebrates unity and connection. Whether you’re a beginner or an experienced quilter, this pattern is sure to inspire your next project.
We’d love to hear your thoughts! Feel free to leave a sincere opinion or suggestions in the comments below, and happy quilting!