The Spool Quilt Block – Pattern is a charming and versatile design that quilters have loved for generations.
This classic pattern is ideal for beginners as well as seasoned quilters, offering endless opportunities for creativity and customization.
Whether you’re crafting a quilt for a special occasion or simply honing your quilting skills, the Spool Quilt Block – Pattern provides a foundation that can be adapted to suit a wide range of color schemes and fabric choices.
The block’s structure resembles a spool, giving it a playful yet traditional look that works well with both modern and vintage-inspired designs.
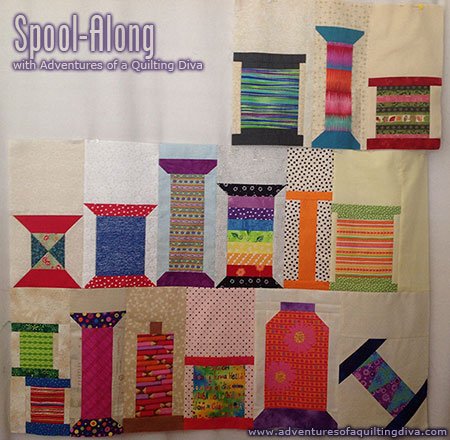
Incorporating the Spool Quilt Block – Pattern into your project allows you to experiment with different fabrics and colors, creating a design that reflects your personality. The shape itself is quite simple, consisting of a central square and surrounding triangles, which can be pieced together to form larger quilt layouts. By adjusting the color placement, you can add depth and visual interest to the design, ensuring that each quilt block becomes a unique piece of art. Whether you’re making a small throw quilt or a large bedspread, this pattern serves as the perfect building block for any quilt.
The beauty of the Spool Quilt Block – Pattern is that it can be combined with other quilt blocks to create even more intricate designs. You can use it as a standalone block in a quilt or integrate it into a larger project to add a touch of whimsy and vintage charm. In this guide, we will take you through the process of creating your very own Spool Quilt Block – Pattern, from understanding the design to piecing it together and assembling the quilt. With step-by-step instructions, you’ll be able to craft a stunning quilt that showcases your skills and creativity.
1. Understanding the Basics of the Spool Quilt Block
The Spool Quilt Block – Pattern is made up of a central square surrounded by four corner triangles, which give the block its distinct “spool” shape. While the design is simple in structure, it offers great flexibility when it comes to color placement and fabric choices. The central square can be made from a solid color or a patterned fabric, while the surrounding triangles can be made from coordinating or contrasting fabrics.
One of the key features of this pattern is its versatility. You can choose to make your spools all the same color or mix and match different fabrics to create a fun, scrappy look. The size of the Spool Quilt Block can also be adjusted to suit your needs, making it perfect for any quilting project, from small wall hangings to large quilts. The pattern’s simplicity means that you can focus on perfecting your piecing technique while still achieving a beautiful finished product.
The Spool Quilt Block – Pattern can be used in a variety of quilt layouts. You can create a grid of identical blocks for a traditional look, or mix it with other quilt blocks for a more dynamic design. The pattern works well in both modern and traditional quilt styles, allowing you to express your personal quilting aesthetic. Whether you prefer a clean, minimalist look or a more eclectic, colorful quilt, this pattern is a great starting point.
2. Materials Needed for the Spool Quilt Block Pattern
Before you begin working on the Spool Quilt Block – Pattern, it’s essential to gather all the necessary materials. Here’s a list of what you’ll need to get started:
- Fabric: Choose a variety of fabrics for the central square and the surrounding triangles. You’ll need fabric for both the background and the spool sections. For a traditional look, use fabric with a uniform pattern, but for a scrappy quilt, feel free to mix and match different colors and prints.
- Rotary Cutter and Cutting Mat: A rotary cutter is essential for accurately cutting your fabric pieces. Use a cutting mat and a quilting ruler to ensure straight edges and precise measurements.
- Quilting Ruler: A quilting ruler helps you cut your fabric into uniform pieces. It’s especially useful when cutting triangles for the spool section of the block.
- Thread: Choose a high-quality quilting thread that matches your fabric. The thread should be strong enough to withstand the stitching and handling of the quilt.
- Sewing Machine: While you can hand-piecing the quilt blocks, using a sewing machine will make the process quicker and more efficient. Make sure your machine has a ¼-inch quilting foot for accurate seam allowances.
- Iron and Ironing Board: Pressing your seams as you go will help keep your quilt block looking neat and professional. Use an iron to press each seam open before moving on to the next step.
Having all your materials organized and ready to go will make the quilting process much smoother and more enjoyable.
3. Step-by-Step Guide to Creating the Spool Quilt Block
Now that you have your materials ready, it’s time to start piecing together your Spool Quilt Block – Pattern. Follow these simple steps to create your first block:
- Step 1: Cut the Fabric Pieces: Start by cutting your fabric into the required shapes. You’ll need one square for the center of the spool, as well as four triangles for the spool’s “spindle.” For each block, cut the central square to your desired size, usually 4 ½ inches by 4 ½ inches, and the triangles should each be cut into 3 ½-inch squares and then cut diagonally to form triangles.
- Step 2: Assemble the Spool Block: Begin by attaching the triangles to the edges of the central square. Place each triangle on one side of the square and sew them in place using a ¼-inch seam allowance. Once all four triangles are attached, press the seams open to flatten them.
- Step 3: Join the Block Pieces: After pressing the seams, join the four corners to complete the spool shape. Make sure the seams align correctly and the edges of the triangles are even with the edges of the central square. Once all the pieces are joined, press the block flat.
- Step 4: Repeat the Process: Continue making additional blocks until you have the desired number for your quilt. You can vary the fabrics and colors in each block to create a scrappy, patchwork look or keep the colors consistent for a more uniform design.
- Step 5: Square Up the Block: Once all the blocks are pieced together, it’s time to square them up. Trim the edges to ensure that all blocks are the same size. This will make it easier to assemble the blocks into a quilt later on.
- Step 6: Quilt and Bind: Once you’ve completed your quilt top, it’s time to add batting and backing fabric. Quilt through all three layers and finish the quilt by adding the binding around the edges.
4. Tips for Customizing the Spool Quilt Block
The Spool Quilt Block – Pattern is highly customizable, so you can experiment with different techniques to make it uniquely yours. Here are some tips to help you personalize your quilt:
- Vary the Fabric Choices: Use a mix of fabrics that complement each other for a cohesive look, or go for a more eclectic style by using different prints and patterns for each block.
- Use Bold Colors: If you want to make your quilt stand out, try using bold, contrasting colors for the spool sections and the background. Bright colors will give the quilt a modern and vibrant feel.
- Add Embellishments: For a more personalized touch, you can add embroidery, appliqué, or other embellishments to the quilt blocks. This is a great way to add texture and visual interest to the design.
- Change the Block Size: If you want a larger or smaller quilt, adjust the size of the blocks. Larger blocks will create a quicker project, while smaller blocks will result in a more intricate design.
- Mix with Other Blocks: Combine the Spool Quilt Block with other traditional quilt blocks to create a more complex design. This is a great way to showcase different quilting techniques and styles.
- Create a Themed Quilt: Use fabrics that match a specific theme, such as holiday prints or floral patterns, to create a themed quilt that’s perfect for a special occasion.
FAQ – Spool Quilt Block Pattern
1. What is a Spool Quilt Block?
A Spool Quilt Block is a quilt block pattern that resembles a spool of thread. It consists of a central square surrounded by four triangular “spindle” pieces, creating the visual effect of a spool.
2. Is the Spool Quilt Block suitable for beginners?
Yes! The Spool Quilt Block is a great pattern for beginners. It involves basic sewing and piecing techniques, making it an excellent starting point for new quilters.
3. How can I customize the Spool Quilt Block?
You can customize the Spool Quilt Block by using different fabrics, changing the block size, adding embroidery or appliqué, or mixing it with other quilt blocks to create a unique design.
4. What are the best fabrics for this pattern?
You can use any type of fabric for the Spool Quilt Block, but quilting cotton is the most popular choice. Use a combination of solids and prints to create visual interest.
5. How do I square up my Spool Quilt Block?
Once your Spool Quilt Block is pieced together, use a quilting ruler to trim the edges and ensure that all sides are even and the block is the correct size.
Conclusion
The Spool Quilt Block – Pattern is a timeless and versatile quilt block that allows for endless creativity and customization. By following the simple steps outlined in this article, you can create beautiful quilt blocks that reflect your unique style. Whether you’re a beginner or an experienced quilter, the Spool Quilt Block is a fantastic addition to your quilting repertoire. Don’t be afraid to experiment with colors, fabrics, and techniques to make this block truly your own.
We’d love to hear your thoughts and suggestions! Please leave a sincere comment below and let us know how you’re planning to use the Spool Quilt Block – Pattern in your next project. Happy quilting!