The Crochet Shoulder Bag – pattern is an incredibly versatile and stylish project that combines both function and fashion.
If you’re a crocheter looking to make something both beautiful and practical, this pattern offers the perfect opportunity to showcase your skills while creating a stunning accessory.
Whether you’re a beginner or an advanced crocheter, you’ll find the process of crafting your own Crochet Shoulder Bag to be enjoyable and rewarding.
A Crochet Shoulder Bag – pattern allows you to express your creativity with a variety of colors, textures, and designs. By customizing the bag’s size, handle style, and embellishments, you can create a one-of-a-kind accessory that reflects your personal style. Whether you’re creating a bag for yourself or as a gift for a loved one, the Crochet Shoulder Bag is a great way to elevate your wardrobe.
This article will guide you through everything you need to know to create your very own Crochet Shoulder Bag. From materials and tools to step-by-step instructions, you’ll learn how to craft a functional and fashionable bag that you’ll be proud to wear. We’ll also provide tips on how to personalize the pattern, making sure your bag is uniquely yours.
1. Materials You’ll Need for the Crochet Shoulder Bag
Before you begin crafting your Crochet Shoulder Bag – pattern, it’s essential to gather all the necessary materials. Here is a list of the items you will need to make this stylish project:
- Yarn: For a durable and stylish bag, choose a yarn that has both strength and texture. Cotton yarn is a great option for shoulder bags due to its sturdiness, but you can also experiment with other fibers such as acrylic or wool. Choose a color that matches your personal style or your outfit preferences.
- Crochet Hook: Select a crochet hook that’s appropriate for the yarn you’re using. For most medium-weight yarns, a 5mm or 6mm hook will work perfectly. Make sure to check the recommended hook size on your yarn’s label.
- Tapestry Needle: A tapestry needle is essential for weaving in the ends of your yarn when you finish crocheting. It’s also useful for sewing any pieces of your bag together if needed.
- Scissors: A good pair of sharp scissors will come in handy for cutting your yarn after you finish each row or round.
- Bag Lining Fabric (Optional): If you’d like your bag to have a more polished finish, consider adding a lining to the inside of the bag. You can use a simple cotton fabric or any other material that complements the color of your yarn.
- Bag Handles: If you prefer not to crochet the handles, you can purchase pre-made handles or create your own out of yarn or fabric.
- Stitch Markers: These are handy tools for marking the beginning of your rounds or keeping track of important stitch placements.
With these materials in hand, you’re ready to start creating your Crochet Shoulder Bag.
2. Step-by-Step Instructions for Making the Crochet Shoulder Bag
Creating a Crochet Shoulder Bag can be an exciting and fulfilling project. Here’s a step-by-step guide on how to get started:
- Start with a Foundation Chain: Begin by crocheting a foundation chain that is the width of the base of your bag. Depending on the pattern, this could range from 30 to 50 chains, or more. Make sure your chain is even and without twists.
- Crochet the Bag Body: Once you have your foundation chain, work in rows or rounds, depending on the pattern. For a classic shoulder bag, you will typically work in rounds to form the body. Crochet the main body of the bag using single crochet or half double crochet stitches, depending on the pattern’s instructions.
- Add a Pattern or Texture: To make your Crochet Shoulder Bag unique, consider adding texture to the body of the bag. You can do this by alternating different stitch types such as bobbles, shells, or even a simple granny square pattern.
- Crochet the Sides: Once the main body of the bag is complete, work on the sides by increasing or decreasing the stitches as needed. This helps to create a three-dimensional shape for the bag, ensuring it has depth and can hold your essentials.
- Create and Attach the Handles: If your Crochet Shoulder Bag – pattern calls for crochet handles, you can crochet them by making long chains and then attaching them to the body of the bag. Alternatively, you can use pre-made handles and sew them securely into place.
- Finish the Bag: Once the bag’s shape is complete, take a moment to tidy up any loose ends by weaving in the yarn with a tapestry needle. If you’re adding a lining to your bag, sew it in place using a matching thread. This step will help to reinforce the bag and add a neat finish.
By following these instructions, you’ll have a functional and stylish Crochet Shoulder Bag ready to wear!
3. Tips and Tricks for a Perfect Crochet Shoulder Bag
While making your Crochet Shoulder Bag – pattern, these tips will help you achieve the best possible results:
- Gauge Is Important: Always check your gauge before starting the project. If your stitches are too tight or too loose, the final product may not turn out as expected. It’s especially important if you plan to line the bag or add embellishments.
- Stitch Consistency: Keep your stitches even throughout the project to ensure a neat and uniform look. Use stitch markers to keep track of your rounds and prevent any confusion when you start a new round.
- Reinforce the Base: The base of your bag needs to support the weight of your belongings. Consider adding a layer of extra yarn or interfacing to reinforce the bottom for added durability.
- Try Different Yarn Textures: Don’t be afraid to experiment with different yarn textures. Variegated yarns, gradient yarns, or even hand-dyed yarns can add a unique flair to your Crochet Shoulder Bag.
- Customizing the Handles: You can personalize the handles by crocheting them in a different stitch or adding extra length for a longer shoulder strap. Consider adding embellishments such as beads or tassels for a fun touch.
- Blocking Your Bag: Once the bag is finished, you may want to block it to ensure it holds its shape. This can be done by gently steaming or wet-blocking the finished bag, depending on the yarn you’re using.
With these tips in mind, your Crochet Shoulder Bag will turn out beautifully, and you’ll enjoy the process even more.
4. Customizing Your Crochet Shoulder Bag Pattern
One of the best parts of crocheting your own bag is the ability to customize it to suit your personal preferences. Here are some ideas for making your Crochet Shoulder Bag – pattern unique:
- Choose Bold Colors: Play with contrasting colors or bold shades for a striking effect. You could even make a two-tone bag or use a color-blocking technique to create a modern look.
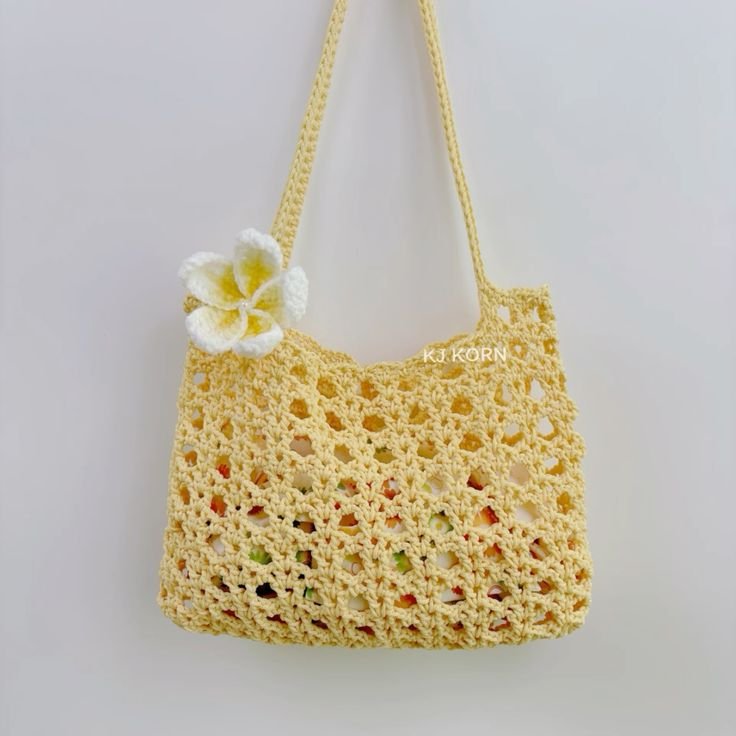
- Add Decorative Elements: Personalize your bag by adding embroidery, appliqué, or even crochet flowers or motifs to the bag’s surface. These small touches can transform a simple bag into a work of art.
- Experiment with Different Bag Shapes: While most Crochet Shoulder Bag patterns are rectangular, you can experiment with round or oval shapes for a different style. Customizing the shape can completely change the look and feel of the bag.
- Use Mixed Fibers: Consider combining different yarns to create a more textured and unique bag. For instance, mixing cotton yarn with a shiny thread can add a touch of sophistication to the design.
- Add a Zip or Closure: For extra security, you may want to add a zipper, button, or magnetic clasp to the top of your bag. This can help to keep your belongings safe while still maintaining the stylish look of your bag.
- Create a Matching Set: You can design other accessories, like a matching crochet wallet or coin purse, using the same yarn and pattern elements. This will create a cohesive look for your accessories.
Customizing your Crochet Shoulder Bag will ensure it reflects your unique style and needs.
FAQ
1. How long does it take to make a Crochet Shoulder Bag? The time required to complete a Crochet Shoulder Bag depends on your skill level and the complexity of the pattern. On average, it may take anywhere from 10 to 20 hours to finish, but it can be completed over several days or weeks.
2. Can I make a Crochet Shoulder Bag without a pattern? Yes, you can create your own design by simply experimenting with different shapes, colors, and stitch patterns. However, following a pattern provides guidance and helps ensure your bag turns out as expected.
3. What size should my crochet hook be for a shoulder bag? The size of your crochet hook depends on the yarn you’re using. For medium-weight yarn, a 5mm to 6mm crochet hook is ideal. Be sure to check the recommended hook size on the yarn label.
4. Do I need to line my crochet bag? Lining your bag is optional, but it can add structure and durability, especially if you plan to carry heavier items. It also gives the inside of the bag a polished, finished look.
5. Can I crochet a shoulder bag for beginners? Yes, there are many beginner-friendly Crochet Shoulder Bag patterns available. Start with simple stitches like single crochet or half double crochet to create a basic design.
6. How do I care for my Crochet Shoulder Bag? To care for your bag, wash it according to the yarn’s care instructions. If your bag has a lining, you may want to hand wash it to preserve the fabric. Store the bag in a cool, dry place when not in use.
Conclusion
The Crochet Shoulder Bag – pattern is a fantastic project for anyone looking to create a unique and functional accessory. With the right materials, patience, and creativity, you can craft a beautiful bag that will complement any outfit. From customizing the color scheme to adding decorative touches, the possibilities are endless. Remember to follow the tips and instructions provided to ensure your project is a success. We’d love to hear your thoughts and suggestions, so feel free to share your experiences in the comments below!