The Crochet Square pattern is one of the most versatile and beloved patterns in the world of crochet.
Whether you are just beginning your crochet journey or are an experienced artisan, creating beautiful and functional crochet squares can be both rewarding and enjoyable.
A crochet square is often the building block for many projects, from blankets and shawls to pillows and bags.
In this article, we will delve into everything you need to know about the Crochet Square pattern, including tips, techniques, and creative ways to incorporate these squares into your next crochet project.
Crochet squares are an essential part of many crocheted items. With their simple structure and endless design possibilities, they allow for a huge range of creativity. The beauty of the Crochet Square pattern is that it can be adapted to suit any skill level, from beginners to seasoned professionals. Many crochet enthusiasts start with the classic granny square, but as they gain confidence, they move on to more intricate designs, all of which are based on this basic square structure.
What makes the Crochet Square pattern so appealing is that it can be customized to suit any project or style. You can experiment with various yarn types, hook sizes, and stitch patterns to create unique and personalized squares. Whether you’re looking to make a colorful, bold design or a more subtle, monochromatic piece, the crochet square is a fantastic starting point.
1. Key Elements of the Crochet Square Pattern
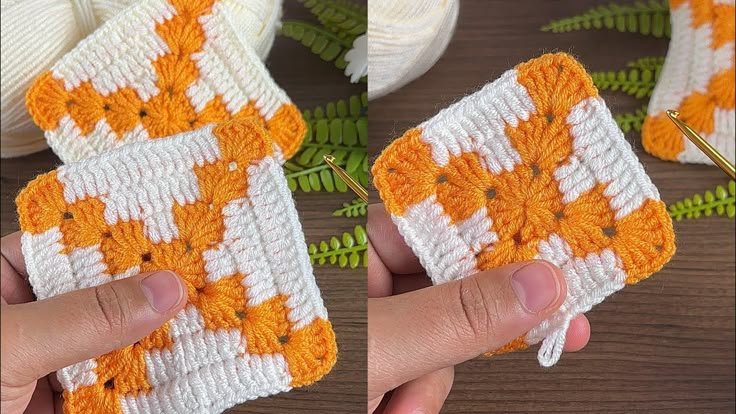
Before you begin crocheting your Crochet Square pattern, it’s important to understand the basic components. A typical crochet square consists of a series of stitches that form a flat, square-shaped piece of fabric. The most common stitch used in crochet squares is the double crochet stitch (US terms), though other stitches like single crochet and treble crochet can also be used for variety.
Each square typically starts with a foundation chain, which is the base for the first round. From there, you’ll work in rounds, increasing stitches as you go to create the square shape. The pattern can be as simple or as intricate as you desire, depending on how many stitches you use and the type of pattern you follow. Some crochet squares feature solid colors, while others may incorporate stripes or more complex color changes.
The beauty of the Crochet Square pattern is that it can be modified to create a variety of effects. By changing colors, adding textured stitches, or introducing patterns such as shells, fans, or clusters, you can create an endless array of designs. You can also alter the size of the square by adjusting the number of rounds or stitches, making it a versatile option for different projects.
In terms of yarn, you can use any type of yarn that suits your desired project. For example, lightweight yarns like cotton or bamboo are great for summer garments or accessories, while heavier yarns such as wool or acrylic work well for cozy blankets. It’s important to choose yarn that complements your project’s purpose and the texture you’re aiming for.
2. Step-by-Step Guide to Creating a Basic Crochet Square
Creating your first Crochet Square pattern can be a fun and fulfilling experience. Follow these simple steps to crochet a basic square that can be customized with different colors and stitch patterns. Once you’re comfortable with the technique, you’ll be able to modify the pattern and experiment with more complex designs.
Step 1: Start with a Foundation Chain
Begin by making a foundation chain. For this example, chain 5 stitches and join them into a ring using a slip stitch. This will form the center of your square.
Step 2: Work the First Round
Chain 3 to count as your first double crochet. Then, work 2 double crochets into the center of the ring. Continue making 3 double crochets into the center of the ring, leaving a small gap between each group. Repeat this step until you have 4 groups of 3 double crochets.
Step 3: Increase in the Next Round
Join the end of the round by slip-stitching into the top of the first chain-3. Now, turn your work and start the next round. Chain 3 to count as your first double crochet, and then work 2 double crochets into the same space as the first stitch. Continue working 3 double crochets into each space between the clusters from the previous round. By the end of the round, you will have eight groups of 3 double crochets.
Step 4: Continue Rounds to Shape the Square
Each additional round should follow the same principle: increase stitches in the spaces between the double crochet groups from the previous round. Make sure to work 3 double crochets into each space. Keep going until your square reaches the desired size.
Step 5: Fasten Off and Weave in the Ends
Once you’ve reached your desired size, cut the yarn, leaving a few inches. Use a yarn needle to weave in the ends and secure your square. Congratulations! You’ve completed a basic crochet square.
3. Common Mistakes and How to Avoid Them
While creating a Crochet Square pattern may seem simple, there are a few common mistakes that beginners often make. Here are some tips to help you avoid these pitfalls and create perfect squares every time:
1. Not Keeping Track of Stitch Count
It’s important to keep track of your stitch count as you crochet. If you accidentally skip a stitch or make too many, your square could become misshapen. Count your stitches at the end of each round to ensure you’re on track.
2. Uneven Tension
Inconsistent tension can lead to uneven squares. Be sure to maintain an even pressure on your yarn as you crochet. If your tension is too tight, your square will be smaller, and if it’s too loose, it will be larger.
3. Forgetting to Join Rounds
When you finish a round, it’s essential to join it with a slip stitch to form a continuous loop. Failing to do this could result in your square having a jagged edge.
4. Ignoring Pattern Instructions
If you’re following a specific pattern, make sure you stick to the instructions. This includes the stitch types, the number of rounds, and any color changes. Not following the pattern can cause inconsistencies.
5. Using the Wrong Hook Size
The hook size you choose can impact the size and look of your square. Be sure to follow the pattern’s recommended hook size, or adjust if necessary, to get the right fit for your project.
4. Creative Ways to Use Crochet Squares in Your Projects
Once you’ve mastered the basic Crochet Square pattern, you can get creative with how you incorporate them into various projects. Here are some fun and exciting ways to use crochet squares in your creations:
1. Create a Blanket
Crochet squares are perfect for making blankets. You can join several squares together to create a cozy and colorful quilt-like design. By mixing different colors and patterns, you can customize the look of your blanket.
2. Make a Pillow Cover
Crochet squares can also be used to create decorative pillow covers. Choose a few coordinating squares, join them together, and sew them onto a pillow form. Add buttons or a zipper for a more polished look.
3. Crochet a Bag
Smaller crochet squares can be used to make unique and stylish bags. Join them together to create a larger piece of fabric, then sew it into the shape of a bag. You can add a lining and handles to complete the project.
4. Design a Scarf or Shawl
By crocheting a series of smaller squares, you can create a beautiful scarf or shawl. Join the squares in a diagonal pattern or use a lacy square design for a light and airy feel.
5. Make Coasters
If you have leftover yarn from your crochet squares, consider making coasters! These smaller squares are great for quick and easy projects that add a personal touch to your home.
6. Craft Wall Hangings
Join several crochet squares together to create a unique wall hanging. Arrange the squares in a pattern or random order for a bold, colorful display that adds a handmade touch to any room.
FAQ: Common Questions About Crochet Squares
Q1: What size should my crochet square be? A: The size of your crochet square depends on your project. Most basic squares range from 4 inches to 12 inches. However, you can adjust the size by increasing or decreasing the number of rounds or stitches.
Q2: Can I use different types of yarn for crochet squares? A: Yes, you can use any yarn that suits your project. The type of yarn you choose will affect the texture and appearance of your square, so experiment with different fibers like cotton, wool, or acrylic to achieve the look you want.
Q3: How do I join crochet squares together? A: You can join crochet squares using various methods, including whip stitch, slip stitch, or the join-as-you-go technique. The method you choose will depend on the look you want to achieve.
Q4: How do I change colors in a crochet square? A: To change colors in a crochet square, simply finish the current stitch and pull through the new color. Be sure to weave in the ends securely to avoid any loose threads.
Q5: What are some common crochet square patterns? A: Some popular crochet square patterns include the granny square, solid square, lacy square, and flower square. Each pattern has its own unique design and can be used in different types of projects.
Q6: How can I avoid curling edges in crochet squares? A: To prevent your crochet squares from curling, make sure to crochet with consistent tension and check that your stitches are even. Blocking the squares after you finish can also help them stay flat.
Conclusion
In this article, we explored the basics of the Crochet Square pattern, from the key components and step-by-step instructions to tips for avoiding common mistakes and ideas for creative projects. With the information provided, you should feel confident in your ability to create beautiful crochet squares for all your crochet endeavors. Whether you’re making blankets, bags, or accessories, Crochet Square patterns are an essential part of many crochet projects. We’d love to hear your thoughts, so feel free to leave a comment or share any suggestions you might have!