If you’re looking to add a touch of charm to your table setting, the Crochet Star Coaster – Pattern is the perfect project for you.
Whether you’re a seasoned crocheter or just getting started, this delightful pattern offers a fun, creative outlet and a functional result you’ll be proud to use or gift.
With its star-shaped design and endless color possibilities, it adds personality and warmth to any home décor.
In this article, we’ll dive into everything you need to know about the Crochet Star Coaster – Pattern. From choosing the right yarn to stitching techniques and styling ideas, this guide is packed with helpful tips. The best part? It’s beginner-friendly and can be completed in under an hour once you get the hang of it.
Let’s explore how to bring this pattern to life, step by step, while also making sure your work stands out on search engines if you plan to share your creations online or start your own crochet blog or shop.
1. Choosing the Right Materials for Your Crochet Star Coaster
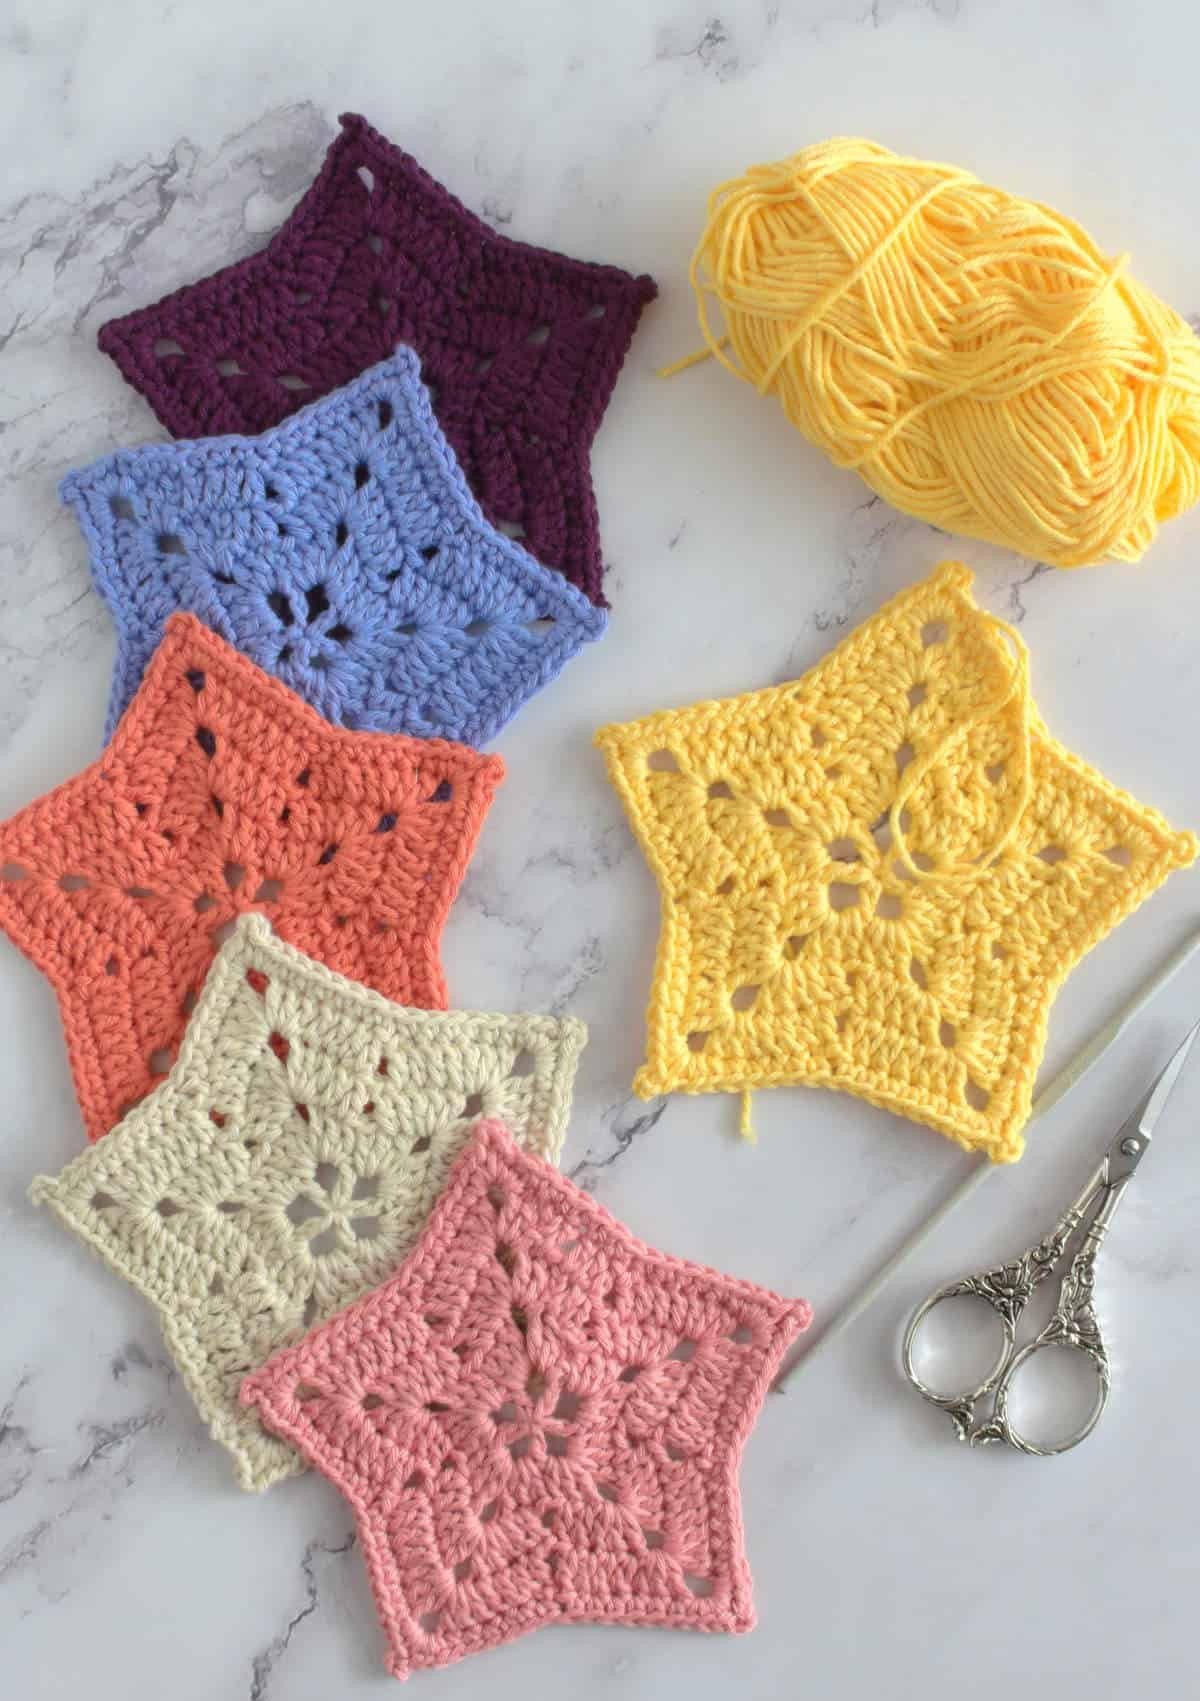
Selecting the right materials is a crucial first step when working with any crochet project. For the Crochet Star Coaster – Pattern, you’ll want to use cotton yarn, as it is absorbent, durable, and washable—perfect for everyday use.
Opt for a worsted weight cotton yarn to ensure your coaster has the right thickness and structure. Lighter yarns may result in a flimsy coaster, while heavier yarns might feel too bulky for drinkware.
Hooks typically range between 3.5 mm to 4.5 mm for this project. A 4 mm hook usually provides a great balance between stitch definition and comfort. Make sure to check your gauge if you want consistency across multiple coasters.
Color choice can add a lot of personality to your coasters. Whether you’re aiming for a soft pastel vibe or a bold and bright palette, using complementary or contrasting colors can really make the star pattern pop.
Other essential tools include scissors, a yarn needle for weaving in ends, and stitch markers if you’re new to tracking rounds. Keeping these tools on hand will make your process smooth and enjoyable.
Finally, ensure your workspace is well-lit and comfortable. The star shape involves increases and sharp turns that are easier to follow with clear visibility and minimal distractions.
2. Step-by-Step Guide to the Crochet Star Coaster Pattern
Creating the Crochet Star Coaster – Pattern is easier than it looks. The key lies in mastering the increases and decreases that form the five or six points of the star.
Begin with a magic ring. This technique helps create a tight center, which is important for the coaster’s symmetry and stability. Inside this ring, you’ll build your first round of stitches.
Most patterns for a star coaster involve double crochets and chains. These stitches form the pointed edges and give the coaster its iconic starburst look. Following the pattern carefully ensures even spacing and clean points.
Each new round will alternate between increasing and shaping the tips of the star. Don’t rush this part—the shaping is what gives the coaster its unique silhouette and professional finish.
Use stitch markers to mark the beginning of each round. This makes it easier to count and prevents you from adding or missing stitches, which could warp the shape of your star.
After completing the main body of the star, you’ll finish off by slip stitching around the edge for a clean, polished border. This final round also strengthens the coaster and helps it lie flat.
Once your star is complete, weave in all loose ends using a yarn needle. This not only improves the appearance but also ensures the durability of your coaster over time.
3. Styling Ideas and Practical Uses for Your Crochet Star Coasters
One of the best things about the Crochet Star Coaster – Pattern is its versatility. These coasters can be used in countless ways around your home, adding charm and a handmade touch to everyday items.
Use them as traditional drink coasters to protect wooden surfaces from heat and moisture. Their shape is eye-catching, making them great conversation starters at gatherings or family meals.
Crochet star coasters also make lovely décor pieces. You can string them together to create garlands, or use them as festive table scatter during holidays and parties. Their star shape fits especially well with holiday themes like Christmas or Independence Day.
Looking for a handmade gift idea? A set of star coasters tied with a ribbon makes for a thoughtful and budget-friendly present for birthdays, housewarmings, or teacher appreciation.
If you’re into sustainable living, using reusable, washable coasters like these helps reduce the need for paper or plastic alternatives. It’s a small change that makes a positive impact.
Finally, consider selling your handmade coasters at craft fairs or online marketplaces. With proper tagging and SEO using terms like Crochet Star Coaster – Pattern, you can attract buyers looking for unique, handmade items.
4. Tips for Customizing Your Star Coaster and Going Beyond the Basics
Once you’ve mastered the basic Crochet Star Coaster – Pattern, it’s easy to put your own spin on the design. There are so many ways to personalize your work!
Experiment with color changes between rounds to create a gradient or rainbow effect. Using variegated yarn can also give a unique look without changing yarns manually.
Add texture by incorporating puff stitches, bobbles, or surface crochet techniques. This not only enhances the look but also provides a tactile element that’s great for sensory décor or gifts.
Try different yarn fibers. While cotton is ideal for functional use, using a sparkly or silky yarn can turn your coaster into a decorative piece, perfect for special occasions or table displays.
You can also adjust the size of your star coaster. Want something bigger? Add extra rounds with increases to create a star-shaped placemat. Want it smaller? Use finer yarn and a smaller hook.
Another fun idea is to turn your coaster into a hanging ornament. Just add a loop and use it as wall décor, Christmas ornaments, or even car mirror hangers for a handmade touch.
Lastly, if you’re a content creator, consider documenting your customization journey. Sharing variations of the Crochet Star Coaster – Pattern can attract followers and inspire others to crochet.
FAQ – Crochet Star Coaster Pattern
1. Is the Crochet Star Coaster – Pattern suitable for beginners?
Yes! While it involves some shaping and stitch counting, it’s a great project for beginners who want to expand their skills beyond basic squares and circles.
2. What yarn works best for this pattern?
Worsted weight cotton yarn is ideal because it’s absorbent and holds its shape well. Brands like Lily Sugar’n Cream or Paintbox Cotton DK are popular choices.
3. How long does it take to complete one star coaster?
Once familiar with the pattern, most crocheters can finish a coaster in 30 to 45 minutes. Beginners may take about an hour.
4. Can I sell coasters made with this pattern?
Absolutely! As long as the pattern is free for commercial use or you have permission, you can sell finished items. Just don’t sell the pattern itself unless it’s your own.
5. How do I keep my coaster flat?
Make sure your stitch counts are correct, block your finished coaster, and use a border round to stabilize the edges.
6. Where can I find the pattern for free?
Many crochet bloggers and creators share the Crochet Star Coaster – Pattern for free. Check the caption of this post or reputable crafting websites and communities.
Conclusion
The Crochet Star Coaster – Pattern is not just a simple craft—it’s a way to express creativity, add beauty to your home, and even start a small business. We’ve explored everything from choosing materials, following the pattern, styling ideas, and creative customization tips. Whether you’re making these coasters for fun, gifts, or to sell, there’s so much joy in each stitch.
We hope this guide helped you feel inspired and confident to try the Crochet Star Coaster – Pattern yourself. If you’ve made one (or a dozen), feel free to leave a sincere opinion below and share your suggestions for future patterns or tutorials! We’d love to hear from you. 🧶🌟