Creating a patchwork flower quilt block – pattern is a beautiful way to combine color, craftsmanship, and creativity into a single quilting project.
Whether you’re just starting your quilting journey or you’ve been quilting for years, flower quilt blocks are both timeless and fun to make.
These blocks can be used in quilts, wall hangings, pillows, or even clothing, adding a charming, handcrafted touch wherever they’re featured.
The patchwork flower quilt block is a design that brings the natural beauty of floral motifs into your textile art. Using different fabric pieces—each representing petals, stems, or backgrounds—you can create intricate and colorful blocks that resemble a blooming garden. This pattern offers flexibility in fabric selection, layout, and stitching, making it ideal for quilters who love to personalize their work.
In this guide, we’ll explore everything you need to know to start and complete a patchwork flower quilt block – pattern. From materials and planning to sewing techniques and creative ideas, you’ll get practical advice and inspiration. Whether you’re aiming for a vintage look or something modern and bold, this guide will help you sew with confidence and joy.
1. Choosing Materials and Planning Your Design
When beginning a patchwork flower quilt block – pattern, selecting the right materials is one of the most crucial steps. The fabrics, tools, and planning process will significantly influence the ease of your sewing and the quality of the final result.
Start by selecting cotton fabric, which is the most recommended for quilt blocks. Cotton is easy to cut, sew, and press, and it holds its shape well, which is essential for precise patchwork. Choose fabrics with coordinating colors or contrasting prints that complement each other to form the flower petals, center, and background.
Next, you’ll need the right tools. A rotary cutter and self-healing mat are ideal for cutting fabric with accuracy. Use a clear quilting ruler to measure and cut straight edges. Also, make sure to have fine quilting pins, a good iron for pressing seams, and a sharp sewing needle or sewing machine with a fine needle setting.
When it comes to planning, sketch out your flower quilt block layout. Decide how many petals your flower will have and what shape they’ll take—rounded, pointed, or geometric. Also, determine the block size, as this will influence how much fabric you’ll need.
Use paper piecing templates or draw your pattern pieces directly onto freezer paper or cardstock if you want a more structured block. This technique is especially helpful for complex floral shapes that require precision.
Consider the use of a design wall or lay your fabric pieces on a flat surface before sewing to see how your colors and shapes interact. Rearranging pieces at this stage is much easier than after sewing.
Lastly, pre-wash and press all your fabric before cutting. This removes any sizing, prevents shrinkage, and ensures your pieces fit together without unexpected stretching.
2. Cutting and Piecing Your Patchwork Flower Quilt Block
Once your materials are ready and your design is planned, it’s time to start cutting and assembling your patchwork flower quilt block – pattern. Precision and patience are your best friends in this phase of quilting.
Start by carefully cutting all your fabric pieces. Follow your templates or pattern, ensuring each petal, center, and background piece is the correct size. Use a rotary cutter and ruler to maintain clean, straight edges. Accuracy at this stage will make piecing much smoother.
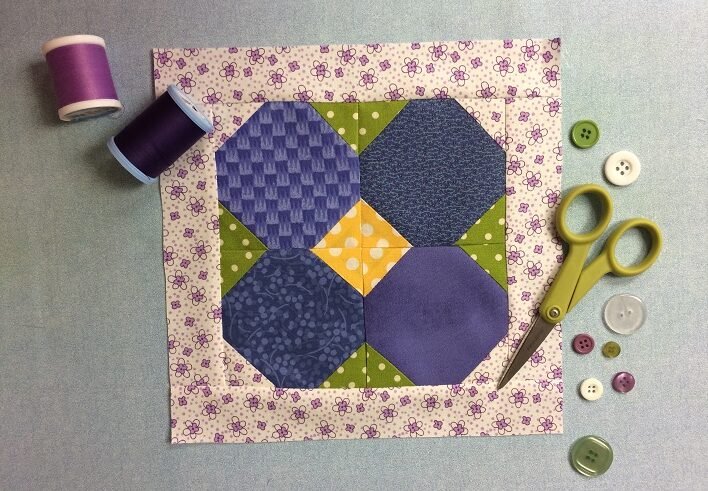
Begin assembling the center of the flower. This piece often acts as the anchor of the block and is typically a small square or circle. Stitch this piece first, then attach each petal around it, either using traditional piecing or applique techniques, depending on your design.
For a traditional patchwork method, use a quarter-inch seam allowance throughout. Consistency here ensures that all your pieces fit together properly when it’s time to sew them into rows or larger quilt sections.
As you attach each petal, press the seams carefully. Always press rather than iron to avoid stretching the fabric. Pressing the seams to one side can help reduce bulk, especially in the center of the flower where multiple seams meet.
If your flower block includes leaves or stems, piece these in after the main flower shape is completed. You may use green fabrics or patterned fabrics that add texture and realism to your design.
Finish your block by trimming the edges so that it measures the correct block size—commonly 12″x12″ or 8″x8″. Use your quilting ruler to square it up, making sure all corners are true and sides are straight.
3. Variations and Creative Ideas
One of the joys of working with a patchwork flower quilt block – pattern is the freedom to customize. There’s no one way to make a flower block, which opens the door to endless creative possibilities and personal expression.
Experiment with different petal shapes. While traditional blocks often use triangles or teardrop shapes, you can try hexagons, diamonds, or even curves for a more organic look. Using templates helps maintain consistency.
Use scrap fabric to create a more eclectic, colorful look. A flower made from a rainbow of different prints can give your block a lively, whimsical feel, especially if you’re working on a scrappy quilt.
Add embellishments to your block after sewing. Embroidery can be used to define petal lines, add stems, or even create texture in the center of the flower. Beads or buttons can also be sewn into the flower center for a three-dimensional effect.
Create a modern quilt by using solid colors and bold contrasts. Large petals in unexpected color pairings (like teal and coral or mustard and navy) give your block a contemporary aesthetic that stands out from traditional floral motifs.
Play with negative space by offsetting the flower within the block or using background fabrics creatively. This allows your flower to “float” and gives the design a more dynamic, artistic composition.
Combine multiple flower blocks into a larger piece like a table runner, baby quilt, or full-sized bedspread. Repeating or varying the flower design across blocks can create stunning visual movement across the entire quilt.
4. Finishing and Using Your Quilt Blocks
After sewing and pressing your patchwork flower quilt block – pattern, there are a few more steps to take before your project is complete. These final touches will elevate your block from a simple piece of fabric art to something polished and usable.
Check for loose threads or uneven seams. Use small scissors to clip any extra threads and re-sew any areas that may have come loose or need better alignment. This attention to detail ensures durability and a neat appearance.
Stabilize your block with light interfacing if you plan to use it in non-quilted projects like bags, pillows, or wall hangings. This helps the block hold its shape and makes it easier to sew into other fabrics.
If you’re incorporating your flower block into a larger quilt, plan your sashing and border colors accordingly. White sashing can make the flowers pop, while patterned borders can tie multiple blocks together thematically.
Quilt your block by adding batting and backing. You can quilt in the ditch (along the seams) or do free-motion quilting around the petals to add texture and dimension to the finished piece.
Use your block in creative ways. Turn it into a mini quilt, a decorative pillow, a tote bag, or even frame it as art. These flower blocks are incredibly versatile and make for wonderful handmade gifts.
Finally, label your work! Include your name, date, and pattern name on the back if you’re giving it away or saving it for posterity. This small step helps keep track of your creative journey.
Frequently Asked Questions (FAQ)
Q1: What size should a flower quilt block be?
A: Common sizes are 8″x8″, 10″x10″, or 12″x12″, but you can adjust the size depending on your project. Just be sure to keep proportions consistent for multiple blocks.
Q2: Can I make a flower quilt block by hand?
A: Yes, absolutely. While machine sewing is faster, hand piecing and hand applique are traditional techniques that offer excellent control and detail.
Q3: What fabrics are best for flower quilt blocks?
A: 100% quilting cotton is best due to its durability and ease of handling. Use pre-washed fabric to avoid shrinkage and maintain color vibrancy.
Q4: How can I make my flower block look modern?
A: Use solid fabrics, bold color combinations, asymmetrical layouts, or minimalist petal shapes to achieve a modern aesthetic.
Q5: Can I combine different flower block designs in one quilt?
A: Yes! Mixing flower block styles creates a visually interesting quilt. Just ensure each block is the same size for easy assembly.
Q6: What is the easiest flower block for beginners?
A: A simple petal design using half-square triangles or basic applique is a great start. These require fewer pieces and offer flexibility in layout.
Conclusion
Making a patchwork flower quilt block – pattern is a delightful project that blends artistry, precision, and storytelling. From choosing fabrics and planning your design to sewing each piece and finishing your block, the process is as rewarding as the result. Whether you’re crafting a single block or building a full quilt, your creativity and effort shine through every stitch.
We hope this guide has inspired you to start your own patchwork flower quilt project. If you
’ve enjoyed the process or have additional tips, please leave your honest feedback and any suggestions you have. Your input helps keep the creative quilting community blooming with new ideas!