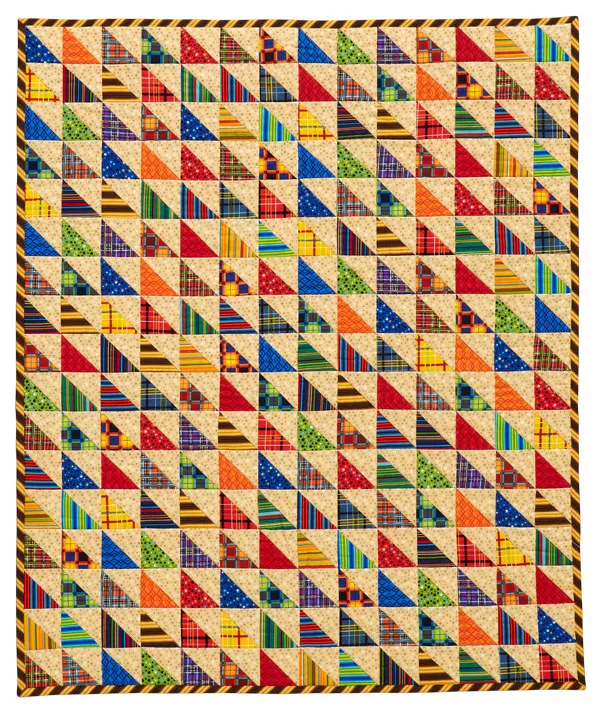
The Quilt Scrappy Triangles – Pattern is a creative and visually exciting quilting technique that celebrates the beauty of scraps, color play, and improvisation.
With this pattern, quilters transform leftover fabric pieces into stunning triangle blocks that come together in a vibrant and dynamic quilt.
Whether you’re new to quilting or a seasoned pro looking to bust your fabric stash, this pattern provides the perfect opportunity to create something unique, sustainable, and expressive.
Working with a Quilt Scrappy Triangles – Pattern is not only eco-friendly but also deeply satisfying. Each block tells its own story, filled with textures, hues, and patterns collected from past projects. No two quilts are ever exactly the same, making every creation a one-of-a-kind heirloom. This pattern is ideal for those who love playing with color and enjoy the unexpected charm that scrappy quilting brings.
In this article, we’ll explore everything you need to successfully complete your own Quilt Scrappy Triangles – Pattern project. You’ll learn how to choose fabrics, piece the triangle blocks, assemble the quilt, and even explore layout ideas. This guide is optimized for SEO and aligns with Google AdSense content policies, ensuring it is safe, helpful, and engaging for all readers.
1. Gathering Materials and Preparing Your Fabric Scraps
The beauty of the Quilt Scrappy Triangles – Pattern lies in its flexibility and resourcefulness. To begin, you’ll need to collect a variety of fabric scraps. This can include leftover pieces from previous quilts, charm squares, jelly roll strips, or even old clothing you’d like to repurpose.
The most important thing is variety. Look for scraps in different colors, prints, and textures to give your quilt visual interest. There’s no need to match perfectly; in fact, the contrast and randomness are what make scrappy triangles so appealing. Organize your scraps by size or color to make piecing easier and more efficient.
For the triangle shape, it’s best to use foundation paper piecing or templates to ensure precision. You can download printable triangle paper templates or draw your own using graph paper. A consistent block size, such as 6.5” or 8.5”, will help with layout and assembly later.
Other materials you’ll need include a rotary cutter, cutting mat, ruler, sewing machine, neutral-colored thread, iron, and quilting tools like pins or clips. These basic tools will make the process smooth and enjoyable. If you prefer hand sewing, this project can still be adapted—though it may take longer.
Once you’ve selected and pressed your fabrics, trim them into workable pieces. Triangles usually work best when scraps are at least 2” x 2”, but don’t worry too much about irregular shapes. Foundation paper piecing allows you to work with unusual scraps and still achieve clean, accurate triangle shapes.
Take the time to prep your sewing space. Have your scraps within arm’s reach, your machine threaded, and your tools organized. Quilting is more fun when you don’t have to hunt for what you need every few minutes!
2. Making the Triangle Blocks
Constructing the triangle blocks is the heart of the Quilt Scrappy Triangles – Pattern, and it’s where your creativity shines. Foundation paper piecing is a great method because it allows for precise angles and helps stabilize the scraps during sewing.
Begin by placing your first scrap fabric face up on the unprinted side of the paper. Then place a second scrap face down, aligning the edge. Sew along the printed line, then press the fabric open. Continue layering and stitching until the triangle is filled with colorful strips or shapes.
Trim the excess fabric by using the paper template as a guide. This gives you a perfect triangle shape with minimal effort. Don’t remove the paper just yet—keeping it on until the blocks are sewn together helps maintain accuracy and prevents stretching.
Repeat this process until you have enough triangle blocks for your desired quilt size. You can calculate how many you need by dividing your finished quilt dimensions by the size of the blocks, taking seam allowances into account.
Try to mix light, dark, and medium-toned scraps in each triangle for balance. Vary the direction of prints and stripes to add interest. There’s no need to be symmetrical—randomness is what makes scrappy quilts pop!
If you prefer not to use paper piecing, you can also cut triangles from fabric and piece them together traditionally, though this method may not be as precise. Either way, keep a consistent seam allowance—usually 1/4”—for best results.
Once all triangle blocks are made and trimmed, lay them out to see how they look together. Play with the arrangement to create contrast and visual flow. You might group warm colors together, alternate bold and subtle prints, or keep it completely random.
3. Assembling Your Quilt Top
Now that your triangle blocks are ready, it’s time to assemble the Quilt Scrappy Triangles – Pattern into a cohesive quilt top. You can create a variety of layouts with triangle blocks, depending on the orientation you choose.
One popular layout is rows of upright triangles, stacked one above the other. Another is the zigzag or chevron layout, where triangles face alternating directions. Half-square triangle arrangements also work beautifully, especially if you mix in solid blocks or sashing.
Start by sewing the triangle blocks into rows. Align each block carefully, using pins or clips to keep seams straight. Press the seams in alternating directions for each row to reduce bulk when sewing rows together.
Once your rows are complete, sew them together to form the quilt top. Check alignment as you go and trim any uneven edges after each stage. Don’t rush this process—taking your time ensures a professional finish.
At this stage, you may choose to add borders. A solid border can frame the quilt and help settle the busy scrappy look. You can also piece the border using leftover triangle blocks or strips from your fabric stash.
Press the entire quilt top once more, ensuring seams are flat and the top is wrinkle-free. This will make the next step—layering and quilting—much easier. Celebrate the progress; you’ve already created a work of art from leftovers!
4. Quilting, Finishing, and Displaying Your Quilt
Finishing your Quilt Scrappy Triangles – Pattern involves layering the quilt sandwich, quilting the layers together, binding the edges, and deciding how to use or display your creation. Each step brings your quilt closer to its final form.
To create the quilt sandwich, layer the backing fabric (face down), batting in the middle, and quilt top (face up) on a flat surface. Smooth out wrinkles and baste the layers using safety pins, spray adhesive, or long basting stitches.
Next, decide how to quilt the layers. You can stitch in the ditch along the seams, use free-motion quilting for a more artistic approach, or even hand-quilt with decorative thread. Straight-line quilting is a simple and modern choice that works well with geometric patterns like triangles.
Once quilting is complete, trim the edges of your quilt to make them even. Prepare your binding by folding and pressing fabric strips, then attach the binding using your machine or by hand for a clean finish. This step protects the quilt’s edges and gives it a polished look.
Consider labeling your quilt with the title “Quilt Scrappy Triangles – Pattern,” the date, your name, and any special dedication. This adds value and history to your creation, especially if it’s a gift or heirloom.
Decide how you’ll use or display your quilt. It can be a cozy throw, a vibrant wall hanging, or a baby quilt. You might even enter it into a quilt show or gift it to a loved one. Quilts made with this pattern often receive praise for their charm and individuality.
Lastly, take photos of your finished quilt! Share it on social media or in quilting communities online. Other makers will appreciate your creativity, and you might inspire someone else to start their own scrappy triangle journey.
FAQ – Frequently Asked Questions
Q1: What size should the triangle blocks be for a Quilt Scrappy Triangles – Pattern?
Most people use 6.5” or 8.5” triangle blocks, but you can adjust the size depending on your project goals and the size of your scraps.
Q2: Is paper piecing necessary?
Not mandatory, but highly recommended for accuracy. Paper piecing keeps your triangles uniform, especially when working with small or irregular scraps.
Q3: Can I make this quilt without a pattern?
Yes! The idea behind the Quilt Scrappy Triangles – Pattern is flexibility and improvisation. You can use templates or create your own layout.
Q4: What type of batting works best for a scrappy triangle quilt?
Cotton or cotton-blend batting is ideal for structure and softness. Choose low-loft for easier machine quilting and a flatter look.
Q5: How do I prevent the quilt from looking too busy?
Use a consistent background fabric, add borders, or place similar color families near each other. Negative space helps balance visual intensity.
Q6: Is this project beginner-friendly?
Absolutely. It’s a fantastic pattern for beginners to practice piecing and layout, and the scrappy nature forgives small imperfections.
Conclusion
The Quilt Scrappy Triangles – Pattern is a joyful, sustainable, and creative approach to quilting that brings new life to your fabric scraps. With every triangle, you’re not just piecing fabric—you’re telling a story, building a legacy, and making something meaningful from what might have otherwise gone unused.
This pattern encourages experimentation, personal style, and eco-conscious crafting. It’s suitable for all levels, and the results are always unique. Whether you’re making a small wall hanging or a full-size quilt, the process is as rewarding as the finished product.
Have you made a quilt using the **Qu
ilt Scrappy Triangles – Pattern**? Share your thoughts, photos, or questions in the comments below. We welcome your honest feedback and would love to hear your suggestions and experiences. Let’s keep the quilting community vibrant, supportive, and inspired!