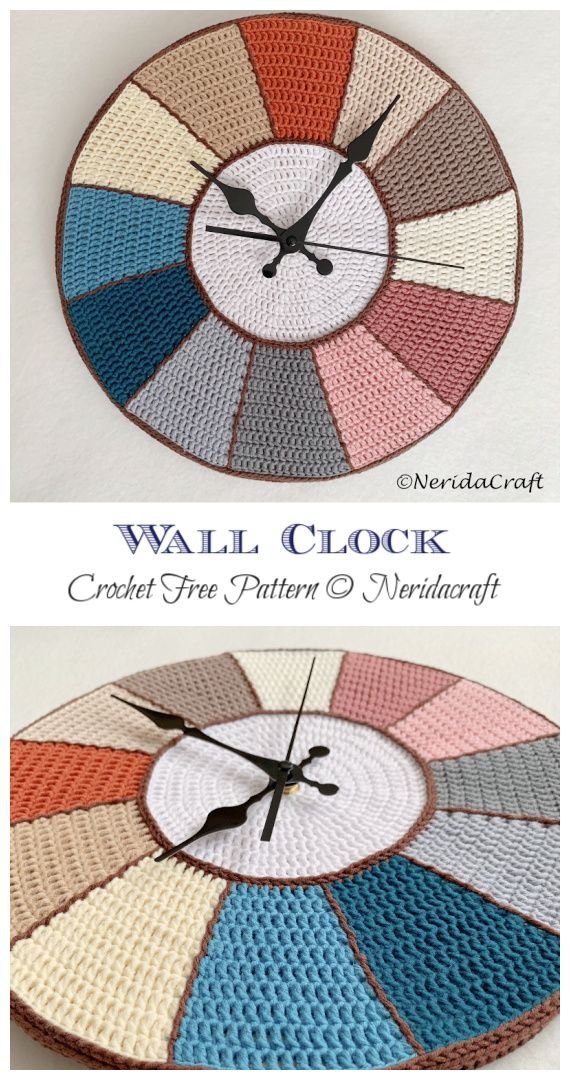
If you’re looking for a creative way to blend function and handmade beauty, the Crochet Wall Clock – Pattern offers a delightful twist.
It’s a unique and stylish way to personalize any space—combining the timeless practicality of a wall clock with the cozy, intricate artistry of crochet.
Whether you’re decorating your living room, bedroom, or crafting a heartfelt gift, this project offers both charm and utility.
Using a Crochet Wall Clock – Pattern allows you to incorporate your own style and colors into a practical home décor item. The versatility of crochet makes it easy to customize to fit modern, rustic, minimalist, or even vintage themes. You can work with various yarn textures, create patterns or motifs like flowers, mandalas, or geometric designs, and truly let your creativity shine.
In this article, we’ll walk through how to create your own crochet wall clock from start to finish. We’ll explore choosing the right materials, structuring the base, styling techniques, and how to install the clock mechanism. By following these tips, you can turn a basic timepiece into a one-of-a-kind piece of art using the Crochet Wall Clock – Pattern.
1. Choosing the Right Materials for a Crochet Wall Clock
Creating a functional and stylish crochet wall clock begins with selecting the right materials. The look and durability of your finished piece will depend heavily on the yarn, hooks, and clock components you choose. Selecting wisely ensures your project is both beautiful and long-lasting.
For the base, opt for a medium to tightly spun yarn, such as cotton or cotton-blend yarn. Cotton holds shape well, resists sagging, and gives a clean stitch definition—perfect for clocks that will hang vertically. Avoid fluffy or loose yarns as they may distort over time or hide the details of your design.
Next, choose a hook size that produces tight, dense stitches. A slightly smaller hook than recommended on the yarn label will give you a firmer structure. For example, using a 3.5mm hook with DK-weight cotton can help ensure a stable, flat circle for the clock face.
You’ll also need a clock mechanism kit, which includes the clock hands and motor. These kits are widely available online and at craft stores. Make sure the shaft length is appropriate for your crochet piece and any backing board or frame you might use.
A rigid backing is essential. You can use materials like cardboard, wood, or plastic canvas to support your crocheted design. This backing will keep your work flat and allow the clock mechanism to function smoothly without wobbling.
Additional tools include a tapestry needle for weaving ends, scissors, a hot glue gun (for attaching the crochet piece to the base), and possibly beads or buttons if you wish to mark the hours decoratively.
Finally, think about the clock’s intended space. For example, a kitchen clock might use food-themed motifs, while a nursery version could include animals or stars. The Crochet Wall Clock – Pattern is flexible enough to suit any environment.
2. Building the Clock Face with Crochet Techniques
With your materials gathered, it’s time to create the actual clock face using the Crochet Wall Clock – Pattern. This is where your design choices and crochet skills come into play to shape a functional and eye-catching piece.
Start with a magic ring or a chain circle, then work in continuous rounds to build a flat disc. Single crochet or half-double crochet stitches are preferred for a tight weave. Use increases (usually every few stitches) to keep the circle flat and avoid curling or ruffling.
If you’re following a pattern with a specific design—like a mandala or floral motif—you’ll switch colors strategically as you build outward. Use a stitch marker to keep track of the beginning of each round to maintain consistency and symmetry.
The average clock face size is 8 to 12 inches in diameter, depending on your space and preferences. Check the size of your clock mechanism and adjust the number of rounds as needed to make sure it will fit comfortably in the center.
After completing the crochet portion, block your work gently to flatten it perfectly. Pin it to a foam board or towel and lightly steam it using an iron or steamer. This will ensure your stitches are even and the clock face lies flat.
Once blocked and dry, attach your crochet circle to the rigid backing with glue or sewing. Carefully cut a small hole in the center for the clock shaft to pass through. Make sure the hole is tight enough to prevent slipping, but large enough to accommodate the clock hands.
Add hour markers using buttons, embroidery, beads, or small appliqué motifs. This not only enhances the look but also makes your wall clock easy to read at a glance. The Crochet Wall Clock – Pattern can be as decorative or minimal as you like.
3. Installing the Clock Mechanism and Assembling
Once your crochet face is complete and mounted on its backing, it’s time to install the clock components. This step transforms your crochet creation into a fully functional timepiece using the Crochet Wall Clock – Pattern as your guide.
Begin by inserting the clock mechanism through the center hole you created. Secure the shaft and mechanism tightly to the backing using the washer and nut included in your kit. It should sit flush against the back of your base with no wiggle room.
Next, attach the clock hands according to the manufacturer’s instructions. Usually, you’ll start with the hour hand, followed by the minute and then the second hand. Push them firmly into place, making sure they don’t touch each other or the crochet surface.
Install a battery in the back and test the movement of the hands. Rotate the hands manually first to ensure they’re not catching or getting stuck on any raised stitches or embellishments. You want smooth, even movement around the entire face.
If desired, add a frame or border around your crochet clock. You can crochet a scalloped edge, lace border, or even a square mat to frame your circular clock, adding extra texture and dimension to your finished piece.
Use a wall-mounting hook, picture hanger, or integrated clock mount to hang your finished crochet wall clock securely. Avoid placing it in areas with high moisture, like bathrooms, unless it’s protected by a sealed frame.
Enjoy the satisfaction of completing a fully handmade and practical piece of art. The Crochet Wall Clock – Pattern combines your love of crafting with something that you and others will use every day.
4. Styling and Gifting Your Crochet Wall Clock
Now that your Crochet Wall Clock – Pattern is complete, it’s time to think about how it fits into your space—or how you might use it as a meaningful handmade gift. These clocks are incredibly versatile and make a statement wherever they hang.
In a modern home, use minimalistic colors and clean lines. A monochrome clock with subtle texturing works well in contemporary living rooms or offices. Pair it with neutral tones and metal clock hands for a sleek aesthetic.
For a boho or vintage look, create a floral mandala design or use warm, earthy colors. You can add tassels or fringe to the bottom for extra flair. These styles work wonderfully in bedrooms, craft rooms, or eclectic entryways.
Thinking of giving a gift? A crochet wall clock is a heartfelt handmade present. Consider making one for a baby shower with pastel shades and soft designs, or personalize a clock for a friend with their favorite colors and themes.
Holiday-themed crochet clocks are also fun. Create clocks inspired by Christmas, Halloween, or Valentine’s Day to decorate your home or give as seasonal gifts. These can become charming traditions year after year.
For craft fairs and online sales, offering customizable clocks can attract buyers looking for unique home décor. Just ensure the clock mechanism is secure and test each one before selling or gifting.
The joy of using the Crochet Wall Clock – Pattern lies not just in creating something functional, but in crafting something that speaks to your taste, style, and effort—making it truly one of a kind.
FAQ – Crochet Wall Clock – Pattern
Q1: Is the crochet wall clock functional or just decorative?
It is fully functional when built with a working clock mechanism. The crochet adds decorative beauty to an operational timepiece.
Q2: What kind of yarn works best for this project?
Cotton yarn is ideal for its firmness and stitch definition. Avoid soft or stretchy yarns that may warp over time.
Q3: How do I make the crochet clock lay flat?
Use tight, even stitches and block your work before assembly to prevent curling or ruffling. Adding a rigid backing also ensures flatness.
Q4: Can I wash my crochet wall clock?
It’s not recommended to wash it, especially with the clock parts attached. Instead, spot clean gently with a damp cloth.
Q5: How do I attach the clock mechanism to the crochet piece?
You’ll insert the shaft through a hole in the center and secure it using the included washers and nuts, typically through a hard backing.
Q6: Where can I buy a clock mechanism?
Clock kits are available on Amazon, Etsy, or craft stores. Ensure you get the correct shaft length for your project thickness.
Conclusion
The Crochet Wall Clock – Pattern is a charming and practical project that brings handmade warmth into any home. It combines the timeless functionality of a clock with the soft artistry of crochet, making it perfect for personal use, gifting, or even selling.
From choosing yarn
to finishing the final assembly, you’ve learned how to craft something that’s both beautiful and useful. Whether you keep it minimal or go all out with colors and embellishments, the end result is uniquely yours.
We would love to hear your sincere feedback and suggestions! Have you made a crochet wall clock before? What styles or ideas did you try? Share your thoughts and inspire other makers in the community!