One of the sweetest and most heartfelt gifts you can create for a newborn is a baby quilt top – pattern.
This beautiful craft blends creativity, warmth, and love into something tangible and lasting.
Whether you’re an experienced quilter or just starting out, making a quilt top is a satisfying and meaningful project that’s sure to be cherished for years to come.
The beauty of creating a baby quilt top – pattern is that it offers endless options for colors, shapes, themes, and fabrics. You can go bright and playful, soft and soothing, modern and clean, or vintage and cozy. From patchwork to appliqué, each quilt top becomes a personal expression of care and creativity.
In this guide, we’ll explore everything you need to know to design, piece, and personalize your own baby quilt top. We’ll look at fabric choices, layout tips, assembly steps, and design ideas that make your quilt both visually appealing and full of heart. Let’s get started creating a keepsake that will wrap a little one in love.
1. Choosing Fabrics and Preparing Your Design
Before you begin cutting or sewing, selecting the right fabrics is key to your success with a baby quilt top – pattern. Because this quilt is for a baby, you’ll want soft, comfortable materials that are also durable and safe for sensitive skin.
The best fabrics for baby quilts are 100% cotton, cotton flannel, or high-quality quilting cotton. These are breathable, machine-washable, and gentle against the skin. Avoid scratchy synthetics or anything with glitter, metallic threads, or stiff finishes, which may irritate or be unsafe.
Choose a color palette or theme that matches the baby’s nursery or personality. Popular themes include animals, clouds, stars, alphabet letters, or soft florals. Soft pastels work beautifully, but don’t shy away from vibrant colors if you want the quilt to have an energetic and playful feel.
Once you’ve chosen your fabric, wash and press it before cutting. Prewashing helps prevent shrinking and removes any chemical residues. Ironing ensures your fabric is smooth and easier to work with, which makes your cutting more accurate.
Sketch a simple layout of your quilt top. The design could be classic squares, half-square triangles, pinwheels, or even simple strips. Baby quilts are typically 36″ x 52″ or smaller, so your design should remain manageable and not overly complex.
Plan for a 1/4″ seam allowance on all pieces. Accurate measuring and cutting are crucial to ensure your quilt top fits together neatly. Use a rotary cutter, cutting mat, and quilting ruler to get precise, clean edges for sewing.
2. Piecing Together the Quilt Top
Now it’s time to bring your design to life by sewing the fabric pieces together into a baby quilt top – pattern. This part of the process is where your quilt starts to take shape and your color and pattern choices really shine.
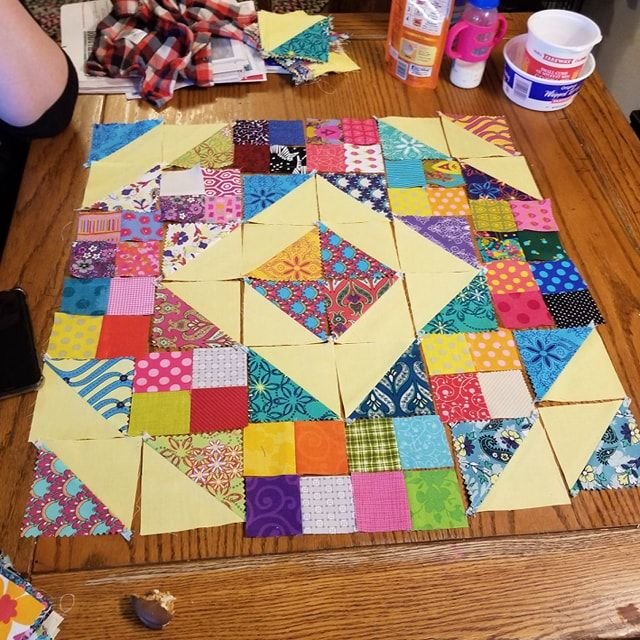
Start by arranging your fabric pieces on a flat surface or design wall. This allows you to visualize how the colors and prints will look together and make any changes before sewing. Take a photo to refer back to your layout during the assembly process.
Sew the pieces together in rows first, using a 1/4″ seam allowance. After finishing each row, press the seams with an iron. For smoother joins, press the seams of alternating rows in opposite directions—this makes it easier to nest seams and keep corners aligned.
Once all your rows are complete, sew them together to form the full quilt top. Take your time aligning seams and corners to ensure everything lines up neatly. Use pins or clips to secure the layers as you sew.
Press the entire quilt top once all rows are sewn together. This will help flatten any puckers and give your top a crisp, professional look. Take care to press, not iron, so you don’t distort the fabric with too much motion.
Check the measurements of your quilt top and square it up using a rotary cutter and ruler if needed. Straight edges are important, especially for attaching the quilt sandwich (top, batting, and backing) later on.
If desired, add a border to your quilt top. A border can frame your design, add contrast, and increase the overall size of the quilt. Cut your border strips to size and sew them to the top, bottom, and then the sides.
3. Personalizing Your Baby Quilt Top
Adding personal touches to a baby quilt top – pattern makes your creation even more meaningful. Personalization transforms a quilt into a memory and something the baby—and their family—will treasure for years.
One of the simplest ways to personalize a quilt top is with appliqué. Add shapes like hearts, stars, animals, or even the baby’s initials using a fusible web and machine stitching. This adds a pop of detail and a sweet custom element.
You can also embroider the baby’s name, birthdate, or a short message into one of the quilt blocks. Embroidery adds texture and a handmade signature that stands out and tells a story.
Mix different fabric textures for added visual and tactile interest. Consider pairing flannel with cotton, or adding minky fabric for a soft accent. Keep in mind, however, that all fabrics should still be machine-washable and baby-safe.
Think about color psychology as well. Soft blues and greens are calming, while yellows and oranges are cheerful and stimulating. You can also include prints with meaningful symbols like trees for growth or hearts for love.
Some quilters like to include a “secret” square—a small patch from a parent’s old shirt, a meaningful print, or a scrap of family fabric hidden within the design. It’s a subtle way to pass along love and history.
Finally, label your quilt top. Whether you write on a small tag or embroider directly into the quilt, include your name, the date, and who it’s for. This is a beautiful way to preserve the story behind a baby quilt top – pattern.
4. Preparing for Quilting and Finishing
Once your quilt top is complete, you’re ready to move on to quilting and finishing. Though this stage goes beyond the top itself, it’s important to understand how your top will interact with the next steps to ensure a beautiful final product.
The first step is creating a quilt sandwich: the quilt top, batting, and backing fabric. Lay out your backing (right side down), then the batting, and finally your quilt top (right side up). Smooth out all layers and baste with pins or spray adhesive to keep them in place.
Decide on a quilting method. You can machine quilt using straight lines, free-motion stitching, or even hand quilting for a softer, traditional touch. The quilting stitches add durability and texture while holding the layers together.
If you’re not quilting it yourself, you can send your quilt top to a professional long-arm quilter. They’ll help select a stitching pattern and thread that complements your design.
After quilting, trim the edges so that all layers are even. This prepares the quilt for binding, which frames the piece and secures the edges. Choose a binding fabric that complements your quilt top, cut strips, and sew them around the perimeter.
Binding can be machine-stitched for durability or hand-finished for a cleaner look. Either method works well—what matters is that it’s securely attached and looks consistent around all four sides.
Your baby quilt is now ready to be gifted, loved, and used. With a thoughtfully crafted baby quilt top – pattern, you’ve created not just a cozy blanket but a piece of heartwarming art.
FAQ – A Baby Quilt Top – Pattern
Q1: What is the standard size for a baby quilt top?
Most baby quilts range from 36” x 52” to 40” x 60”, but you can adjust based on your needs. Crib-size quilts are also popular.
Q2: Do I need a sewing machine to make a quilt top?
While a sewing machine makes the process faster, it’s possible to sew a quilt top by hand—just be prepared for it to take longer.
Q3: Can I use leftover fabric scraps?
Absolutely! Scrap quilting is a great way to use fabric leftovers, and it adds a patchwork charm to the design.
Q4: Is batting necessary for a baby quilt?
Yes, batting provides warmth and thickness, and helps the quilt maintain its structure over time.
Q5: How long does it take to make a baby quilt top?
Depending on the complexity of the pattern, it can take anywhere from a few hours to a few days.
Q6: Are there patterns specifically for beginners?
Yes, many simple baby quilt patterns are designed for beginners using squares or strips. They’re easy to follow and quick to complete.
Conclusion
Creating a baby quilt top – pattern is a heartwarming and creative process that allows you to pour love and personality into a handmade treasure. From choosing fabrics and piecing the design to adding personal touches and preparing it for quilting, each step brings you closer to a gift that will be cherished for years.
Whether you’re making it for your own baby, as a shower gift, or to donate to a family in need, this project is both meaningful and fun. The joy of giving something handmade—especially for a new life—is a special kind of magic.
We’d love to hear your sincere opinions and suggestions. Have you made a baby quilt before?
What colors or patterns did you use? Share your ideas below to inspire other crafters and keep the creativity flowing!