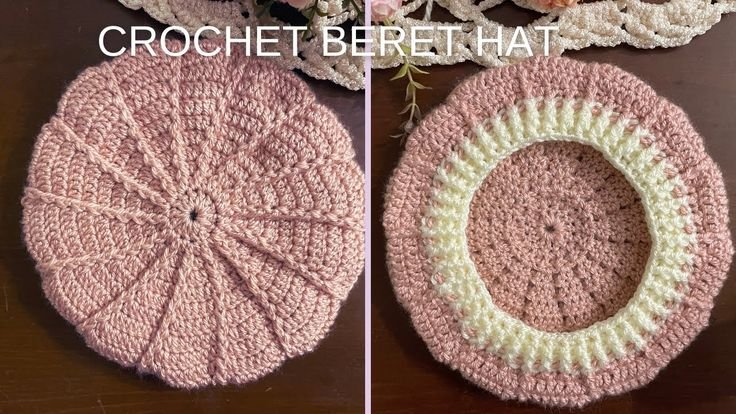
The Crochet Beret Hat – Pattern is an elegant and timeless accessory that can be handmade with love, creativity, and skill.
Whether you’re a seasoned crocheter or just beginning your journey into yarn crafts, making a crochet beret hat is a rewarding experience.
The beauty of this project lies in its versatility—it’s stylish, practical, and perfect for year-round wear.
Creating a crochet beret hat is more than just a fashion project. It’s a fun and relaxing way to express your personal style while learning or practicing valuable crochet techniques. With the right pattern, a few basic tools, and some yarn, you can craft a beret that’s as unique as you are.
In this guide, you’ll learn how to choose the ideal crochet beret hat – pattern, select the best materials, follow the correct steps for creating your beret, and even customize it to suit your style. We’ve also included a helpful FAQ section and a conclusion to wrap it all up. Let’s dive into this cozy world of handmade fashion.
1. Choosing the Right Crochet Beret Hat – Pattern
When starting your crochet project, finding the perfect Crochet Beret Hat – Pattern is essential. The pattern you choose will determine the look, fit, and complexity of your beret, so it’s important to select one that matches your skill level and design preferences.
If you’re a beginner, look for patterns labeled “easy” or “beginner-friendly.” These usually involve basic stitches like single crochet, double crochet, and slip stitch. Starting with a simple pattern allows you to build confidence while still creating something stylish and wearable.
For intermediate or advanced crafters, patterns with textured stitches, lacy designs, or colorwork can add visual interest to your beret. These patterns may require more concentration, but they often produce stunning results that stand out from store-bought options.
It’s also important to consider the shape and fit of the beret. Some crochet beret patterns create a snug cap that sits close to the head, while others have a slouchier, more relaxed silhouette. Choose a style that suits your face shape and fashion sense.
Another key factor is the pattern format. Digital PDF patterns with detailed instructions and photos are very popular and often more convenient than printed ones. Many designers also include video tutorials to make the learning process smoother.
Lastly, always read reviews before purchasing or downloading a pattern. Feedback from other crocheters can give you insight into potential challenges, and you’ll know what to expect when you start your project.
2. Gathering Materials and Tools for Your Crochet Beret Hat
After selecting your Crochet Beret Hat – Pattern, the next step is gathering the right materials. Having the correct yarn and tools will not only make your work easier but also ensure that your final result looks and feels great.
Start with the recommended yarn weight for your chosen pattern. Most crochet berets use lightweight (DK) or medium-weight (worsted) yarns. These provide the perfect balance between structure and flexibility, making the beret comfortable and stylish.
Choose a yarn fiber that suits your climate and preferences. Wool and wool blends are perfect for colder seasons, offering warmth and elasticity. For warmer climates or sensitive skin, cotton or bamboo yarns are breathable and soft to the touch.
The crochet hook size will usually be specified in the pattern. Using the correct hook ensures your stitches match the designer’s gauge, which is important for getting the right fit. Consider ergonomic hooks if you’ll be crocheting for long periods—they reduce hand strain.
You’ll also need basic tools like scissors, a yarn needle for weaving in ends, and stitch markers to keep track of your rounds. A measuring tape is useful to ensure your beret is the correct size as you go.
Optional tools include blocking mats and pins. Blocking your beret after it’s finished can help smooth the stitches and shape the hat nicely, especially if your design has openwork or lace details.
If you’re experimenting with colors or textures, be sure to make a test swatch before beginning the actual project. This will help you adjust your tension and visualize the final look of your crochet beret hat.
3. Step-by-Step: How to Crochet a Beret Hat
With your Crochet Beret Hat – Pattern and materials in hand, you’re ready to begin crocheting. Most beret patterns follow a circular construction, starting from the crown and working outwards, so understanding this structure is helpful.
Begin by creating a magic ring or a chain loop to start the top of the hat. You’ll typically work in rounds, increasing stitches gradually to form a flat circle. This forms the top of the beret and sets the tone for the overall shape.
Once the crown is large enough, you’ll stop increasing and begin working even rounds. This forms the sides and body of the beret, giving it its classic rounded look. Depending on the pattern, you may use special stitches or color changes here.
After the body of the hat is complete, you’ll decrease slightly or use tighter stitches to shape the opening and fit it to the head. Some patterns also include ribbing or bands at the base to keep the hat snug and secure.
Weaving in the yarn ends neatly is an important finishing step. Use a yarn needle to tuck them inside the stitches, and trim excess yarn to keep the interior of your beret clean and comfortable.
Blocking your hat is optional but recommended. Wet the beret slightly, pin it into shape on a flat surface, and let it dry. This step helps even out the stitches and gives your hat a polished, professional finish.
4. Customizing Your Crochet Beret for Personal Style
One of the joys of using a Crochet Beret Hat – Pattern is the endless room for personalization. Whether you’re making a gift or something special for yourself, there are many ways to make your beret truly unique.
Start with color choices. You can go for a classic solid shade, a trendy ombré yarn, or bold color-blocked sections. Multicolored yarns or variegated skeins add dimension without needing to change yarns frequently.
Incorporate decorative stitches. Some beret patterns use shell stitches, puff stitches, or even post stitches to add texture and depth. These stitches can give your beret a more sophisticated or whimsical look, depending on your style.
Add embellishments like crocheted flowers, buttons, beads, or fabric patches. These small touches can elevate the design and give your beret a playful or artistic vibe.
Adjust the size or slouch of the beret by modifying the number of rounds or rows. If you prefer a more dramatic look, simply add a few extra rows before decreasing the edge.
Try using novelty yarns for an unusual texture. Faux fur, velvet, or metallic yarns can give your beret a high-fashion feel. Just be sure to adjust your stitch tension accordingly, as these yarns can behave differently from standard yarns.
Lastly, think seasonally. Make lighter, lacy versions for spring or summer, and thick, cozy ones for fall and winter. This way, you can enjoy your handmade crochet beret hats year-round.
FAQ – Frequently Asked Questions
Q: Is a crochet beret hat easy for beginners?
Yes, many Crochet Beret Hat – Patterns are beginner-friendly and use basic stitches. Start with a simple pattern and gradually explore more complex designs as you gain confidence.
Q: How long does it take to crochet a beret hat?
Depending on the complexity and your skill level, it can take anywhere from 2 to 6 hours. Some advanced designs may take longer if they include intricate details or multiple colors.
Q: What type of yarn is best for crochet berets?
Lightweight or worsted yarns are commonly used. Wool is ideal for warmth, while cotton is better for breathable, summer-friendly berets.
Q: Can I wash a crochet beret hat?
Yes, but always check the yarn label for care instructions. Hand washing in cold water and laying flat to dry is generally safest to preserve shape and texture.
Q: How can I make sure the beret fits well?
Follow the pattern’s sizing guide and check your gauge before starting. You can also try the beret on as you go to make small adjustments if needed.
Q: Where can I find crochet beret hat patterns?
You can find patterns on platforms like Etsy, Ravelry, Pinterest, and designer blogs. Many offer free patterns, while others provide premium options with detailed instructions.
Conclusion
Making your own crochet beret hat using a quality pattern is a rewarding and creative journey. From choosing the right materials and tools to mastering the stitches and customizing your final look, every step allows you to express your personal style. Whether you’re crafting for yourself or a loved one, there’s something magical about creating something handmade, fashionable, and functional.
We hope this guide helped you feel more confident in starting your next crochet project. If you’ve already made a beret or plan to start one, leave your honest opinion and any suggestions in the comments. Your feedback helps inspire other makers and keeps the creativity flowing!