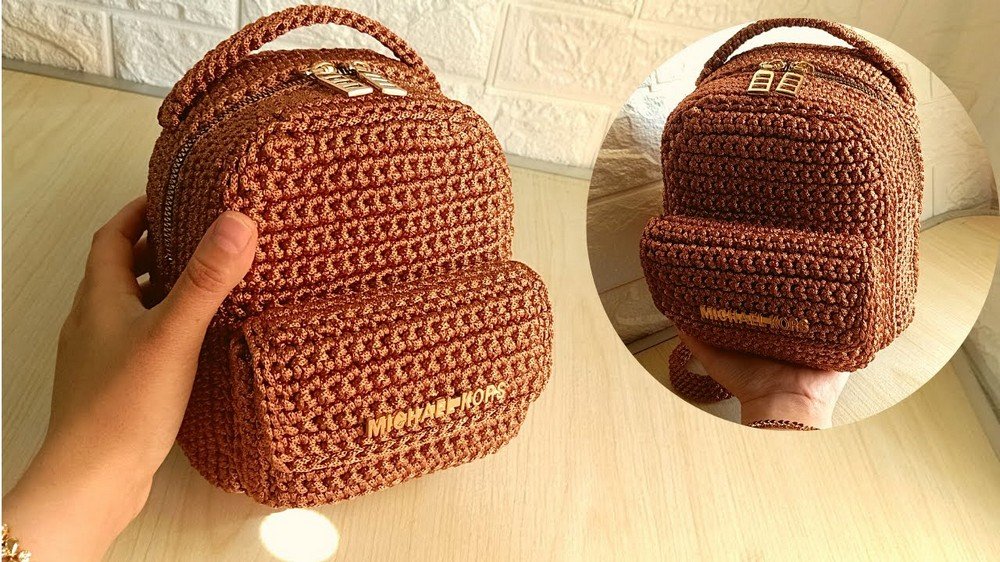
Creating a beautiful crochet backpack – pattern is one of the most enjoyable and rewarding projects for both beginner and experienced crocheters. Whether you’re looking to craft a stylish everyday bag, a fun accessory, or a personalized gift, this project combines utility with beauty.
A handmade crochet backpack not only shows off your skills but becomes a piece you can proudly carry or gift.In today’s world of fast fashion and mass production, more and more people are turning to handmade items for their uniqueness and personal touch.
A beautiful crochet backpack – pattern allows you to express your creativity while making something functional and fashion-forward. With just yarn, a hook, and a bit of time, you can design a backpack that stands out in any crowd.
This article will guide you step-by-step through the process of making your own beautiful crochet backpack – pattern. From selecting the right yarn to assembly, closures, and customization ideas, you’ll find everything you need to turn your vision into a reality. Whether you plan to use it yourself, sell it at a craft fair, or give it as a thoughtful gift, your crochet backpack will be both stylish and practical.
1. Materials and Tools You’ll Need
Starting your beautiful crochet backpack – pattern begins with gathering the right supplies. Choosing quality materials ensures that your backpack is both durable and visually appealing. You don’t need a huge toolkit—just the essentials and a bit of creativity.
First, choose your yarn wisely. Cotton and acrylic blends are perfect for backpacks because they are strong, washable, and hold their shape well. Consider using medium (worsted) weight yarn for sturdiness, or even chunky yarn if you’re going for a bold, oversized look.
Next, select an appropriate crochet hook. Most beautiful crochet backpack – pattern designs call for hook sizes between 4.0 mm and 6.0 mm. The goal is to create tight, dense stitches so the bag maintains structure and doesn’t stretch out too easily.
You’ll also need stitch markers to help you track rounds, a yarn needle for weaving in ends, scissors, and possibly a lining fabric if you want to reinforce the inside of your bag. Some patterns also require D-rings, straps, and closures like magnetic snaps or buttons.
Don’t forget about color! Choosing vibrant or neutral shades will completely change the style of your backpack. You could go with a boho multicolor look or a minimalist solid tone, depending on your personal aesthetic or the taste of whoever will receive the bag.
Finally, keep your beautiful crochet backpack – pattern handy—whether printed out or loaded on a tablet. Reading through the entire pattern before you begin helps avoid surprises and ensures you understand the steps and techniques involved.
2. Step-by-Step Construction Process
Once your materials are ready, it’s time to begin your beautiful crochet backpack – pattern. The process usually starts from the base of the backpack and works upward in rounds. Following each step carefully will give your bag a neat, professional finish.
Start with the base—most crochet backpacks begin with a circular or oval foundation. This provides the support your bag needs and helps it stand up straight when filled. Work in continuous rounds, using single or half-double crochet stitches to keep the base firm.
Next comes the body. As you build up from the base, maintain even tension and check that your stitch count remains consistent. You can use different stitch patterns here—such as shell stitch, puff stitch, or simple single crochet—for added texture and style.
If your design includes a drawstring top or flap, be sure to follow the shaping instructions carefully. These sections often involve chain spaces and slip stitches to allow for movement and closure. Reinforce areas that will bear stress, like drawstring openings or strap attachments.
Now, attach your straps. Some beautiful crochet backpack – pattern designs call for crocheted straps, while others use pre-made leather or canvas straps for a hybrid look. Sew these on securely, making sure they are evenly spaced and tightly attached to handle weight.
Optional features like exterior pockets, decorative buttons, or fringe can be added after the main construction is done. These details add personality and function to your backpack, letting you tailor it to your needs or style.
Lastly, weave in all ends and steam or lightly block your backpack to smooth out any wrinkles or uneven sections. If you’re lining the inside, now is the time to sew the fabric into place using a needle and thread or a sewing machine for a professional finish.
3. Customizing Your Crochet Backpack Design
One of the best parts about making a beautiful crochet backpack – pattern is how easily you can customize it. From the colors to the closures, every detail is an opportunity to make the backpack uniquely yours.
Color choice plays a big role in the final look. Try mixing two or three complementary colors or adding stripes to give your backpack a playful, trendy vibe. Ombre or gradient yarns also work beautifully in crochet, creating a flowing visual effect.
Textures matter, too. If your base pattern uses simple stitches, consider adding a textured panel with bobble, waffle, or cable crochet. These features add visual interest and make the backpack look more advanced and stylish.
Think about the closure mechanism. A drawstring closure adds a casual, sporty touch, while a flap with button gives a more classic feel. You can even incorporate zippers if you’re confident with sewing or want added security.
Want to add pockets? External and internal pockets increase the backpack’s functionality. Use small square panels attached with slip stitches or sewn on afterward for extra storage space—great for phones, pens, or keys.
Add personal flair with patches, appliqués, or initials. These can be crocheted separately and stitched on, or even embroidered directly onto the backpack for a unique, personalized touch.
Finally, consider how your beautiful crochet backpack – pattern can be adapted seasonally. Use lighter yarns and open stitch patterns for summer versions, and heavier yarns with thicker textures for fall or winter backpacks.
4. Caring for and Sharing Your Crochet Backpack
After completing your beautiful crochet backpack – pattern, proper care ensures it lasts long and continues to look fresh. Whether you keep it, gift it, or sell it, knowing how to maintain your handmade item is essential.
Crochet backpacks should be hand washed or gently machine washed (if your yarn allows) and air dried flat to maintain shape. Avoid high heat and rough agitation, which can stretch or damage the stitches.
Store your backpack properly when not in use. Avoid overloading it, as this can stress the straps and bottom. If storing long-term, keep it in a fabric bag or pillowcase to avoid dust and fading.
If you plan to give your backpack as a gift, consider adding a care tag with washing instructions. Handmade gifts feel even more special when they include thoughtful touches like that.
Thinking of selling your backpack? Set yourself apart by offering custom options like color choices, initials, or size variations. Well-photographed listings with detailed descriptions can increase sales and attract a loyal customer base.
Don’t forget to share your finished beautiful crochet backpack – pattern on social media or crafting platforms. Sites like Instagram, Pinterest, and Etsy are great places to show off your work and connect with other crochet enthusiasts.
Lastly, always credit the pattern designer if you’re posting online or selling finished items, especially if you’re using a purchased pattern. It shows professionalism and supports the crafting community.
FAQ – Beautiful Crochet Backpack – Pattern
Q1: Is a crochet backpack strong enough for everyday use?
Yes, when made with durable yarn and tight stitches, a crochet backpack can be very strong. Reinforce stress points like straps and add a lining for extra durability.
Q2: What’s the best yarn for a crochet backpack?
Cotton or acrylic yarns are ideal. Cotton is sturdy and holds shape well, while acrylic is lightweight and easier to clean. You can even blend the two for added benefits.
Q3: Can I add a zipper to my crochet backpack?
Absolutely! Zippers add extra security. Sew them in with a machine or by hand using a tapestry needle and strong thread, after the crochet part is complete.
Q4: Do I need to line my crochet backpack?
Lining is optional but recommended for structure and longevity. A fabric lining prevents stretching and protects the contents of your bag.
Q5: How long does it take to complete a crochet backpack?
Depending on the pattern complexity and your speed, a beautiful crochet backpack – pattern can take 6 to 12 hours to complete, spread over a few days.
Q6: Can I sell crochet backpacks made from a pattern?
Most free patterns allow you to sell finished products with credit. If you’re using a paid pattern, check the designer’s policy. Always be transparent and respectful of copyright.
Conclusion
A beautiful crochet backpack – pattern is a wonderful project that combines style, skill, and function. With the right materials, attention to detail, and a bit of creative flair, you can create a stunning handmade bag that’s perfect for daily use or gifting.
In this article, you learned how to select materials, follow step-by-step instructions, personalize your backpack, and care for it after completion. You also discovered tips for selling or sharing your creation and got answers to common questions about crochet backpacks.
If you’ve tried this project or plan to, we’d love to hear from you. Leave a sincere opinion or suggestion in the comments—your feedback helps others and makes this community even stronger. Happy crocheting!