If you’ve been looking for a whimsical and fun sewing project that doubles as a functional piece of home décor, then the Cane Toad Cutie Bean Bag – Pattern is just what you need. Whether you’re an experienced sewer or a beginner looking to try something new, this pattern offers the perfect blend of charm, creativity, and practicality.
The Cane Toad Cutie Bean Bag – Pattern is more than just a quirky creature—it’s a soft and squishy companion that can be used as a small seat, footrest, or even a plush pillow for kids or the young at heart.
With its adorable toad-like features and soft bean-filled body, it brings both personality and comfort into any room.In this article, we’ll cover everything from materials and construction tips to creative customization and care.
Whether you’re making it for your own space or gifting it to someone special, the Cane Toad Cutie Bean Bag – Pattern will surely become a favorite project you’ll want to make more than once.
1. Materials You’ll Need for the Cane Toad Cutie Bean Bag
Before diving into the sewing process, it’s essential to gather all the necessary supplies for your Cane Toad Cutie Bean Bag – Pattern. Using the right materials ensures your project is sturdy, comfortable, and safe for everyday use.
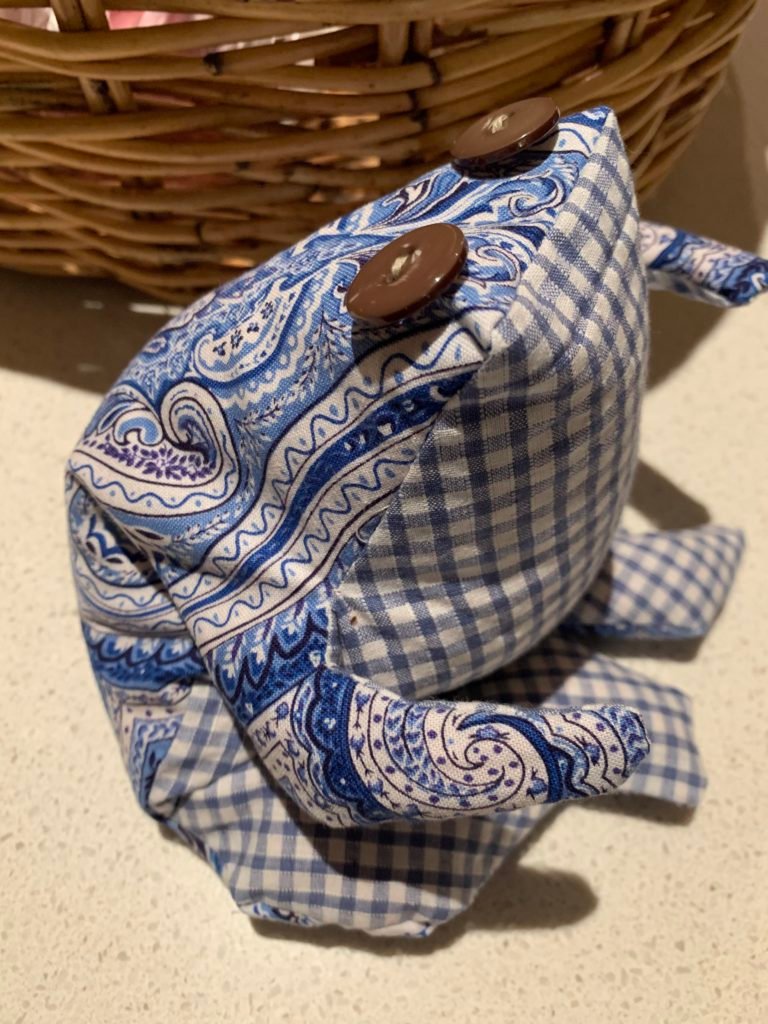
The outer fabric is a crucial part of the bean bag’s personality. You can choose soft fleece, cotton canvas, or even faux suede for a premium finish. Earth tones or bold prints give your toad character, while neutrals fit well with minimalistic decor.
For the belly or underpart of the toad, use a contrasting fabric or lighter shade to mimic a real cane toad’s appearance. A different texture, like smooth cotton or minky fabric, adds extra visual interest and a sensory experience when touched.
The filler is what gives the Cane Toad Cutie Bean Bag – Pattern its shape and squish. Polystyrene beads are common, but they can be messy if not handled carefully. Alternatively, use shredded foam, microbeads, or eco-friendly filling options like recycled fabric scraps or corn-based stuffing.
You’ll also need basic sewing tools like scissors, pins, a sewing machine, and heavy-duty thread. Because the bean bag will be sat on or handled frequently, durability is key—so reinforced seams and quality thread matter.
Safety is a major concern, especially if the bean bag will be around children. Include a hidden zipper or an internal lining to prevent beads from spilling out. Double-check stitching and secure all openings thoroughly before finishing.
Optional decorative features include felt eyes, a stitched-on mouth, and patterned fabric legs. These details turn the bean bag from a generic blob into a characterful toad that’s both functional and full of personality.
2. How to Sew the Cane Toad Cutie Bean Bag – Step-by-Step
With your materials in hand, it’s time to bring the Cane Toad Cutie Bean Bag – Pattern to life. This step-by-step guide will help ensure each stage of the process is smooth and satisfying.
Start by cutting out all your pattern pieces according to the template. These typically include two main body panels (top and bottom), leg shapes, eye pieces, and any optional decorative patches. Lay them out to confirm size and orientation before sewing.
Begin with the legs. Sew the leg pieces right sides together, then turn them inside out and lightly stuff with filler. Don’t overstuff—soft, floppy legs add to the toad’s charm and flexibility when it’s used as a bean bag.
Next, prepare the eyes. You can create 3D stuffed eyes or use felt appliqué. Hand-sew or machine-attach these to the top body panel. Make sure they’re symmetrically placed to maintain a balanced appearance.
Once your facial features are ready, pin and baste the legs to the bottom body panel, with the legs facing inward. When the top panel is sewn on, the legs will flip out, creating a seamless join with no raw edges.
Pin the top and bottom body pieces together, right sides facing, and sew around the edges—leaving a wide opening for inserting the filler. If using a zipper or velcro closure, sew it securely into place on one side of the seam.
Turn the toad right side out, fill it slowly and carefully with your chosen stuffing, and then stitch the opening closed securely. Use strong, invisible hand stitching or top-stitching for a clean finish that holds up under use.
3. Customizing Your Toad for Fun and Function
One of the best parts about using a Cane Toad Cutie Bean Bag – Pattern is how easily you can customize it to reflect your own style, personality, or intended use. A few thoughtful tweaks can turn a standard toad into a true conversation piece.
First, color choice makes a huge difference. Use camouflage for an outdoorsy, frog-in-the-forest look, or go bold with neon hues, rainbow stripes, or glittery fabrics for something more playful and unique.
You can also scale the pattern up or down. Make a smaller version for a child’s bedroom or a larger one as a floor pillow in a living room or reading nook. Just remember that scaling up means needing more filler and more durable stitching.
Add accessories! A tiny felt crown turns your toad into a prince or princess. A backpack strap allows for easy transport, especially if it’s used at daycare, school, or sleepovers. A stitched-on tongue with a fly appliqué adds humor.
If gifting the bean bag, consider monogramming the recipient’s initials or adding a personalized message with embroidery. This turns a fun item into a heartfelt keepsake.
Want extra function? Insert a handle at the back so kids can drag their toad around the house. Or make the belly area a hidden pocket for storing books or toys—just be sure the zipper is child-safe.
If you’re part of a crafting or sewing business, the Cane Toad Cutie Bean Bag – Pattern makes a great addition to your product lineup. It’s eye-catching, Instagrammable, and functional—all the things buyers love.
4. Cleaning and Maintaining Your Bean Bag
After all the effort you’ve put into creating your Cane Toad Cutie Bean Bag – Pattern, you’ll want it to last. Maintenance is easy if you follow a few key care tips to keep it clean, fresh, and safe.
If your bean bag is made with machine-washable materials, create a removable outer shell with a hidden zipper. This makes it simple to take off and wash without disturbing the inner filler.
Spot cleaning is your go-to for minor spills or dirt. Use a mild soap, a soft cloth, and cold water. Avoid harsh chemicals or bleach, as they can fade fabric and weaken stitching.
For heavily used bean bags, especially in homes with kids or pets, add an antimicrobial or stain-resistant fabric treatment. Some fabrics come pre-treated, or you can apply a protective spray post-construction.
Over time, the bean bag may flatten. Top it off by opening the seam or zipper and adding more filler. Fluff regularly to keep it plump and comfortable.
Store the bean bag indoors and out of direct sunlight when not in use. UV rays can cause fabrics to fade and weaken, especially if your toad bean bag lives in a sunny room.
Make it a habit to check seams, especially around the zipper and legs. Regular inspection ensures no leaks or tears develop that could pose a choking hazard or spill beans all over the house.
FAQ – Cane Toad Cutie Bean Bag – Pattern
Q1: Is this pattern beginner-friendly?
Yes! The Cane Toad Cutie Bean Bag – Pattern is suitable for confident beginners. If you can sew basic seams and stuff a plush toy, you can tackle this project easily.
Q2: What’s the best filler for the bean bag?
Polystyrene beads are most common, but shredded foam, old fabric scraps, or microbeads are great alternatives. Choose based on comfort, availability, and environmental impact.
Q3: Can I wash the whole bean bag?
Only if the outer shell is removable. Otherwise, stick to spot cleaning. Always check the care labels of your chosen fabrics and fillers.
Q4: How big is the finished toad?
Most standard Cane Toad Cutie Bean Bag – Pattern templates create a toad around 18–24 inches wide. You can scale it up or down depending on your needs.
Q5: Is this safe for small children?
Yes—with precautions. Use safety stitching, avoid loose embellishments, and make sure the bean filler is enclosed in a sealed internal lining or zipper pouch.
Q6: Can I sell bean bags made from this pattern?
Check the pattern license. Many independent designers allow the sale of finished products with credit. Always respect copyright and attribution requirements.
Conclusion
The Cane Toad Cutie Bean Bag – Pattern is more than a sewing project—it’s a delightful experience in creativity, functionality, and personal expression. Whether you’re making one for a loved one, your living room, or as a product for sale, this quirky bean bag brings smiles and comfort wherever it lands.
In this guide, we walked through materials, step-by-step construction, creative customization ideas, and long-term care tips. With just a few hours and some fabric, you can create a
lovable toad that’s both fun and practical.
We’d love to hear your thoughts! Have you tried the Cane Toad Cutie Bean Bag – Pattern or made modifications of your own? Leave a sincere comment or suggestion below—your input inspires the community and helps fellow makers improve their craft. Happy sewing!