The Crochet Drawstring Bags – Pattern is one of the most versatile and fun projects you can add to your handmade collection. Whether you’re looking to organize small items, gift in a stylish way, or create a market-ready accessory, crochet drawstring bags are both functional and fashionable.
Their compact size, simple construction, and endless customization options make them a go-to project for crafters of all levels.Working with a Crochet Drawstring Bags – Pattern allows you to experiment with stitches, colors, and textures without the pressure of a large or complicated piece.
It’s also a great way to use up leftover yarn, practice shaping, or even try out new techniques like colorwork, lace patterns, or embroidery. These bags are lightweight, easy to transport, and can be made in various sizes to suit your exact needs.
In this article, you’ll discover everything you need to know to create your own crochet drawstring bag. From materials and construction techniques to styling ideas and helpful tips, this guide is designed to walk you through each step. We’ll also cover customization, care, and include a detailed FAQ at the end to answer the most common questions about the Crochet Drawstring Bags – Pattern.
1. Materials Needed to Start Your Crochet Drawstring Bag
Before you dive into creating your Crochet Drawstring Bags – Pattern, it’s essential to gather the right materials. Luckily, this project doesn’t require a lot, making it ideal for beginners or anyone on a budget.
Start with yarn that suits your purpose. For sturdy bags that hold their shape, cotton yarn is the best choice. It’s durable, washable, and available in various colors and weights. Acrylic yarn also works well, especially for more decorative or lightweight bags.
Select a crochet hook that matches your yarn’s weight. Most patterns use a size between 3.5 mm to 5 mm, but always check the label or test your gauge to ensure tight, dense stitches that won’t let small items slip through.
You’ll also need scissors, a tapestry needle for weaving in ends, and stitch markers, especially if you’re working in the round or want to keep your increases aligned. These small tools will help your work stay neat and organized.
For the drawstring itself, you can crochet a cord, braid some yarn strands, or use ribbon, leather cords, or twine for a rustic touch. Be sure to choose a material that slides easily through the eyelets or holes of the bag’s top row.
Some patterns suggest using linings, especially if you want extra durability or if the bag will carry small or delicate items. Lightweight fabric and a bit of hand stitching are usually enough to line your bag.
Lastly, consider embellishments like buttons, tassels, beads, or even embroidery to personalize your bag and give it a unique flair.
2. Step-by-Step Instructions for the Basic Pattern
Creating your own Crochet Drawstring Bags – Pattern starts with a basic structure that you can build upon. Most bags follow a cylindrical or rectangular shape and are worked from the bottom up.
Begin by making a base. You can create a circular base by working in the round, increasing each round until it reaches the desired diameter. Alternatively, a rectangle or oval base can be used if you want a more pouch-like or flat-bottomed design.
Once your base is complete, start building up the sides of the bag. This is usually done in continuous rounds using simple stitches like single crochet (sc), half double crochet (hdc), or double crochet (dc), depending on the look and texture you want.
As you reach the height of the bag, it’s time to create the drawstring eyelets. This is done by crocheting a row with spaces—usually chain stitches followed by skipped stitches or chain spaces—to allow the drawstring to be woven through.
After completing the eyelet row, finish with one or two rounds of simple stitches to reinforce the edge. This helps keep the drawstring row sturdy and prevents stretching.
Next, make or choose your drawstring cord. If crocheting your own, a simple chain stitch with slip stitch reinforcement works well. Thread the cord through the eyelet row using a safety pin or yarn needle.
Finally, test the drawstring to ensure it pulls evenly and closes the bag securely. You can also sew the ends of the drawstring together or leave them loose with tassels or beads for added charm.
3. Creative Customizations and Styling Ideas
One of the best things about the Crochet Drawstring Bags – Pattern is how easy it is to personalize and adapt. You can make each bag look completely different simply by changing a few details.
Experiment with striped or color-blocked designs. Use multiple colors to create patterns, gradients, or contrasting rows. This is an excellent way to use up leftover yarn and add visual interest.
Try different stitch patterns to add texture. Shell stitch, granny stitch, or puff stitch can give your bag a unique surface while still maintaining functionality. Just remember to test your gauge to avoid unintentional sizing changes.
Add decorative motifs like flowers, hearts, or stars. These can be appliquéd or crocheted directly into the bag using tapestry crochet techniques. They add personality and make the bag suitable for themed gifts or occasions.
Customize the shape by increasing or decreasing the number of rounds. Short bags can become coin purses, while tall ones make perfect wine bottle holders or reusable gift bags.
For an extra elegant finish, line the inside with fabric, especially if the bag will hold delicate or small items. A patterned lining adds a touch of luxury and prevents the bag from stretching over time.
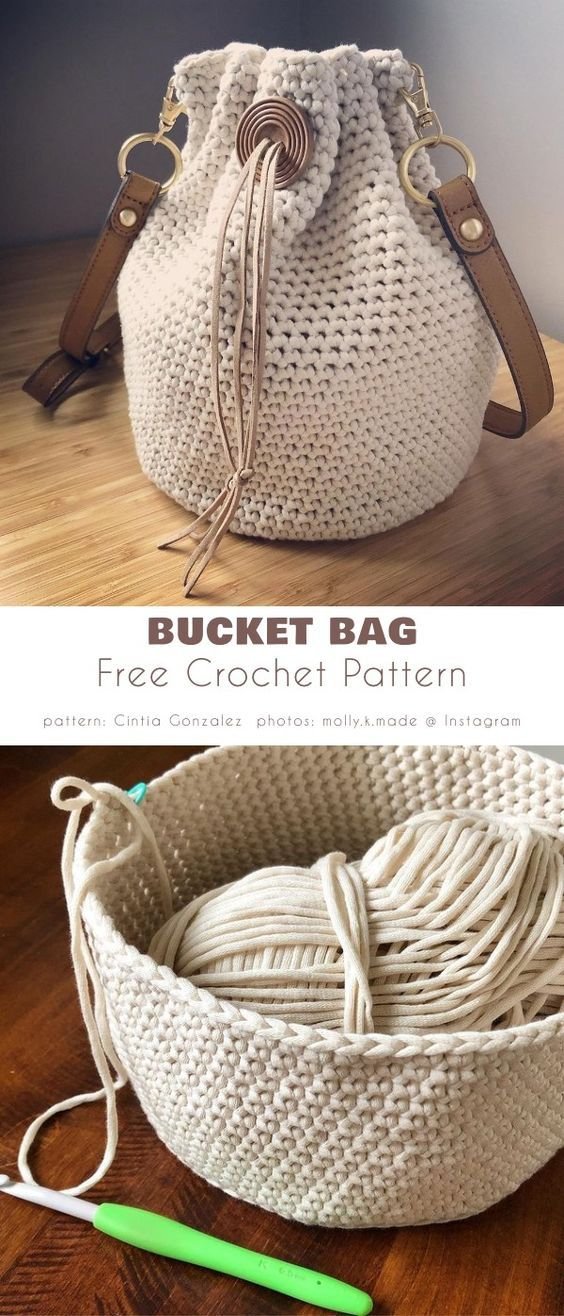
You can also add handles or straps for different carrying styles. Crochet long cords for crossbody use, short loops for a wristlet, or even attach metal hardware for a mixed-material aesthetic.
4. Tips for Beginners and Common Mistakes to Avoid
If you’re new to crocheting bags, don’t worry—the Crochet Drawstring Bags – Pattern is very forgiving and easy to follow. Here are some useful tips and common pitfalls to avoid.
Tighten your tension. Loose stitches may make your bag floppy or let items slip out. Practice with a swatch and adjust your hook size or grip if necessary to get a firm fabric.
Count your stitches regularly. Especially when working in the round, it’s easy to accidentally add or miss stitches. Use markers at the beginning of rounds to help you stay on track.
Use the right yarn. Some yarns, like super soft acrylics or novelty yarns, may not be structured enough for bags. Stick to durable fibers like cotton or sturdy blends to maintain the bag’s shape.
Don’t skip the drawstring row. It’s tempting to finish quickly, but the drawstring is what makes the bag functional. Take your time to space the eyelets evenly for a smooth close.
Check your size as you go. Hold the base or body of the bag up to your items to ensure it will fit what you plan to carry. This is especially important for pouches meant for phones, makeup, or other specific items.
Block your bag if needed. If your bag looks uneven or curled at the edges, lightly block it using steam or by shaping it while damp. This helps smooth out stitches and improve the final look.
FAQ: Crochet Drawstring Bags – Pattern
Q1: What size should a crochet drawstring bag be?
The size depends on its purpose. Small bags (4×6 inches) are great for gifts or coins, while larger ones (10×12 inches or more) can carry toiletries, books, or lunch items.
Q2: Can I machine wash crochet drawstring bags?
Yes, if you use machine-washable yarn like cotton or acrylic. Always check the yarn label and use gentle settings to protect the shape and stitch definition.
Q3: What’s the best yarn for crochet drawstring bags?
Cotton yarn is best due to its durability, stiffness, and easy care. Blends with acrylic also work well. Avoid stretchy or overly soft yarns for structured bags.
Q4: How do I make the drawstring more durable?
You can braid multiple yarn strands, reinforce a crocheted chain with slip stitches, or use pre-made cord or ribbon. Make sure the ends are secured to prevent fraying.
Q5: Can I add a lining to the bag?
Yes! Use lightweight cotton or muslin fabric. Cut it slightly smaller than the bag, sew the sides, and hand-stitch or glue it into the inside of the bag for a clean finish.
Q6: Are these bags good for selling at craft fairs?
Absolutely. Crochet drawstring bags are quick to make, low-cost, and can be customized easily. They’re practical and make great gifts, which buyers love.
Conclusion
The Crochet Drawstring Bags – Pattern is more than just a fun project—it’s a gateway into creative expression, sustainable crafting, and practical handmade design. With a few simple tools and some yarn, you can create bags that are useful, beautiful, and personal. Whether you’re gifting, selling, or making for yourself, each drawstring bag offers an opportunity to play with color, texture, and style.
We hope this guide inspired you to try the Crochet Drawstring Bags – Pattern for your next
project. If you’ve completed your own version or have tips, suggestions, or ideas, please leave a sincere comment below. Your feedback helps us and other crafters grow and connect through creativity. Happy crocheting!