The Starshadow block – Pattern is a striking and visually impactful quilt block that adds dimension and artistry to any quilting project. Recognized for its bold geometric lines and starburst effect, this block creates an illusion of light and shadow, making it a favorite among modern quilters and traditionalists alike. Whether used as a standalone focal point or repeated in a full quilt, it never fails to capture attention.
One of the beautiful things about the Starshadow block – Pattern is its ability to highlight fabric contrast and precision piecing. The interplay between light and dark fabrics gives the block its “shadow” effect, adding depth and visual movement to the design. It’s a perfect challenge for intermediate quilters who want to push their skills and make something truly unique.
In this guide, we’ll walk through everything you need to know about creating the Starshadow block – Pattern, from fabric selection and cutting techniques to assembly tips and creative variations. Whether you’re starting your first block or looking to master a new pattern, you’ll find detailed guidance here to help you succeed with confidence.
1. Understanding the Starshadow Block Design
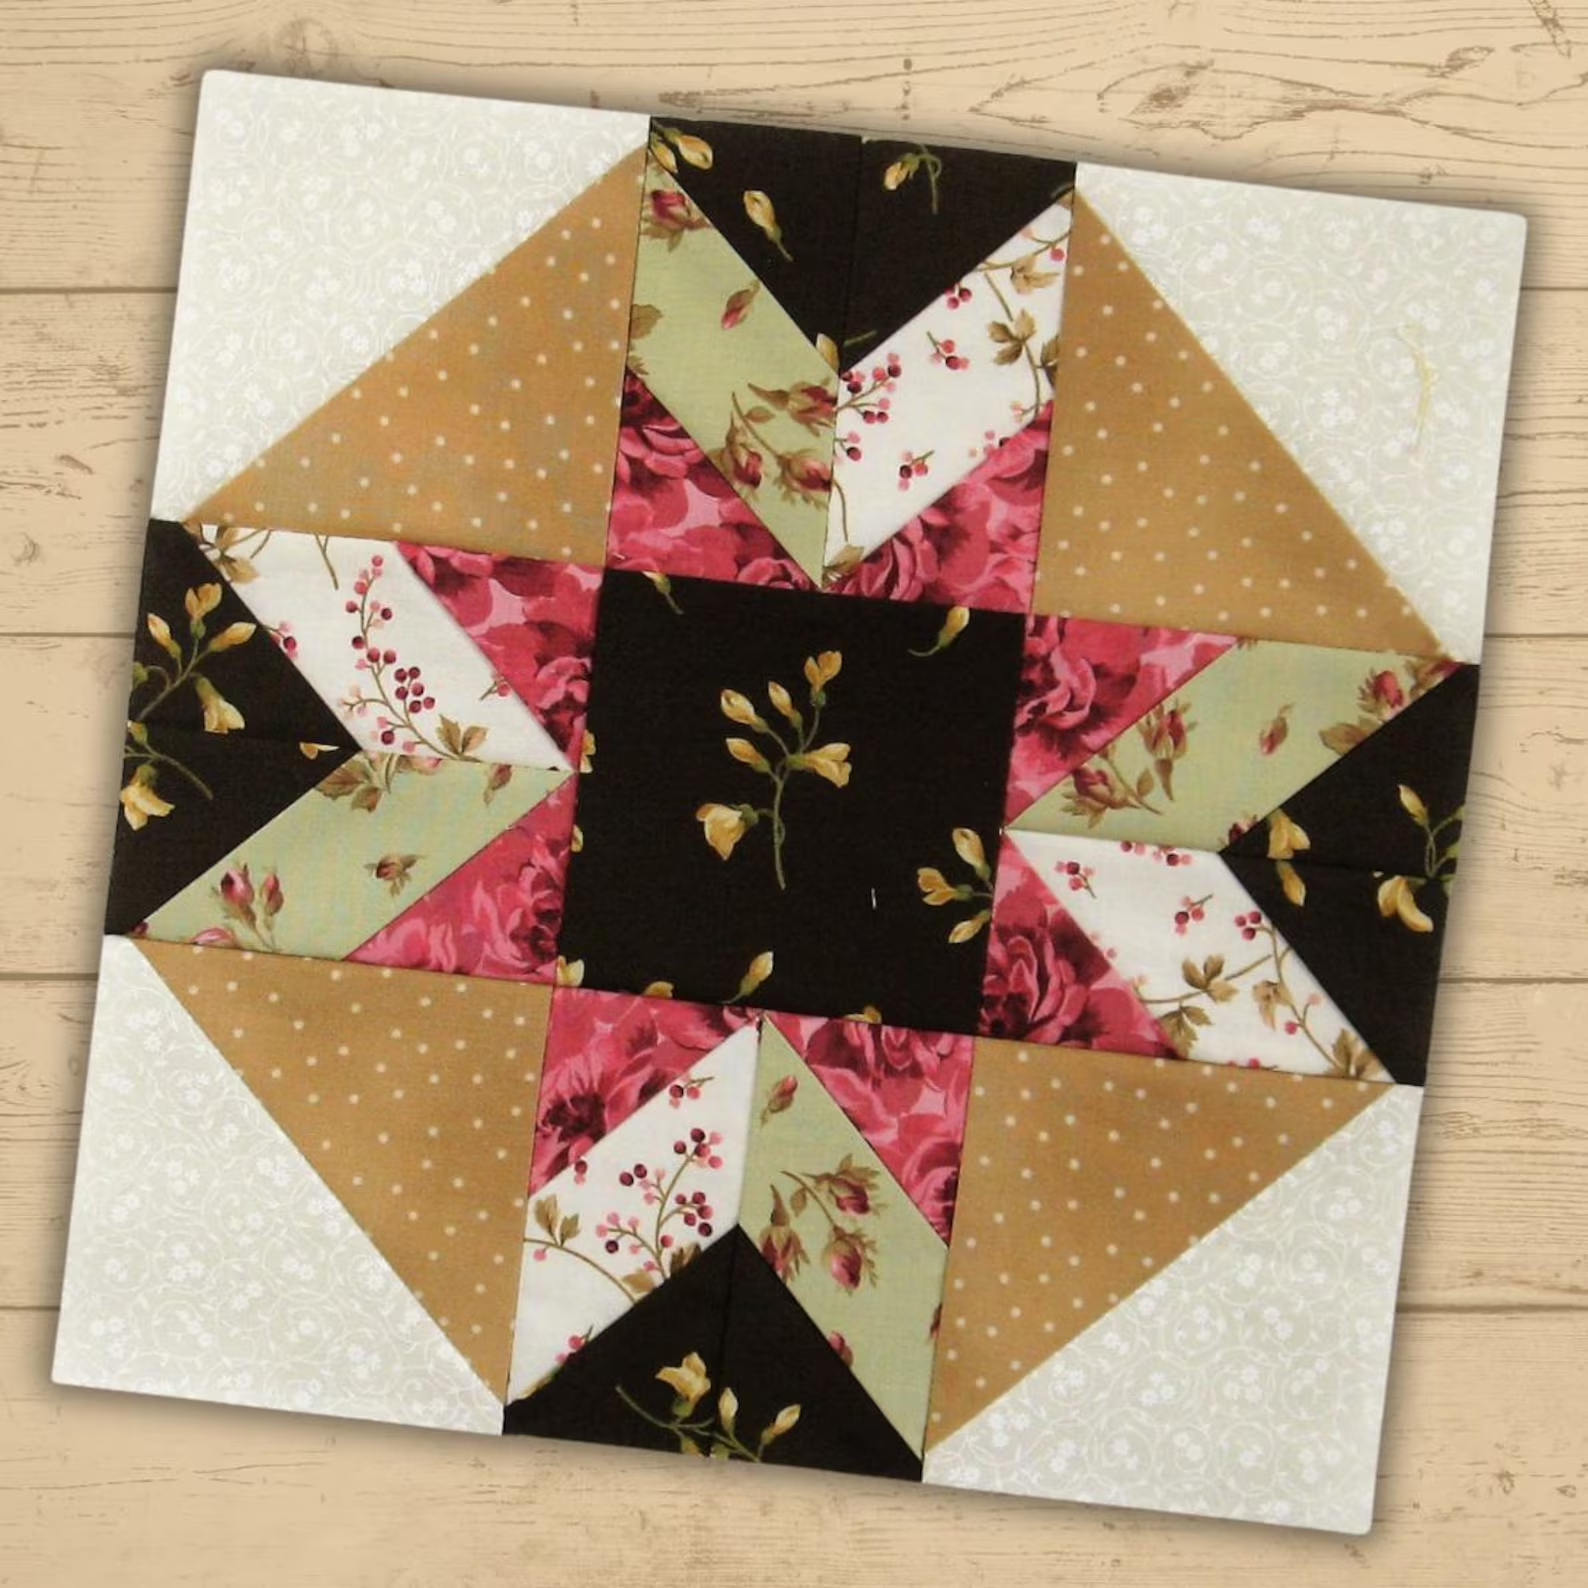
The Starshadow block – Pattern is built on the classic star motif, but with an added twist—literally. The design incorporates angled shapes and high-contrast fabric placement to create a visual “shadow” effect, giving the star more depth and a three-dimensional look.
At first glance, the block may appear complex, but it’s really just a clever arrangement of half-square triangles (HSTs), flying geese units, and parallelograms. These elements come together to form points that stretch across the block like beams of light, with darker shapes nestled beside them to create the illusion of a shadow.
Choosing the right fabrics is crucial for this pattern. You’ll want a high contrast between light and dark tones—think navy and white, or black and pale gray. You can also incorporate a third fabric to introduce a pop of color or soften the starkness between your light and dark selections.
The standard size for the Starshadow block – Pattern is 12 inches finished, but it can be scaled up or down depending on your project. Whether you’re making a pillow, wall hanging, or full quilt, this pattern adapts beautifully to different formats.
To get the best results, accuracy is key. Because of the angular nature of the block, even slight misalignments can throw off the symmetry. Use a rotary cutter, sharp quilting ruler, and a consistent quarter-inch seam allowance to keep everything sharp and aligned.
Once assembled, the block offers a dramatic impact, even when surrounded by simpler designs. That’s part of the magic of the Starshadow block – Pattern—it brings elegance and sophistication to whatever you pair it with.
2. Materials and Tools You’ll Need
Before you begin stitching your Starshadow block – Pattern, it’s important to gather all the materials and tools you’ll need for a smooth quilting experience. Preparation goes a long way in ensuring the final product looks polished and professional.
Start with quality quilting cotton in three main tones: one light, one dark, and an optional accent or background fabric. Stick to solid colors or subtle prints to enhance the block’s structure. Loud patterns can distract from the shadow effect.
You’ll also need a cutting mat, rotary cutter, and acrylic ruler. Precision is vital when working with triangles and diagonals, and these tools will help ensure your cuts are accurate and your pieces fit together correctly.
Invest in a reliable sewing machine with a quarter-inch foot, or use a seam guide to maintain uniform seams. This will keep your block square and help your points align as they should.
Have pins or clips on hand for securing tricky joins, especially where multiple seams meet. These can prevent slippage when sewing and help maintain your block’s symmetry.
An iron and pressing mat are essential. Pressing (not ironing) after each step helps keep the pieces flat and aligned. It also reduces bulk where points and corners meet, which is important in this block’s detailed layout.
Finally, keep a pattern or template nearby. You can either draft your own based on block measurements or use a printed version to keep your cutting and piecing organized. Templates are especially helpful for beginners working with unfamiliar shapes.
3. Step-by-Step Guide to Sewing the Block
Now that you’re set with materials, let’s go step-by-step through sewing the Starshadow block – Pattern. Don’t worry—while it may look complex, breaking it down into manageable parts makes the process much easier.
Begin by cutting your fabric pieces. For a standard 12-inch block, you’ll need squares for half-square triangles (HSTs), rectangles for flying geese, and smaller squares or parallelograms for the shadow areas. Use a cutting guide or pattern chart to stay organized.
Start with your half-square triangles. Pair a dark and light square, draw a diagonal line, sew a quarter-inch on both sides of the line, then cut and press. These triangles form the star points and should be pressed with seams to the darker fabric for cleaner lines.
Next, sew your flying geese units, which form the central star arms. There are several methods for making flying geese—traditional, no-waste, and stitch-and-flip. Choose the one you’re most comfortable with and remember to trim them to size after sewing.
Then create your shadow shapes. These can be parallelograms or rectangles that sit beside the star points, depending on your pattern version. Position them carefully so that the shadow appears to follow the light direction in the star.
Begin assembling the block in sections. Typically, the Starshadow block – Pattern is built row by row or in quadrants. Align and sew each unit with care, pressing seams flat and trimming dog ears or excess fabric as needed.
After the rows or quadrants are complete, sew them together, nesting seams for clean joins. Give the block a final press, ensuring all points are crisp and the edges are square.
And just like that, you have a finished Starshadow block – Pattern—ready to be showcased in a quilt top, pillow cover, or framed as wall art.
4. Creative Variations and Design Ideas
One of the joys of quilting is personalization, and the Starshadow block – Pattern is no exception. While it’s stunning in its classic form, there are countless ways to customize the design and make it your own.
Try playing with color placement to change the illusion of light direction. For example, by moving your darkest tones to one side or using gradient fabrics, you can simulate different light sources or create a swirling visual effect.
Incorporate the block into a larger quilt layout with alternating simpler blocks like solids or four-patch squares. This highlights the Starshadow blocks and gives the eye a place to rest, especially in large quilts.
Experiment with negative space. Enlarging the block or adding solid sashing between blocks can make the starburst shapes appear to float, giving a modern and minimalist aesthetic.
Try using batik or hand-dyed fabrics for the shadow pieces. These fabrics offer subtle texture changes that enhance the illusion of depth without overwhelming the overall design.
Add borders or frame the block with a log cabin-style surround to create a larger, more complex focal point for your quilt. This is especially effective in wall hangings or bed-sized quilts.
You can even combine multiple Starshadow block – Pattern variations, rotating them to create new symmetrical patterns. When placed together, the blocks create secondary shapes and movement that are visually captivating.
FAQ – Starshadow block – Pattern
Q1: What makes the Starshadow block different from other star blocks?
A: The unique use of light and dark fabrics to create a “shadow” effect gives this block its depth and 3D appearance, setting it apart from traditional star designs.
Q2: Is the Starshadow block suitable for beginners?
A: It’s best for intermediate quilters due to the precision required in piecing and color placement, but confident beginners can try it with patience and clear instructions.
Q3: What size should I cut my fabric pieces?
A: For a 12-inch finished block, follow a detailed cutting guide. Typical pieces include 3.5″ squares for HSTs and rectangles around 2×3.5″ for flying geese.
Q4: Can I chain piece the units for faster sewing?
A: Yes, chain piecing works well with HSTs and flying geese. Just be sure to press between steps and trim where necessary to maintain accuracy.
Q5: How many blocks do I need for a full quilt?
A: That depends on your desired quilt size. For a throw, 12 to 20 blocks may be enough; for a queen-size, you might need 30 to 40, depending on block size and borders.
Q6: Can I use printed fabrics or should I stick to solids?
A: Subtle prints can work well, especially tone-on-tone or batiks. Avoid large or busy prints that might obscure the clean lines and shadow effect of the block.
Conclusion
The Starshadow block – Pattern is more than just a quilting technique—it’s an artistic expression of light, shape, and precision. From choosing high
-contrast fabrics to assembling intricate geometric shapes, this pattern offers quilters a satisfying challenge and a stunning result. Whether you’re adding it to a quilt top or creating a decorative project, the Starshadow block always leaves a lasting impression.
We hope this guide has helped you understand the structure, techniques, and creative possibilities behind this beautiful pattern. If you’ve tried it—or plan to—leave a sincere opinion in the comments! Your feedback and suggestions help us grow and bring even more valuable content to the quilting community.
Happy quilting!