The Turning Tulips Block – Pattern is a charming and timeless quilting design that beautifully captures the grace of tulips in motion. With its floral motif and dynamic layout, this block pattern brings a lively elegance to any quilt project. Whether you’re a beginner exploring floral quilt blocks or a seasoned quilter looking for something fresh and versatile, the Turning Tulips Block – Pattern offers a satisfying and creative journey.
This classic design mimics the gentle curve of tulip petals turning toward the sun, often arranged in a pinwheel or rotating layout to emphasize movement. The result is a block that adds energy and flow to your quilt, making it ideal for spring-themed blankets, wall hangings, or decorative throws. The Turning Tulips Block – Pattern combines clean lines, floral shapes, and playful arrangements into a single, impactful design.
In this guide, you’ll learn everything you need to know about the Turning Tulips Block – Pattern, including how to construct it, the best fabrics and tools to use, where to find inspiration and variations, and tips for piecing and assembling your tulip blocks. We’ve also included a comprehensive FAQ to answer the most common questions and a conclusion to wrap up with key takeaways.
1. What Is the Turning Tulips Block – Pattern?
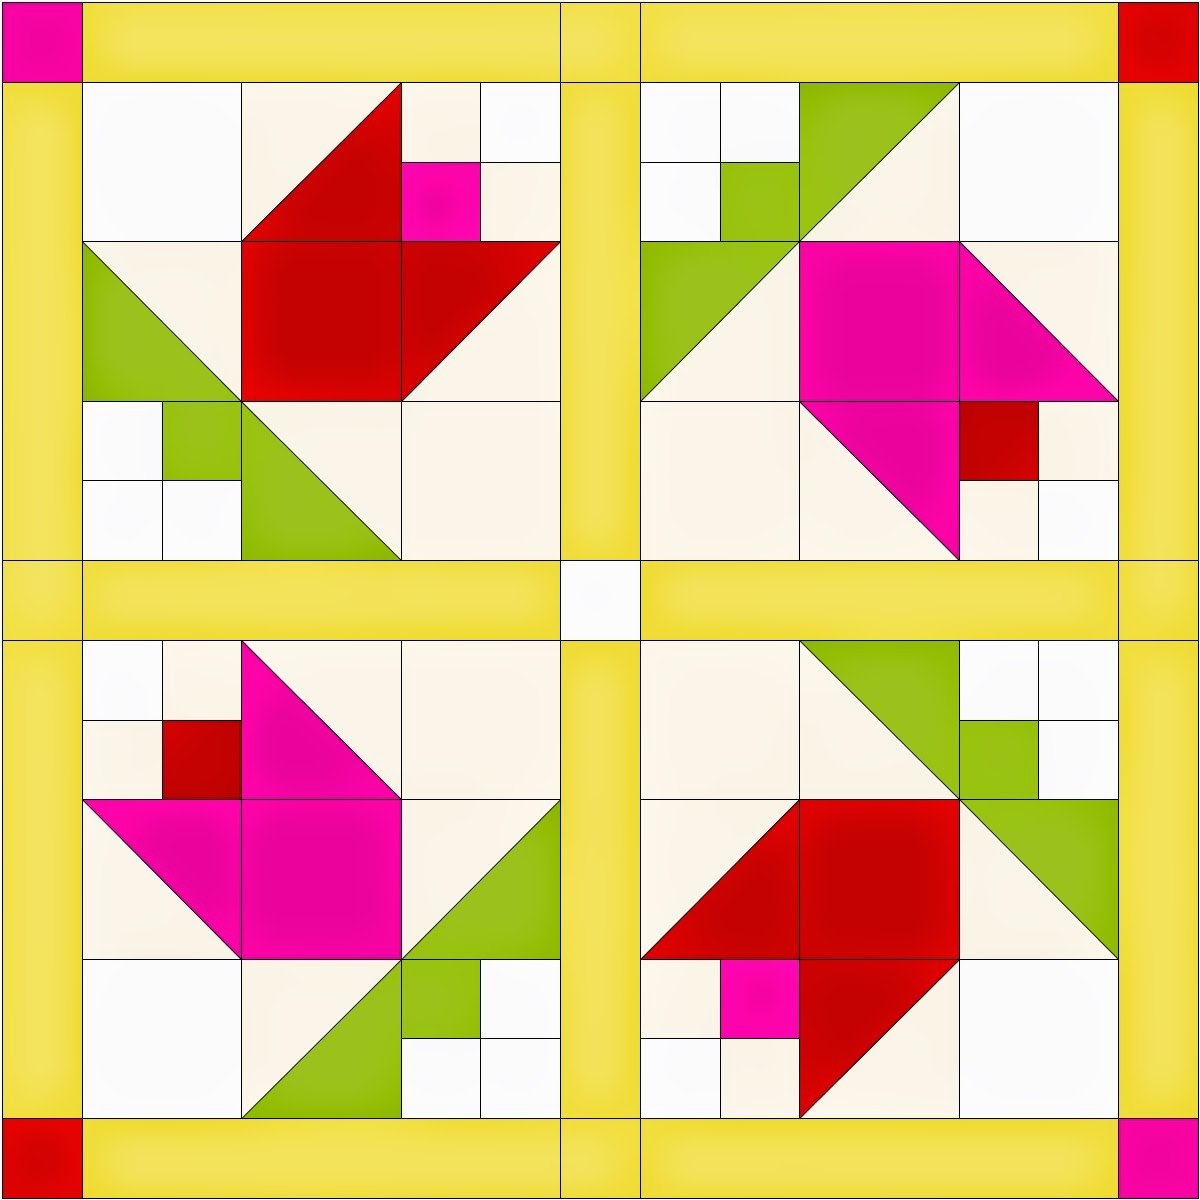
The Turning Tulips Block – Pattern is a quilt block design that features tulip-inspired shapes arranged in a rotating or dynamic format. Typically built from squares, rectangles, and half-square triangles (HSTs), this block creates the illusion of tulip flowers gently spinning or blooming outward.
What makes this block special is the motion it implies. While many floral quilt blocks are static or symmetrical, the turning tulip design introduces a sense of direction and liveliness. It’s not just about capturing the look of tulips—it’s about embodying their gentle motion in fabric.
Most Turning Tulips blocks follow a four-patch or nine-patch layout, with each “tulip” made from three or more fabric pieces. The petals are often made using HSTs or stitch-and-flip methods, which allow you to manipulate angles for that rotating effect. The stem and leaves may be pieced traditionally or appliquéd for added dimension.
Crafters love this pattern for its adaptability. You can play with petal colors, fabric prints, and block sizes to suit different seasons or themes. Use soft pastels for a spring quilt or bold jewel tones for a modern twist on a classic floral.
Though it may look complex at first glance, the Turning Tulips Block – Pattern is quite beginner-friendly when broken down step-by-step. The geometric construction makes it easy to chain-piece, and the repeated shapes lend themselves well to assembly line quilting.
Whether used as a stand-alone block or repeated across a quilt top, this pattern offers an eye-catching focal point and works beautifully in both traditional and contemporary quilts.
2. How to Make a Turning Tulips Block – Pattern
Creating a Turning Tulips Block – Pattern starts with selecting your colors and understanding the block’s layout. Most designs require at least three contrasting fabrics—one for the petals, one for the leaves/stems, and one for the background.
Start by cutting out your fabric pieces. You’ll typically need squares and rectangles that are 2.5″ to 4.5″, depending on your desired block size. Many patterns begin with half-square triangles (HSTs) for the tulip petals. To make HSTs, pair two squares right sides together, draw a diagonal line, sew 1/4″ on either side, cut on the line, and press open.
Next, arrange your HSTs and rectangles in the desired tulip shape. Usually, two triangles form the outer petals, with a central rectangle or square forming the flower’s body. Position these so that each tulip “turns” in a circular motion around the block’s center.
Sew the components together row by row, pressing seams as you go. It’s important to be precise with your seam allowances to ensure the pieces line up cleanly. Once all rows are complete, join them to finish the block.
Add stem and leaf details next. These can be created using green fabric strips sewn into the background or by appliquéing leaf shapes onto each corner or base of the flower. Appliqué adds a lovely touch and can make your tulips pop with texture.
Repeat the block as many times as needed for your quilt project. For a lap quilt, you might create 20–30 blocks; for a wall hanging, 9–12 may suffice. Make sure all your blocks are the same size before assembling.
Finish with sashing or borders if desired. A soft white or cream border will make the tulips stand out, while a floral print adds cohesion to the garden theme. You can also add quilting motifs like vines or petals for extra dimension.
3. Best Fabrics and Tools for the Turning Tulips Block
The right materials will help your Turning Tulips Block – Pattern turn out clean, crisp, and long-lasting. Choosing quality fabric and tools is essential for achieving sharp points and consistent block sizes.
Start with quilting cotton. It’s sturdy, easy to press, and widely available in floral prints, solids, and geometric designs. Choose a petal fabric that contrasts well with the background, so your tulips really shine.
You’ll also need a reliable rotary cutter, self-healing mat, and quilting ruler. These tools make it easy to cut accurate squares and triangles, which is critical for a block design like this that relies on symmetry and alignment.
Use a 1/4″ presser foot on your sewing machine to maintain consistent seam allowances. Even slight variations can cause tulip shapes to shift or appear uneven in a repeating quilt layout.
High-quality thread, preferably cotton, will give your seams strength and flexibility. Match your thread color to your petal or background fabric, especially if your stitches will be visible.
To make piecing easier, consider using a starch spray or fabric stabilizer when pressing your cut pieces. This helps keep the fabric from stretching, especially when working with bias edges from HSTs.
Lastly, don’t forget about pressing tools—an iron with steam function, a wool pressing mat, and a seam roller can make all the difference in achieving a professional finish for your Turning Tulips Block – Pattern.
4. Design Ideas and Variations for Turning Tulips Block Quilts
Once you’ve mastered the Turning Tulips Block – Pattern, there are endless ways to customize it and make it your own. You can play with color placement, block rotation, sashing, and quilting motifs to create a unique final piece.
Try rotating alternate blocks to create a more dynamic layout. By shifting the direction of each tulip block, you give the illusion of a floral pinwheel or garden in motion. This technique adds visual interest without altering the core pattern.
Use ombré or gradient fabrics to add depth to the tulip petals. You can start with dark tones at the base and transition to lighter shades at the tips, mimicking how light naturally hits flower petals.
Add decorative elements like embroidery or embellishments. A few hand-stitched details in the center of the tulips can represent pollen, giving the block a more lifelike appearance. Beads or buttons also work as flower centers, especially for wall hangings.
Change up the background fabric for a seasonal twist. A soft blue background evokes spring skies, while dark gray or deep green gives a modern, moody aesthetic. You can even use scrappy backgrounds for a cottagecore or vintage effect.
Don’t limit yourself to just quilts. The Turning Tulips Block – Pattern is perfect for table runners, pillow covers, tote bags, or framed quilt art. Smaller blocks can be used as coasters or mini quilts for gifts.
Finally, experiment with size. Enlarging the block makes it suitable for beginners or quick projects, while smaller blocks can create intricate, detailed designs that challenge your precision and technique.
FAQ – Frequently Asked Questions
Q1: Is the Turning Tulips Block – Pattern suitable for beginners?
Yes, with a basic understanding of half-square triangles and piecing, beginners can successfully make this block by following step-by-step instructions.
Q2: What size should each block be?
Common sizes include 8″, 10″, or 12″ squares. Choose the size based on your desired quilt dimensions and comfort level with small pieces.
Q3: Can I make this block using scraps?
Absolutely! The petals and background pieces are perfect for using up fabric scraps, especially if you want a scrappy or multi-colored garden effect.
Q4: How do I keep my blocks from warping?
Press each seam carefully, avoid stretching fabric along the bias, and use starch or stabilizer if needed. Accurate cutting also helps maintain block shape.
Q5: What quilting design works best for tulip quilts?
Floral or vine quilting motifs complement the tulip design beautifully. You can also outline the tulips to highlight the piecing.
Q6: Where can I find Turning Tulips Block patterns?
Quilting websites, Pinterest, Etsy, and quilting books often offer this pattern. Look for PDF patterns with visual diagrams for easier construction.
Conclusion
The Turning Tulips Block – Pattern is a timeless and creative way to bring the beauty of nature into your quilting. With its dynamic layout, floral inspiration, and endless customization options, this block is both a joy
to make and a delight to showcase. Whether you’re quilting for a loved one or creating a statement piece for your home, this design will bloom with charm and creativity.
We hope this article has inspired you to try the Turning Tulips Block – Pattern in your next project. If you’ve used this pattern or plan to, please leave your honest opinion, share tips, or suggest variations you’d love to see. Your feedback helps keep the quilting community vibrant and connected!