The Patchwork Strawberry Mini Quilt Pattern is one of the sweetest and most delightful quilt designs for both beginners and seasoned quilters. This cheerful mini quilt adds a touch of handmade charm to kitchens, sewing rooms, nurseries, or seasonal displays. With its vibrant red “berries” and leafy green tops, it’s no wonder this pattern is a favorite for spring and summer projects.
The appeal of the Patchwork Strawberry Mini Quilt Pattern lies in its balance of simplicity and creativity. It allows quilters to use up their favorite red and pink scraps while practicing essential patchwork techniques. Plus, mini quilts are quick to complete, making them the perfect bite-sized project when you want instant gratification without committing to a full-sized quilt.
In this article, you’ll learn everything you need to know to bring your own Patchwork Strawberry Mini Quilt Pattern to life. From materials and construction tips to layout options and display ideas, this comprehensive guide covers it all—so let’s get started with a pattern that’s as sweet as the fruit it’s inspired by.
1. What is the Patchwork Strawberry Mini Quilt Pattern?
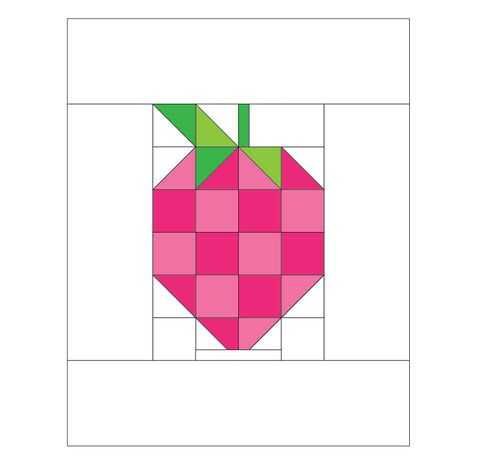
The Patchwork Strawberry Mini Quilt Pattern is a small quilt project that typically features a stylized strawberry shape made from a patchwork of red, pink, and sometimes even white or burgundy fabric squares. The top of the strawberry is formed with green fabric pieces to mimic leaves or a stem, bringing the fruit to life in a cute and crafty way.
Unlike more complex quilt patterns, this one is often made with basic square and rectangle shapes. This simplicity makes it beginner-friendly, while the charming finished look appeals to quilters of all levels. It’s also a great project for kids or for teaching new quilters how to piece blocks together.
The mini quilt size usually ranges from 12×12 inches to 18×18 inches, making it ideal for wall hangings, table toppers, or even as part of a larger quilt when combined with other fruit-themed blocks. Its small size means you can complete it in just a few hours or over a weekend.
Because this quilt pattern uses small fabric pieces, it’s perfect for stash-busting. Those leftover scraps of red and green from Christmas or Valentine’s Day projects? This is the place to use them. Many quilters also enjoy fussy-cutting fun fabric prints to include tiny florals or polka dots in their strawberries.
The Patchwork Strawberry Mini Quilt Pattern can be adjusted for seasonal use. Swap out traditional reds for pastel pinks in the spring or rich burgundy tones in the fall. You can even add embroidery or applique for a more custom finish.
Whether you’re sewing it solo or creating a few as gifts, this mini quilt is packed with joy. It’s a small project with big personality, proving once again that handmade items can be both fun and functional.
2. Materials and Tools You’ll Need
Before you start sewing your Patchwork Strawberry Mini Quilt Pattern, it’s important to gather all the necessary materials. Fortunately, this project doesn’t require much—making it perfect for using what you already have on hand.
Start with your fabric selection. You’ll need a mix of red, pink, or burgundy fabric scraps for the strawberry body, and green fabrics for the leaves or stem. Small prints, solids, and tone-on-tone fabrics all work well. Aim for variety to create texture and depth in your patchwork.
You’ll also need a background fabric to frame the strawberry design. A light-colored background—like white, cream, or low-volume prints—will help your strawberry pop. If you’re feeling bold, a gingham or polka-dot background can add vintage flair.
For batting, a low-loft cotton or cotton-blend batting is ideal for mini quilts. It adds softness and structure without being too bulky. Since the project is small, you can use leftover batting from previous quilts.
You’ll need basic quilting tools: a rotary cutter, self-healing cutting mat, and quilting ruler. Accuracy is key when working with small patchwork pieces, so make sure your tools are sharp and clean.
Use coordinating thread for piecing and quilting. A neutral gray or white thread often works best, but red or green thread can add subtle accents, especially if you plan to quilt over the strawberry sections.
Finally, prepare your sewing machine with a 1/4-inch foot for consistent seam allowances, and have an iron and pressing mat ready. Pressing after each seam will help your mini quilt come together smoothly and professionally.
3. How to Piece the Patchwork Strawberry Mini Quilt Pattern
Now that your materials are ready, it’s time to sew your Patchwork Strawberry Mini Quilt Pattern. This process is fun, quick, and satisfying—especially as you start to see the fruit shape emerge from simple squares.
Start by cutting your red and pink fabrics into small squares, typically 1.5 to 2.5 inches, depending on the size of the mini quilt. Lay them out in a rough triangle or rounded shape to mimic the body of a strawberry. Play with placement until the colors flow nicely and the shape looks full.
Cut green fabric pieces for the strawberry top. These can be triangles, rectangles, or even improv-cut shapes that resemble leaves. Some patterns use a simple green strip across the top, while others add spiked leaf shapes for more detail.
Begin piecing the red/pink squares together row by row. Sew each row, press seams to one side or open as preferred, then sew the rows together to complete the strawberry shape. Make sure everything stays aligned and square.
Once the body is complete, attach the green pieces at the top. This can be done by adding a green row or arranging leaf shapes and stitching them in place. Appliqué techniques can also be used for a more decorative finish.
Add your background fabric pieces around the strawberry to frame it into a square or rectangular mini quilt. This step also allows you to adjust the final size. Some quilters like to add a border or sashing for extra contrast.
Once your top is complete, make your quilt sandwich: backing fabric, batting, and quilt top. Baste the layers together with safety pins or temporary spray adhesive. You’re now ready to move on to quilting!
4. Quilting, Binding, and Display Options
With your quilt top basted, it’s time to finish your Patchwork Strawberry Mini Quilt Pattern with quilting, binding, and display details. This is your chance to add personality and polish to the project.
Choose a quilting design that complements the strawberry shape. Straight-line quilting is always a good choice—it’s clean, modern, and easy to do on any machine. You can echo the outline of the strawberry, stitch diagonal lines across the quilt, or follow the seams.
If you’re comfortable with free-motion quilting, try swirls or loops in the background fabric to give the strawberry a floating effect. You could also quilt little seeds or hearts inside the fruit area for a cute and whimsical touch.
After quilting, trim your quilt to square up the edges and remove any excess batting or backing. Be precise, especially if you plan to hang the mini quilt or use it as a decorative piece.
Choose a binding fabric that complements your strawberry and background colors. Red gingham, green stripes, or even a solid white binding can add the perfect finishing touch. Use a standard double-fold binding method for a clean edge.
Once bound, consider adding a hanging sleeve or corner tabs to the back of the quilt for easy wall display. These are simple to sew and make hanging the quilt on a rod or tack easy and safe for the fabric.
Display your finished quilt with pride! It looks great on a wall, over a cabinet, as a placemat, or gifted to a loved one. The Patchwork Strawberry Mini Quilt Pattern is small in size but big in impact—and it’s sure to bring smiles wherever it goes.
FAQ: Patchwork Strawberry Mini Quilt Pattern
Q: What size is the finished Patchwork Strawberry Mini Quilt Pattern?
A: Most mini quilts range from 12×12 inches to 18×18 inches, but the size can be adjusted based on your fabric squares and layout preferences.
Q: Is this pattern suitable for beginners?
A: Yes! The pattern uses basic patchwork skills like cutting squares and sewing straight seams. It’s an ideal project for new quilters or those looking for a quick and easy sew.
Q: Can I use fabric scraps for this quilt?
A: Absolutely. This pattern is a fantastic scrap-buster, especially for small red, pink, and green pieces left over from other projects.
Q: How do I add leaves or a stem to the strawberry?
A: Leaves can be pieced using green fabric squares or triangles, or appliquéd for more detail. Some patterns include simple shapes, while others allow creative interpretation.
Q: What quilting designs work best?
A: Straight-line quilting is great for beginners. More advanced quilters may use echo quilting or free-motion designs like swirls, seeds, or hearts to enhance the strawberry motif.
Q: Can I turn this mini quilt into a larger project?
A: Yes! Combine multiple strawberry blocks to create a table runner, lap quilt, or even a full-size quilt. You can also mix it with other fruit or garden-themed blocks.
Conclusion
The Patchwork Strawberry Mini Quilt Pattern is a perfect blend of simplicity, sweetness, and creative expression. It’s a beginner
-friendly project that allows you to explore fabric play, use up scraps, and create something beautiful in just a short time.
Whether you make it as a cheerful kitchen decoration, a handmade gift, or a seasonal accent, this mini quilt is sure to bring joy to your sewing space and everyone who sees it. With a few fabric pieces and a little time, you can turn a simple idea into a heartfelt treasure.
We’d love to hear your thoughts! Have you made a strawberry mini quilt before, or are you trying this pattern for the first time? Leave your honest opinion and suggestions below—your experience helps others in the quilting community and inspires creativity in all of us.