The Fabric Wall Organizer – Pattern is one of the most versatile and functional sewing projects for both beginners and experienced makers. Not only does it help declutter your space, but it also adds a touch of creativity and color to your home decor. Whether you want to organize craft supplies, kids’ toys, office accessories, or kitchen tools, a fabric wall organizer is the perfect solution.
Creating your own fabric wall organizer allows you to tailor the size, fabric choice, and number of pockets to suit your specific needs. Plus, it’s an eco-friendly and budget-conscious alternative to plastic or store-bought organizers. The satisfaction of making something useful with your hands is just the cherry on top.
In this article, we’ll explore how to make a fabric wall organizer – pattern from scratch, including material selection, design ideas, sewing tips, and how to customize it for different rooms. Whether you’re sewing for yourself, gifting a handmade item, or adding to your product line, this guide covers everything you need to know.
1. Choosing Materials and Tools for Your Fabric Wall Organizer – Pattern
When starting a fabric wall organizer – pattern, the first and most important step is selecting the right materials. The type of fabric and tools you use will affect the strength, appearance, and longevity of the finished product.
The most commonly used fabric is cotton canvas or duck cloth because it’s sturdy yet easy to sew. You can also use denim, twill, or linen blends for a more decorative finish. These fabrics help the organizer hold its shape and support heavier items in the pockets.
For the backing, consider using fusible interfacing or stiff stabilizer. These materials add structure and prevent the organizer from sagging when mounted on the wall. Heavier stabilizers are especially important if you plan to store items like tools, craft supplies, or electronics.
You’ll also need bias tape or binding, which is used to finish the edges of the organizer neatly. This gives a professional look and reinforces the outer frame. Choose a contrasting or coordinating color to complement your fabric.
Essential tools for this project include a rotary cutter, fabric scissors, cutting mat, quilting ruler, sewing pins, and a sewing machine with a standard or walking foot. If you’re new to sewing, make sure your needle and thread are suitable for heavier fabrics.
Lastly, think about how you’ll hang your fabric wall organizer. Common options include wooden dowels, grommets, eyelets, or fabric loops. Choose based on the look you want and the weight the organizer will carry.
2. Planning Your Fabric Wall Organizer Layout
Before you start cutting and sewing, it’s essential to plan the layout of your fabric wall organizer – pattern. This step ensures that the final product is not only attractive but also functional for your needs.
Start by deciding on the overall size. Consider the space where you plan to hang the organizer—whether it’s on a kitchen wall, behind a door, or in a kid’s room. Standard sizes range from 16×24 inches to 24×36 inches, but you can adjust based on your storage needs.
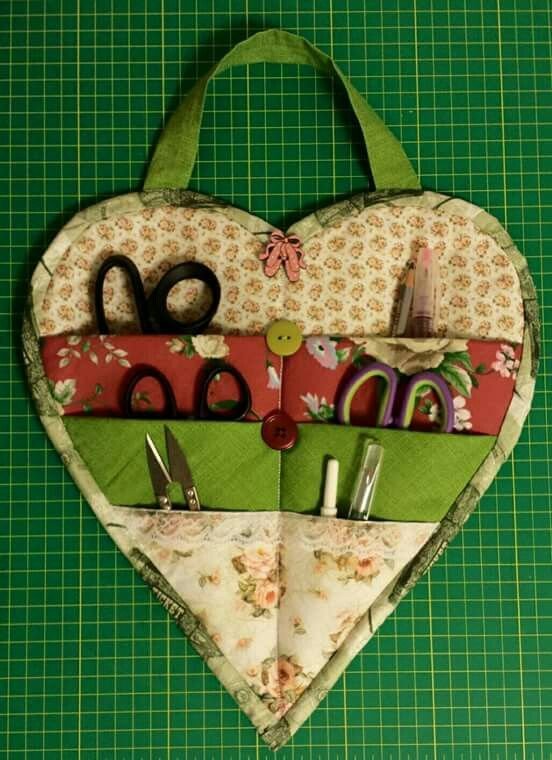
Next, determine how many pockets you want and what sizes they should be. Larger pockets work well for items like notebooks or mail, while smaller ones are perfect for pens, scissors, or cosmetics. Some organizers include deep or pleated pockets for bulkier items.
Sketch your layout on paper or use a simple design app to visualize how everything will look. This helps you balance the spacing and ensure you leave enough room between pockets for stitching and hanging hardware.
Don’t be afraid to get creative with color and pattern combinations. Mixing solids with prints or using different fabric textures can add interest to your design. Keep in mind that darker colors hide stains better, which is useful in areas like kitchens or craft rooms.
You may also want to include labels or tags on the pockets. These can be sewn on or added with iron-on vinyl. Labels make it easier to identify what goes where and are especially helpful in shared spaces or children’s rooms.
Finally, test your layout by pinning or temporarily basting the pockets to the backing fabric. This gives you a visual mock-up and allows you to make adjustments before you sew everything in place permanently.
3. Step-by-Step Guide to Sewing Your Fabric Wall Organizer – Pattern
With your materials and layout ready, it’s time to bring your fabric wall organizer – pattern to life through sewing. This part of the process is both rewarding and straightforward if you take it step by step.
Start by cutting your fabric pieces, including the backing panel and all pockets. Use your rotary cutter and ruler for precise edges. Don’t forget to add a seam allowance—usually ¼ inch—on all sides of each piece.
If you’re using interfacing, fuse it to the backing fabric according to the manufacturer’s instructions. This gives the wall organizer a firm foundation and helps it maintain its shape over time.
Next, hem the top edge of each pocket by folding it over twice and stitching it down. This step prevents fraying and gives each pocket a clean, finished look. You can also topstitch decorative trim or piping for added flair.
Pin the pockets to the backing panel according to your planned layout. Then, sew each pocket in place along the sides and bottom. Be sure to backstitch at the beginning and end of each seam to reinforce it.
If you’re adding dividers within larger pockets, stitch vertical lines down the middle to create smaller compartments. Use a fabric pen to mark lines before sewing to ensure everything is even and symmetrical.
Finish the outer edges of your wall organizer with bias tape or fabric binding. This helps conceal raw edges and adds durability. Sew slowly and use clips or pins to keep everything aligned as you go around corners.
4. Customizing and Using Your Fabric Wall Organizer
One of the best aspects of making your own fabric wall organizer – pattern is the ability to customize it to fit your lifestyle. Whether you’re organizing craft tools or cleaning supplies, you can adapt the design for any purpose.
In a home office, use labeled pockets to store pens, notebooks, sticky notes, chargers, and more. It keeps your workspace tidy and your supplies within easy reach.
In a kids’ room, opt for fun fabrics with playful patterns, and use the organizer to store crayons, small books, or stuffed animals. Mount it at a child-friendly height for easy access.
In the kitchen, use a narrow and tall organizer to hold takeout menus, scissors, coupons, and grocery lists. Waterproof or laminated fabrics are a great choice here to protect against spills.
For craft and sewing rooms, you can design your organizer with deeper or gusseted pockets for items like thread spools, rotary cutters, rulers, and patterns. Hang it near your workspace to streamline your process.
You can even create a travel wall organizer for your RV, camper, or tiny home. These spaces require efficient storage, and a fabric wall organizer fits perfectly into the lifestyle of minimalism and mobility.
Want to sell your creations? Consider marketing your fabric wall organizers online or at craft fairs. Offer custom sizes and fabric choices. These are high-demand items for back-to-school seasons, dorm rooms, and home organization trends.
Frequently Asked Questions (FAQ)
Q1: What is a Fabric Wall Organizer – Pattern?
A: It’s a sewing design or template used to create a hanging fabric organizer with pockets, meant to help organize and store items on the wall. It’s popular for home, office, and craft room use.
Q2: Is a fabric wall organizer beginner-friendly?
A: Yes! It’s one of the best sewing projects for beginners because it uses straight seams, simple pocket structures, and requires minimal advanced techniques.
Q3: What kind of fabric should I use?
A: Medium to heavy-weight cotton fabrics like canvas, denim, or twill are best. These provide structure and durability to hold up under daily use.
Q4: How do I hang a fabric wall organizer?
A: Common methods include wooden dowels, grommets, loops, or command hooks. Choose a method based on the weight of your organizer and your wall surface.
Q5: Can I machine wash my fabric wall organizer?
A: If you use washable fabrics and secure all seams, yes. However, organizers with interfacing or wooden parts should be spot cleaned or hand washed.
Q6: Where can I find ready-to-use Fabric Wall Organizer Patterns?
A: Many are available online through sewing blogs, craft marketplaces like Etsy, or free PDF downloads. Some include step-by-step photo guides and cutting diagrams.
Conclusion
The Fabric Wall Organizer – Pattern is more than just a sewing project—it’s a functional piece of decor that adds order and personality to your space. Whether you’re aiming to tidy up a workspace, add storage to a small room, or give a thoughtful handmade gift, this organizer can be customized to meet your exact needs.
We’ve covered everything from choosing materials and planning your layout to sewing techniques and creative uses. With a little time and effort, you can create something beautiful, practical, and
long-lasting.
If you found this guide helpful or have your own experience with a fabric wall organizer – pattern, please leave a sincere opinion and share your suggestions or tips. Your feedback helps others and encourages more creative makers in the community!